Not sure about the fan positioning, but seems to work ok similiar to a bathtoom exhaust have the usually have brass motor bearing so time will tell…
The bed is big 35 x 55 and the back has 2 8" ports that I Wye into the 8" fan.
When cutting I see the air pull is significant, no smell outside the unit…
Think it is gonna be ok…
I try to get into the office by 5:30am so I have plenty of time to play…
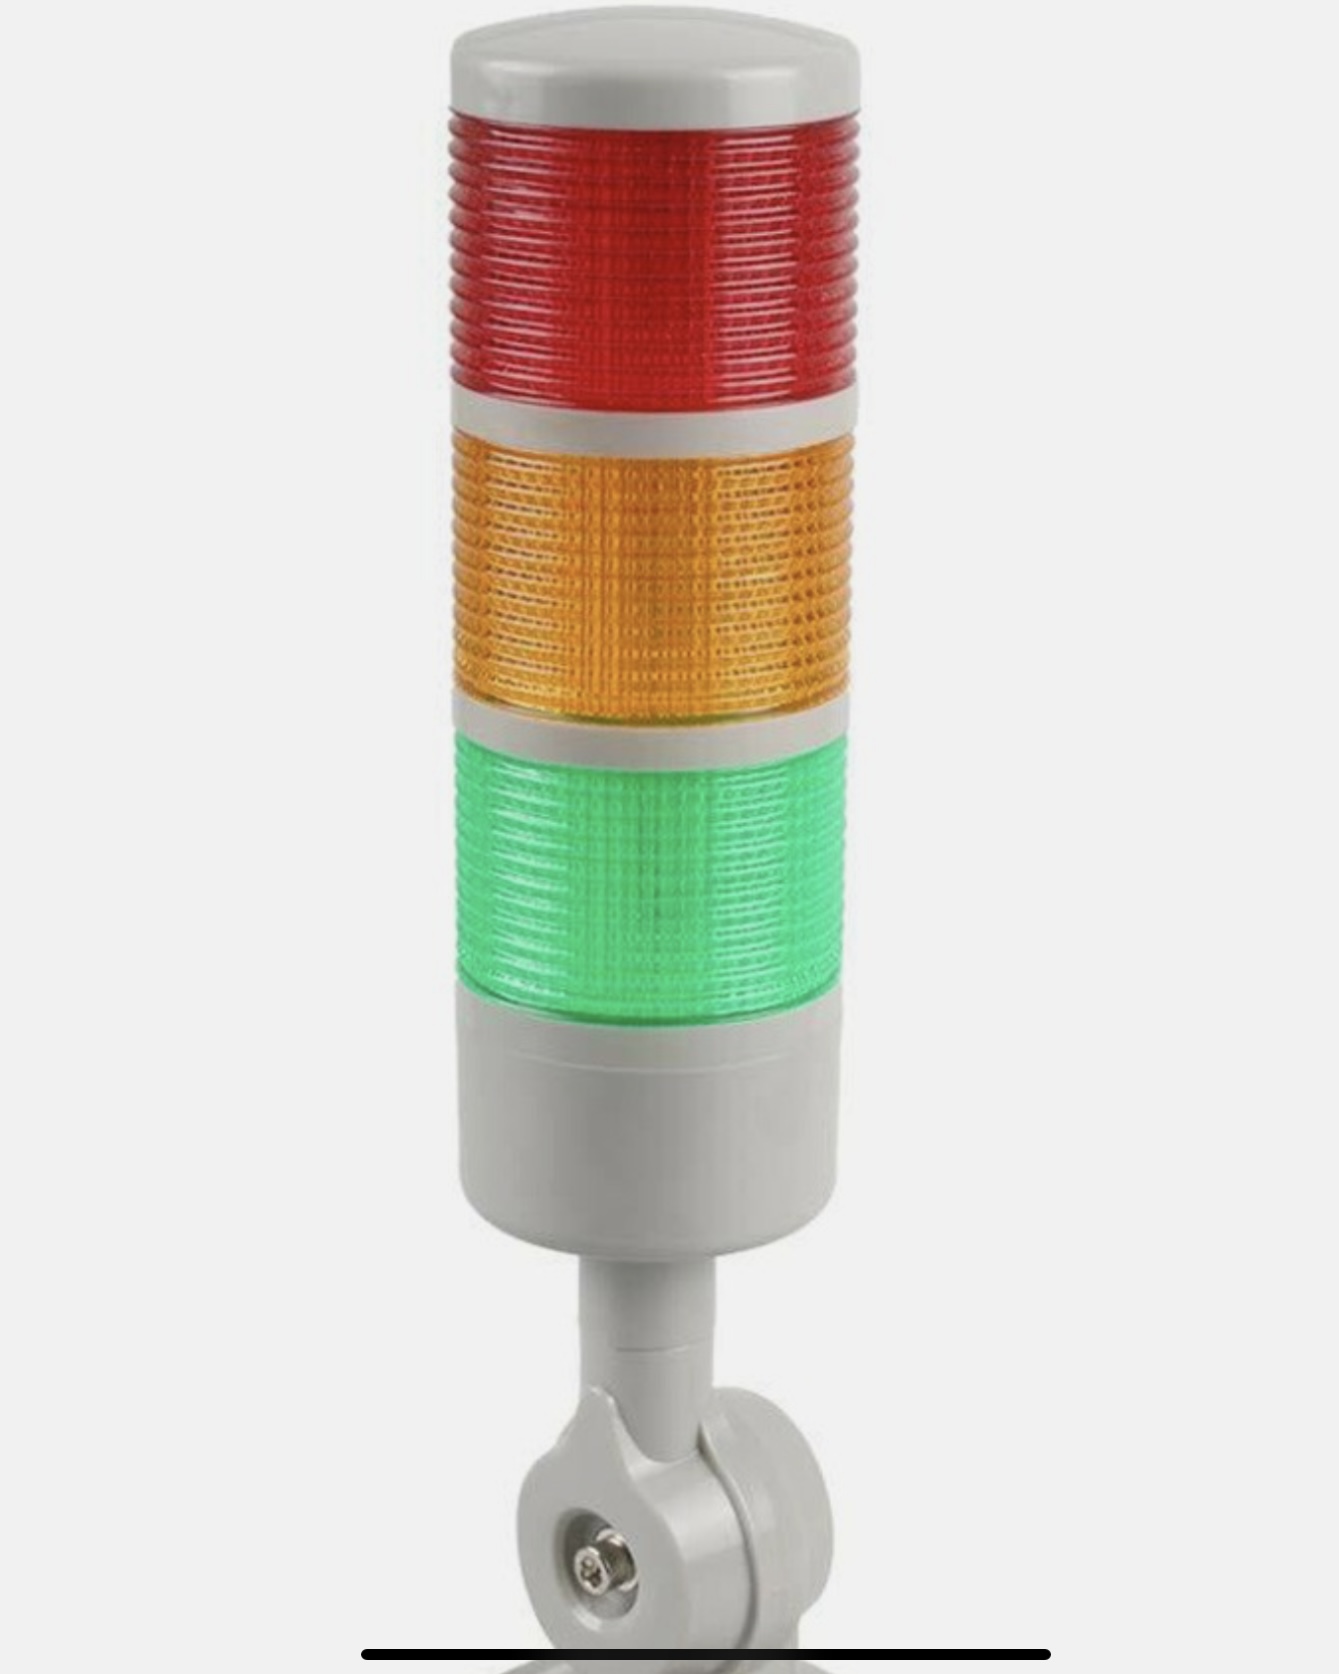
Next project is to install a three tier Status Lamp indicator
My laser has a built in water chiller, with alarm outputs so the Red will be the
Water Alarm
Yellow will be Door ( lid) open/closed
Green will be LASER ON…
(kinda like getting the New 65 Mustang convertable…I had one)
Ya have to get the New 8 Track Tape deck installed, and Pin Strips to make it look cool !
So cool now I have to get a second to put outside the door
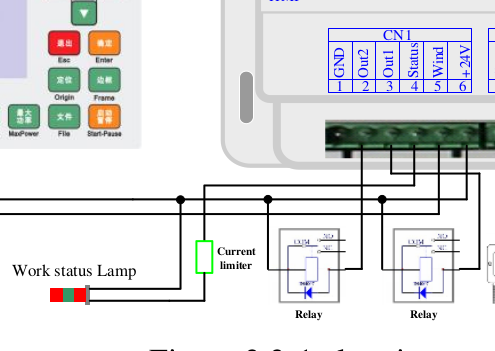
I think Jim may be getting the 12V and Grounds confused…
I know mine has a common ground and 12-24v feed for the colors (OH and a buzzer).
So I know I will have to break out each LED in the light as separate wires to hook to the Chiller and Ruida Controller… all doable… just need to make time…
I could take a,page from Ed Nisleys design efforts and design a micro controller around each lamp to show multiple flavors of conditions by unique Flash Rates… but then I do have other things at work to keep me busy
if you are thinking of a Status Light…
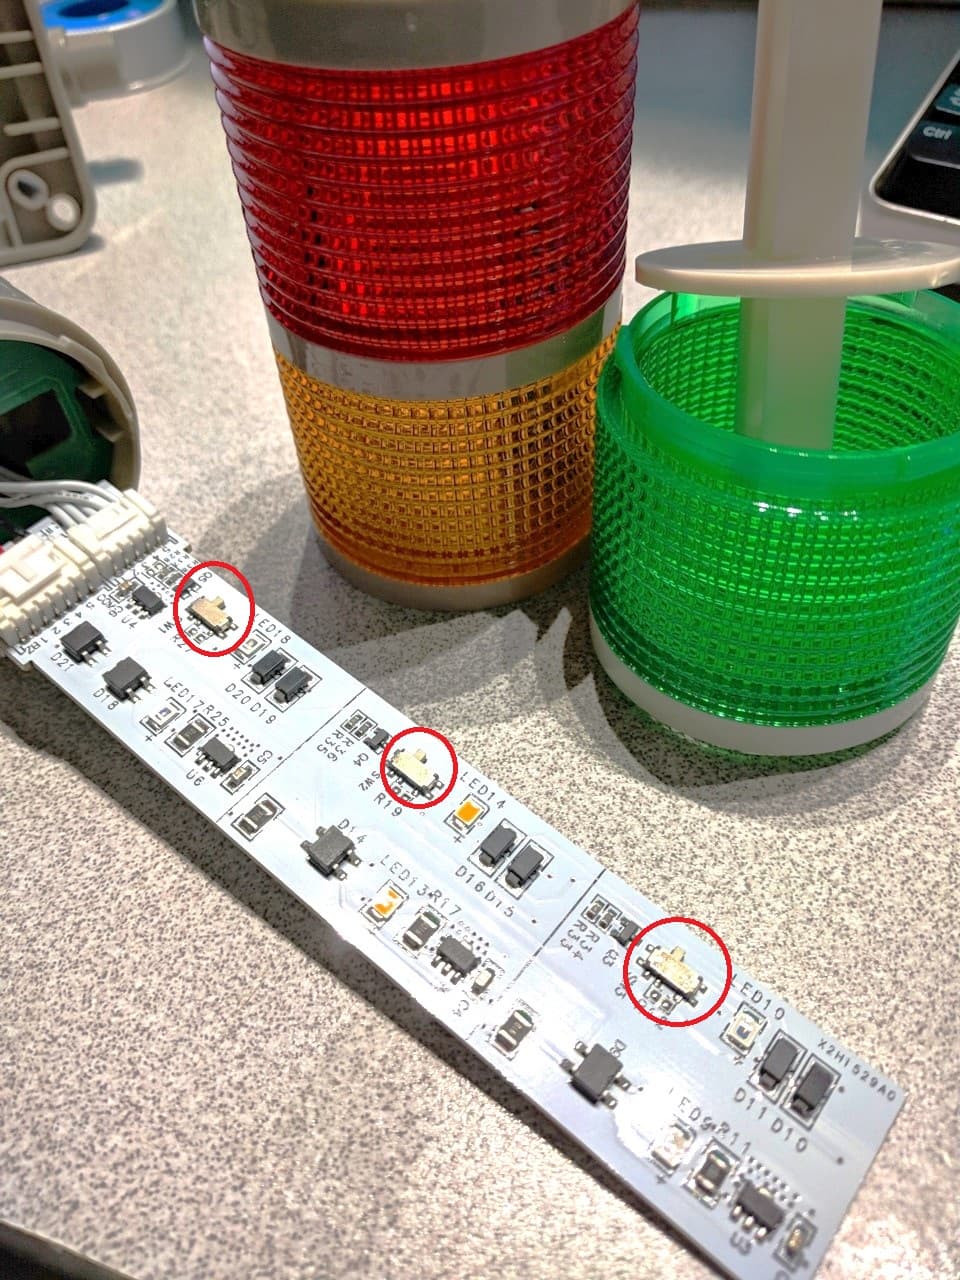
This morning I opened up the unit I bought off ebay in a effort to rewire
and found ‘switches’ on each tier color…
Flipped them and the Lights BLINK
Kinda nice feature, unexepected, but then the chinese brand no instructions… .expected !
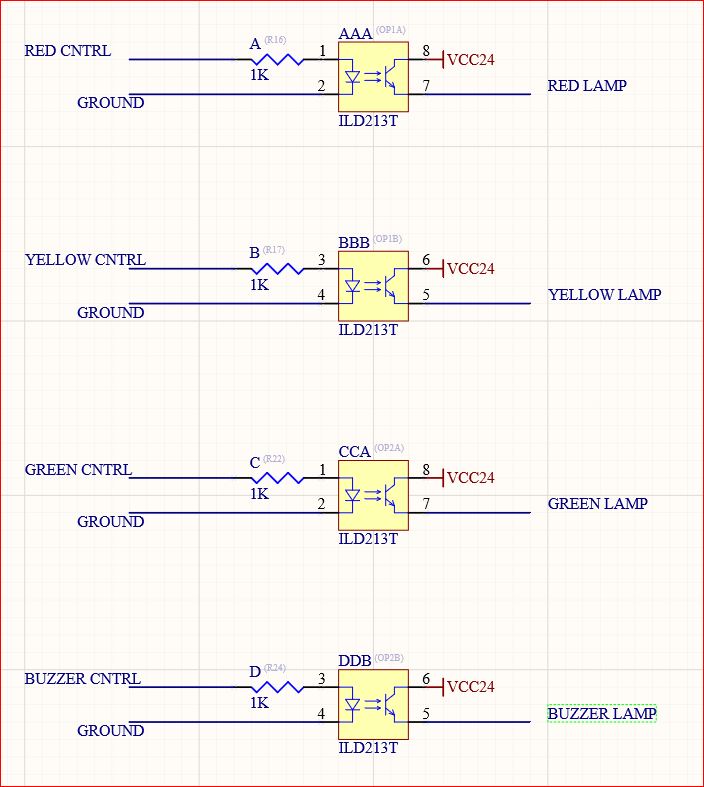
I plan on putting some small opto-isolators on each lamp to give independent
12-24V / Gound wires to allow wiring up for 24V feed or Ground Control.
Plenty of room inside the unit…
Yes… Sink… this lamp has 12-24v input for each lite…
need to use a few optos and give some independent control over the Pos /Neg…
plus there is some active ckty on this lamp that will need power so I also need
Supply input to power the lamp
24V power
Gnd Ground
Generally speaking, when using open collector like this, the load has the 24V and the open collector completes the ground. The load can change what the opto sees as ground if the power is switched to the load, instead of the completing the ground path.
I’d connect the lamp to 24V, then to pin 6 of the opto – pin 5 to ground. This is how all the Ruida documentation is laid out.
Wow. I wonder what I’m doing wrong? I have seen none of these issues with my ThunderLaser Nova 24. It cuts acrylic as smooth as glass as well as other materials. Still using the honeycomb that was supplied with the machine…
J
I have another project going… gonna try focused air on some cutting…
Low pressure High Pressure , pushing some air ‘across’ the part instead of down the cut line…maybe enough to just move the cut vapors out of the cut channel to let the cutting be a little more effective… Theory only…
this may keep the cut a bit more polished!
Should prove interesting… I’ll 3D Print the part when I get to work and try the 2.5" lens with some 10mm Cast acrylic…
More to come…
If this has any improvement, anyone needing the .STL files let me know…
Happy to share…
If anyone has done this let me know…it fits a 25mm barrel
Is there a chance that as Stuff gets blown away ‘in the direction of a vent’, it will cool just enough to make it less sticky before its comes to rest.
Is there a reason half the air assist opening is closed, or is that just how it looks.
I watched a vid of the SM-Ray cutting through ply and while I think the focus was supposed to be on the cutting quality, I took more notice of the black staining being left on the underside due to the channelled cutting deck…hence the effort to purge that issue.
If I understand correctly, I narrowed down the Air Outlet to allow pressure build in the inside cavity so the air outflow might be uniform, I can always increase the air flow to get more air across the surface…
After looking and thinking I may make the exhaust outlet arm longer to allow the
exhaust turn down parallel to the top cutting surface, or as close to that as possible… more options…
I have in my head an idea of what might happen, but blowing the vapors ‘across’ the part may very well prove to be a disaster…
But I am interested in cooling the top of the cut to maybe reduce the rough edges that seem to be caused by heated vapor escaping (defer to Russ).
I can;t believe this has not already been tested by someone, but being new to the laser scene… I will undoubtedly re-invent the wheel now and then…
Which is ok… playing with our toys is a good thing…
Just had another thought, maybe convert this into a vacuum… hmmmm
You could call it the Dizzie Galespie-Ax2…hope I spelled his name right! He knew plenty about controlled pressure.
I did a little experiment today that blew my mind concerning the supply of air to the main enclosure & the subfloor air feed for the cutting deck. If I’m wrong I’ll have to reedo quite a bit, but if I’m right…its a big improvement ‘in my case at least’ and saves stress on the fan and gives better smoke/debris clearance.
Paid for laptop today ‘Hp g5 i5’ simple workhorse they say, it gets here tuesday so I have a few days of pondering the enclosure before loading LB, final cuts and assembly.
Yeah, the 400cfm blows like crazy, the 700 must be a lot of fun just on its own.
I’ll get all the bits ready and picture it step by step during the build.
The two y axis support the x so there’s no box frame and the y axis are (H)70x(W)50mm so the air has to hurdle over the y at exhaust out end…that will be my biggest issue, maybe prop it a few mm and I was going to leave an inch or so for air flow between enclosure wall and y ends, but that adds weight and size, so if I butt the enclosure wall up against the y ends, the lid is easily lifted off giving nice size/weight & full access for cleaning, positioning work or machine removal. Also guiding the air to the out duct rather than slamming into a flat gable end and going wild…but I think I’ve got it…and then take it up the country to a perspex fabricator for the cover/lid to be shaped.
Here are pictures as promised, not 0.8mm but of 3mm plywood cut directly on my Honeycomb, right now. The reflexions from Honeycomb can be clearly seen, but again the result is very useful. You could dry off the items with alcohol if you think.
I used 20mm/s at 30% min and max power, that corresponds to about 5mA (forgot to check if it’s still true)
The parts are used to place flower decorations, above containers/vases of different sizes. It is custom work and it was fun to discuss with the flower lady how it should be used and work.