Ruida offset with lower laser power

As I said, this is limit on your machine, not a recommendation for normal use. If you’re not losing steps, it’s probably getting to speed…


What do you want, fast head movement or fast job execution?

Fast job execution requires higher acceleration values so the overscan is less.


High speed scanning values are inconsequential on a dsp using line mode as the tube is in CW (constant wave) mode at the set layer power and speed values for the whole line.

Most K40 machines are not wired to handle the lps as a dsp type does.


In the end your usable maximum speed, is limited by a combination of the lps response time of 90% voltage <= 0.10mS… and the chosen interval.

:smile_cat:

OK and now the whole thing again for fools

I understand tour confusion. If you assumed that your machine could engrave your job at 600 mm/s and it turns out that is an unrealistic, theoretical number. It reminds me a bit of those who buy 80 Watt diode lasers and think they really have the same power as an 80 Watt CO2 laser, these are probably mostly sales arguments that are often used to capture attention.

My well-intentioned advice is, be happy with your new OMT laser, most people on the forum with this machine are. Do many intensive speed and power tests for all the materials you work with and find the limits of the machine and the materials.
The machine must of course be able to run as quickly as possible but also not exceed its physical limits. You will feel and sense it when the machine’s limits have been reached, just as you don’t want to overrun your tube with more than the recommended mA / power. If you stick to what I wrote, you will have a nice strong machine for a long time.

Somehow I can’t imagine that the engraving will get any better because it’s annoying if I test it 100 times but nothing is changed in the settings
So my question again is what should I do to get a perfect engraving? I prefer quality

You had stated you did not want to change any of the settings, which is where I had to stop giving suggestions: when you do not change anything, nothing will change.

If you’re now willing to change the settings to improve the results, do what I suggested earlier:

  • Run a Material Test to find appropriate speeds & powers
  • Run an Interval Test to find the appropriate scan interval
  • Run a Scanning Offset Adjustment to verify the offset values

All of those tests exist for a reason: finding the correct settings so that a particular machine can produce the best results on specific materials.

I would love to live in the parallel universe where that assumption was valid. :grin:

Again: Trust, but verify.

To show what I mean by quality/speed relation, I have engraved your file. Material is a 2mm modified PE which is also used for signs. Based on experience from tasks I have solved before with this material, I have taken the given data as a starting point. My standard OMT 60 Watt has a relatively heavy laser head which does not allow high-speed engraving of such small items as this small sign. But the most important thing is that the process time becomes longer at a certain speed because acceleration and deceleration cannot keep up and thus the idle time becomes longer. (the process time is minimally faster with 100 mm/sec than it is with 200 mm/sec !!!)
I could have tweaked the speed a bit, but I see no necessary reason for that, not least because the quality is satisfactory for me at 100 mm/s.
It should be noted that my power is set to 10% in LightBurn, I can actually go all the way down to 8.75% before engraving can no longer be seen, I very much doubt that your 100 Watt tube has such a low starting point. This makes it difficult to work with subjects of this size.

Do you perhaps have such tests, perhaps with instructions on what is best to set and how with which test? Maybe also with instructions on how to use the respective test

That doesn’t help me, it just shows me that your laser is well adjusted

It is a prerequisite.

My example of your file is made with 100 and 200 mm/s and I have described what the difference in the settings and the result is.

You can select the items you are missing and determine which points actually can be changed/worked on, to achieve the goal.

1 - the correct/ideal tool/machine for point 2 ?
2 - the correct/ideal task and material for point 1 ?
3 - the correct settings and handling of points 1 and 2 ?

You can maybe just change the machine like that
I can’t do that, which means that I first have to get my machine to be the right/ideal tool

Your machine is already well adjusted, which means your machine is ready to fulfill its task (being the ideal tool).

My machine is not set up correctly so it cannot fulfill its task (being the ideal tool).

It’s fair enough, but it wasn’t meant to be malicious on my part either.

There is one thing that I have written that I need to edit. After I made a new test series with your file, with “fill all shapes at once” in use, there are no problems for me to reach higher speeds either. A stupid mistake on my part. I can reach up to 500 mm/s with my machine, it is set for that at its maximum speed.
The result is fine enough, without the problems you are experiencing. In return, the uncontrolled small misfires become much more visible and irritating when using this material and these speeds.

Do you want to try to do a little test and show the result here?

Chef Regeln-test.lbrn2 (3.0 KB)

The choice of material is secondary, as long as you adjust your power (max and min should be the same for this test).
Do two rounds, one with and the other without “Scanning Offset”, you can just turn it on and off again.

I get very similar results to yours when I turn off my offset compensation.

1401
1402
liz

I can not open this
how do I get a newer version?

what is this LS and where do I set it up?
where do I set the seconds?

It is the official available beta version, can be downloaded here:
https://drive.google.com/drive/folders/1eOw5Ea2soarfXAcKJjq5bDgtstpXTfNX

But, it is not necessary, just click yes to open the file and it will open normally.

I used a different abbreviation, sorry for the confusion.

The seconds are read on the Ruida controller display after the job is finished, and are the time it took to engrave your file with the various parameters.
This time is almost identical to the time that you can read when you see the preview window of the current jobs, the data for the calculation of the time can be found here:

I’m struggling with setting the offset
I have already set it several times
and now it’s wrong again
why does it make a shadow at the beginning of every 2nd line
It’s always a good idea to have a shadow at the beginning because it’s moving back
left off
right on

I don’t understand what you mean by that.

Your offset is not corrected or corrected not enough or too much, or turned off, I can’t see that from the picture.

This video:

explains the problem very well and shows the procedure for the adjustment.

The tests are all accessed through LightBurn’s Laser Tools menu.

The objective of all the tests is to find the settings that will enable your laser to produce results you find satisfactory on your materials. The tests show the results for a wide variety of settings so you can quickly narrow the search.

For the first Material Test (instructions), start with whatever material you generally cut. Click the Edit Material Setting to set a Line layer for cutting, then run the test with a power range from 15% to 80% and a speed range from 50 mm/s to 300 mm/s. Most of the squares will drop right out, but you can examine them to see which edges “look better” for your purposes.

Run a second test with values bracketing the best-looking cuts to find the sweet spot: enough speed for your production rate and enough power to ensure consistent results.

When you have a good tradeoff between speed and power for that material, save the results in the Material Library (instructions) so you can access them easily by name in the future.

Then iterate with other materials, all of which will require a different combination of speed and power.

For engraving, you run the same test, but click the Edit Material Setting to set a Fill layer. Engraving with a 100 W laser will require high speeds and low powers, so try 15% to 30% at speeds from 100 mm/s to 600 mm/s.

The yellow earrings I showed earlier ran at 400 mm/s and 15% power on a 60 W laser. Your machine has at least twice the power, so most of the useful results will be clustered tightly in the low-power / high speed quadrant of the results.

Then you can iterate with tighter limits on speed and power to fine-tune the results. Again, save the results in the Material Library for future use.

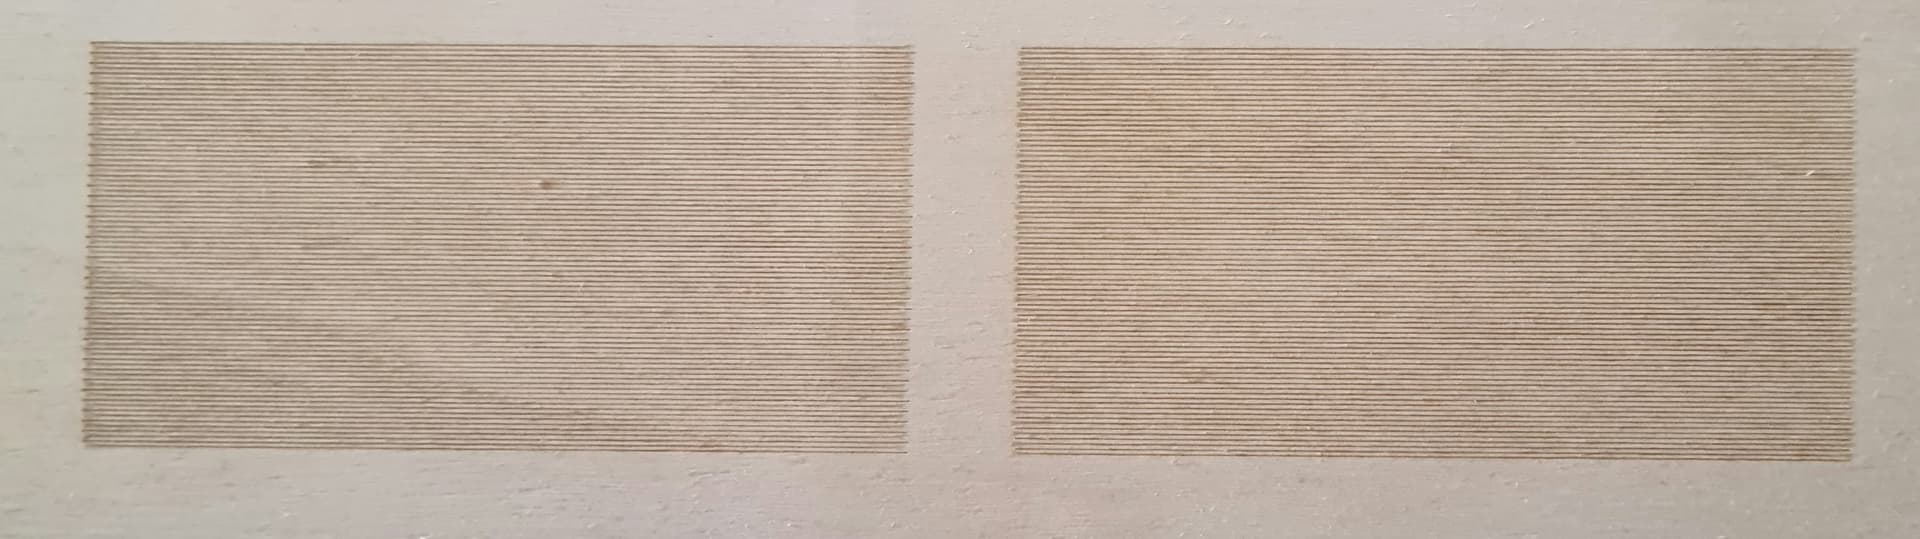
When you get through that, run a Scanning Offset Adjustment test to line up the engraving edges, with a line spacing of 0.5 mm to make successive lines easily visible and measurable. Transparent acrylic has good resolution, so use the values you found for engraving to get crisp lines.

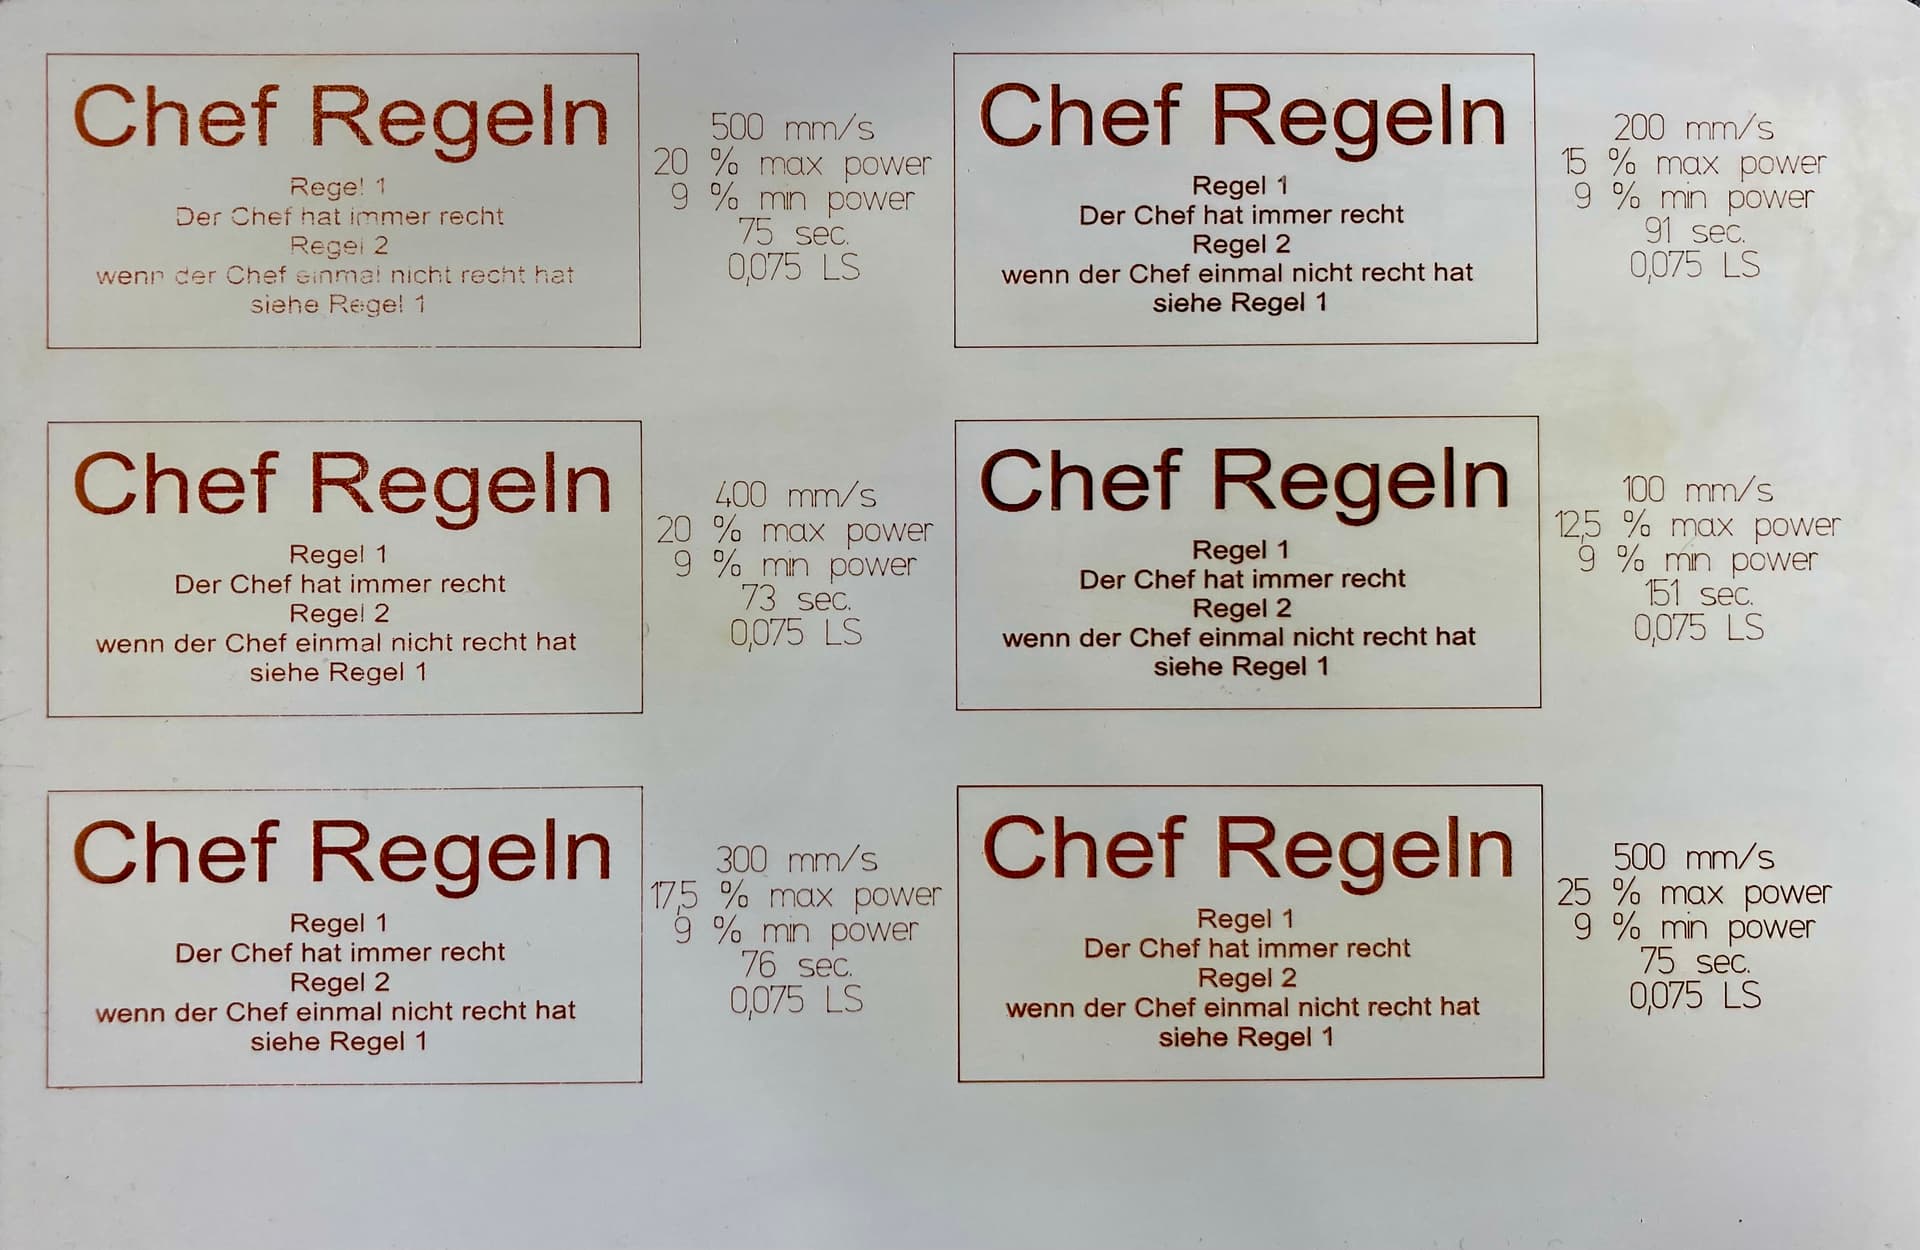
Knowing the proper speed & power for good engraving results on a specific material, run an Interval Test to find the best spacing for that material. Update the Material Library values with that line spacing.

It may seem tedious, but it’s the only way to discover how your laser behaves on your materials.

thank you very much

Sigh, I just can’t do it with the overscan

At 100 the shadow is barely visible. Everything above it already has this shadow which prevents me from adjusting it precisely