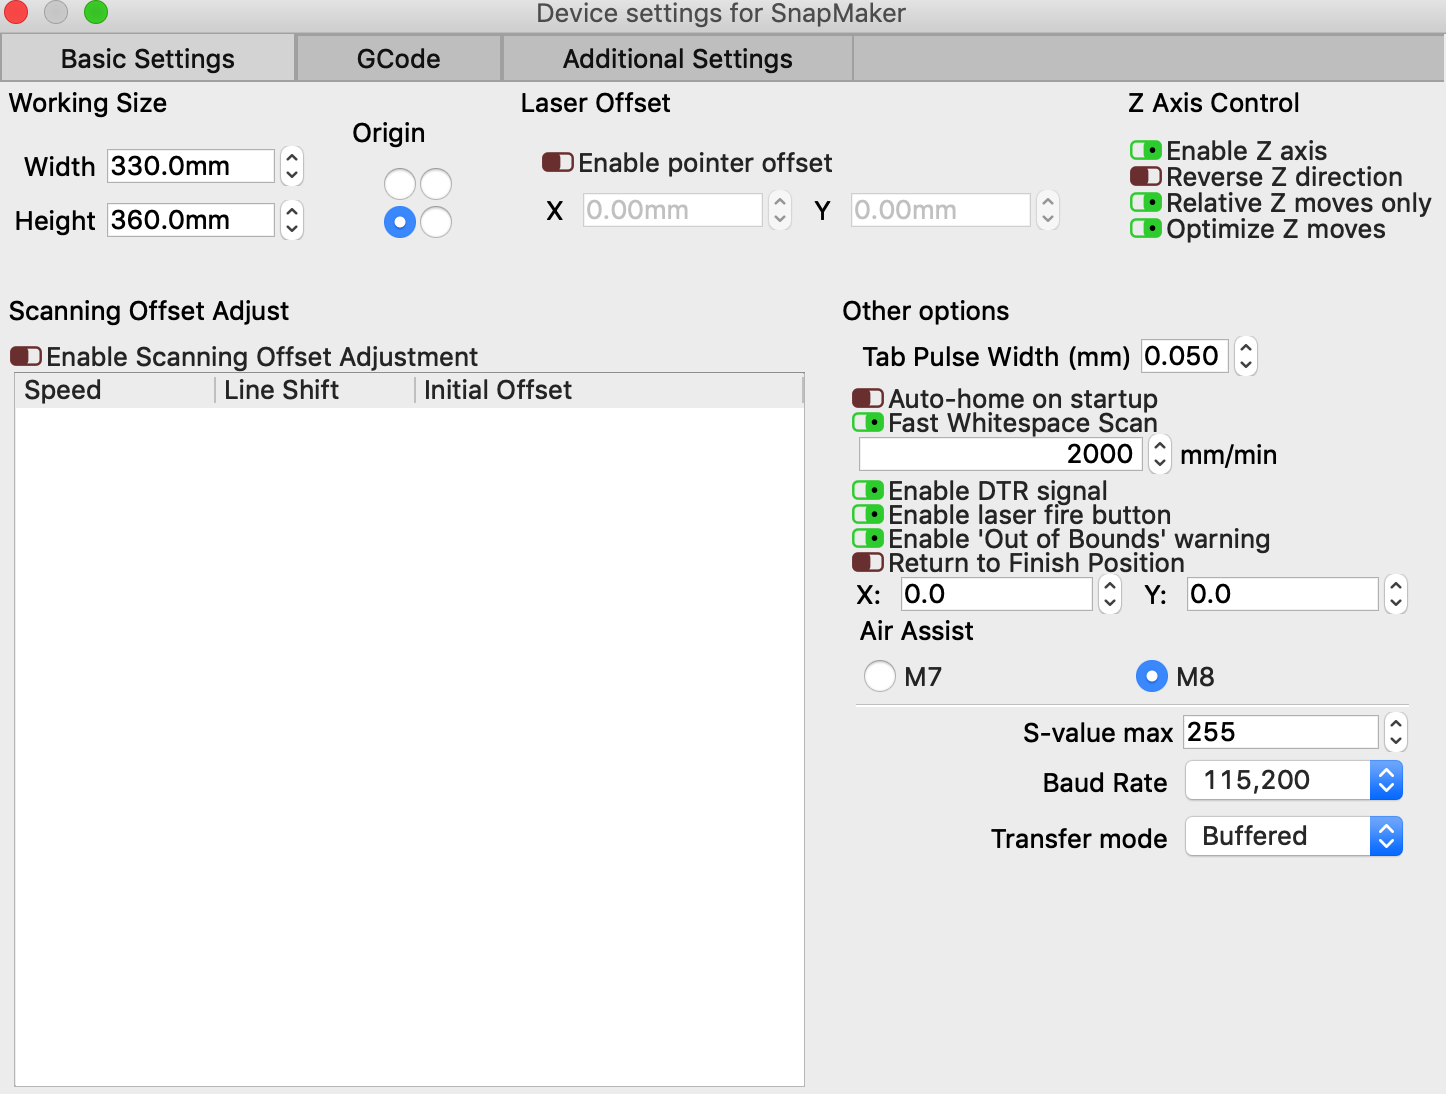
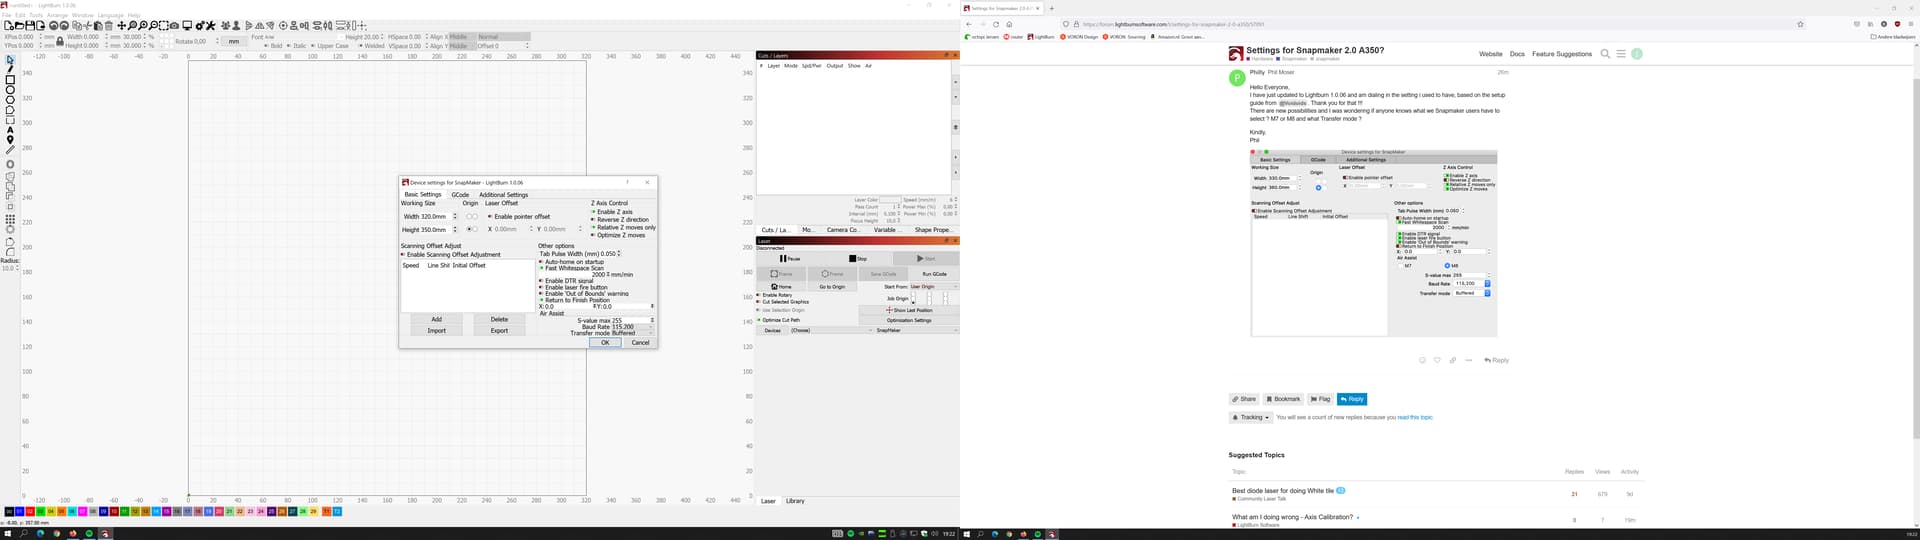
Hello Everyone,
I have just updated to Lightburn 1.0.06 and am dialing in the setting i used to have, based on the setup guide from @Voidoids. Thank you for that !!!
There are new possibilities and I was wondering if anyone knows what we Snapmaker users have to select ? M7 or M8 and what Transfer mode ?
FWIW: I’ve been using the same Lightburn Marlin profile configured for the Snapmaker 2 A350, 1.6W, 10W and 20/40W quite successfully for the past couple of years now. Not the Snapmaker Marlin profile in Lightburn or Snapmaker GRBL profile.
Also, the “Read From Controller” function does not work with Snapmaker because the Snapmaker controller does not support this function.
I just got my 40W blue installed and running, but the air assist does not come on.
I have M8 selected, and I have air assist toggled on in my layers.
What else could be the problem?
I ran a test where I put M08 in the startup Gcode and M09 in the ending gcode, and my air assist works just fine, so I guess my hardware is ok.
Does lightburn send “M8” and “M9” or is it “M08” and “M09”, and does the presence or absence of the zero matter?
Still a problem in the latest 2.0 release candidate.
Ok, after working with LB tech support, the solution is to NOT use the snapmaker profile, but to use a GRBL profile under Laser Tools, Manage Devices, Create Manually. I used the plain “GRBL” profile, and the only thing I really had to do was enter the bed size (350/320 on the SM350) When I output the job under that profile, the air pump is controlled as I expect with no mods needed to the Gcode.
Note: I’m running LB2.0 RC2 now. Not much point investing time in earlier versions with 2.0 release coming soon.
I did notice that in LB 1.7 the test box was off by 12.3mm in Y, and that the pointer offset (at least in the Y axis) did nothing. In LB2 RC2, the pointer offset works as expected in both X and Y.
Also FWIW, aligning the lower left corner of the test paper with the alignment cross on the 40W blue laser put the test box cut precisely where it should be, 20mm from the bottom and left edges as designed. IOW: No offset adjustment. I just moved the head so the cross was just barely on the edges of my precision test post-it note, and set that as the work origin. In LB I have that set so that the work origin is the lower left.