It is 2mm birch plywood and 2mm oak plywood, the trick is to find the right kerf setting. A side benefit of this test is that you also find out if the X-Y Steps is precis or not. To find my Kerfsetting I have cut a hole with 30x30mm and a counterpart with 30x30mm. The piece that needs to be inserted must be able to fit precis, no matter if you turn the parts, ie. X to x or x to y. Preferably, light should not be seen between the parts when you hold it against a light source.
I’ve been experimenting with veneer inlays on CNC carved boxes but haven’t tried much with inlaying thicker stock. Are you using the line offsets to adjust for the kerf?
No, I cut out the “female” part with the nominal measurement and adjust the counter part with the kerf setting. It works very well (for me). I have also made initarsia on solid wood, deep engraved the female part and cut the counterpart out of veneer, also with the appropriate kerf settings. It requires a lot of fine-tuning, but it also works.
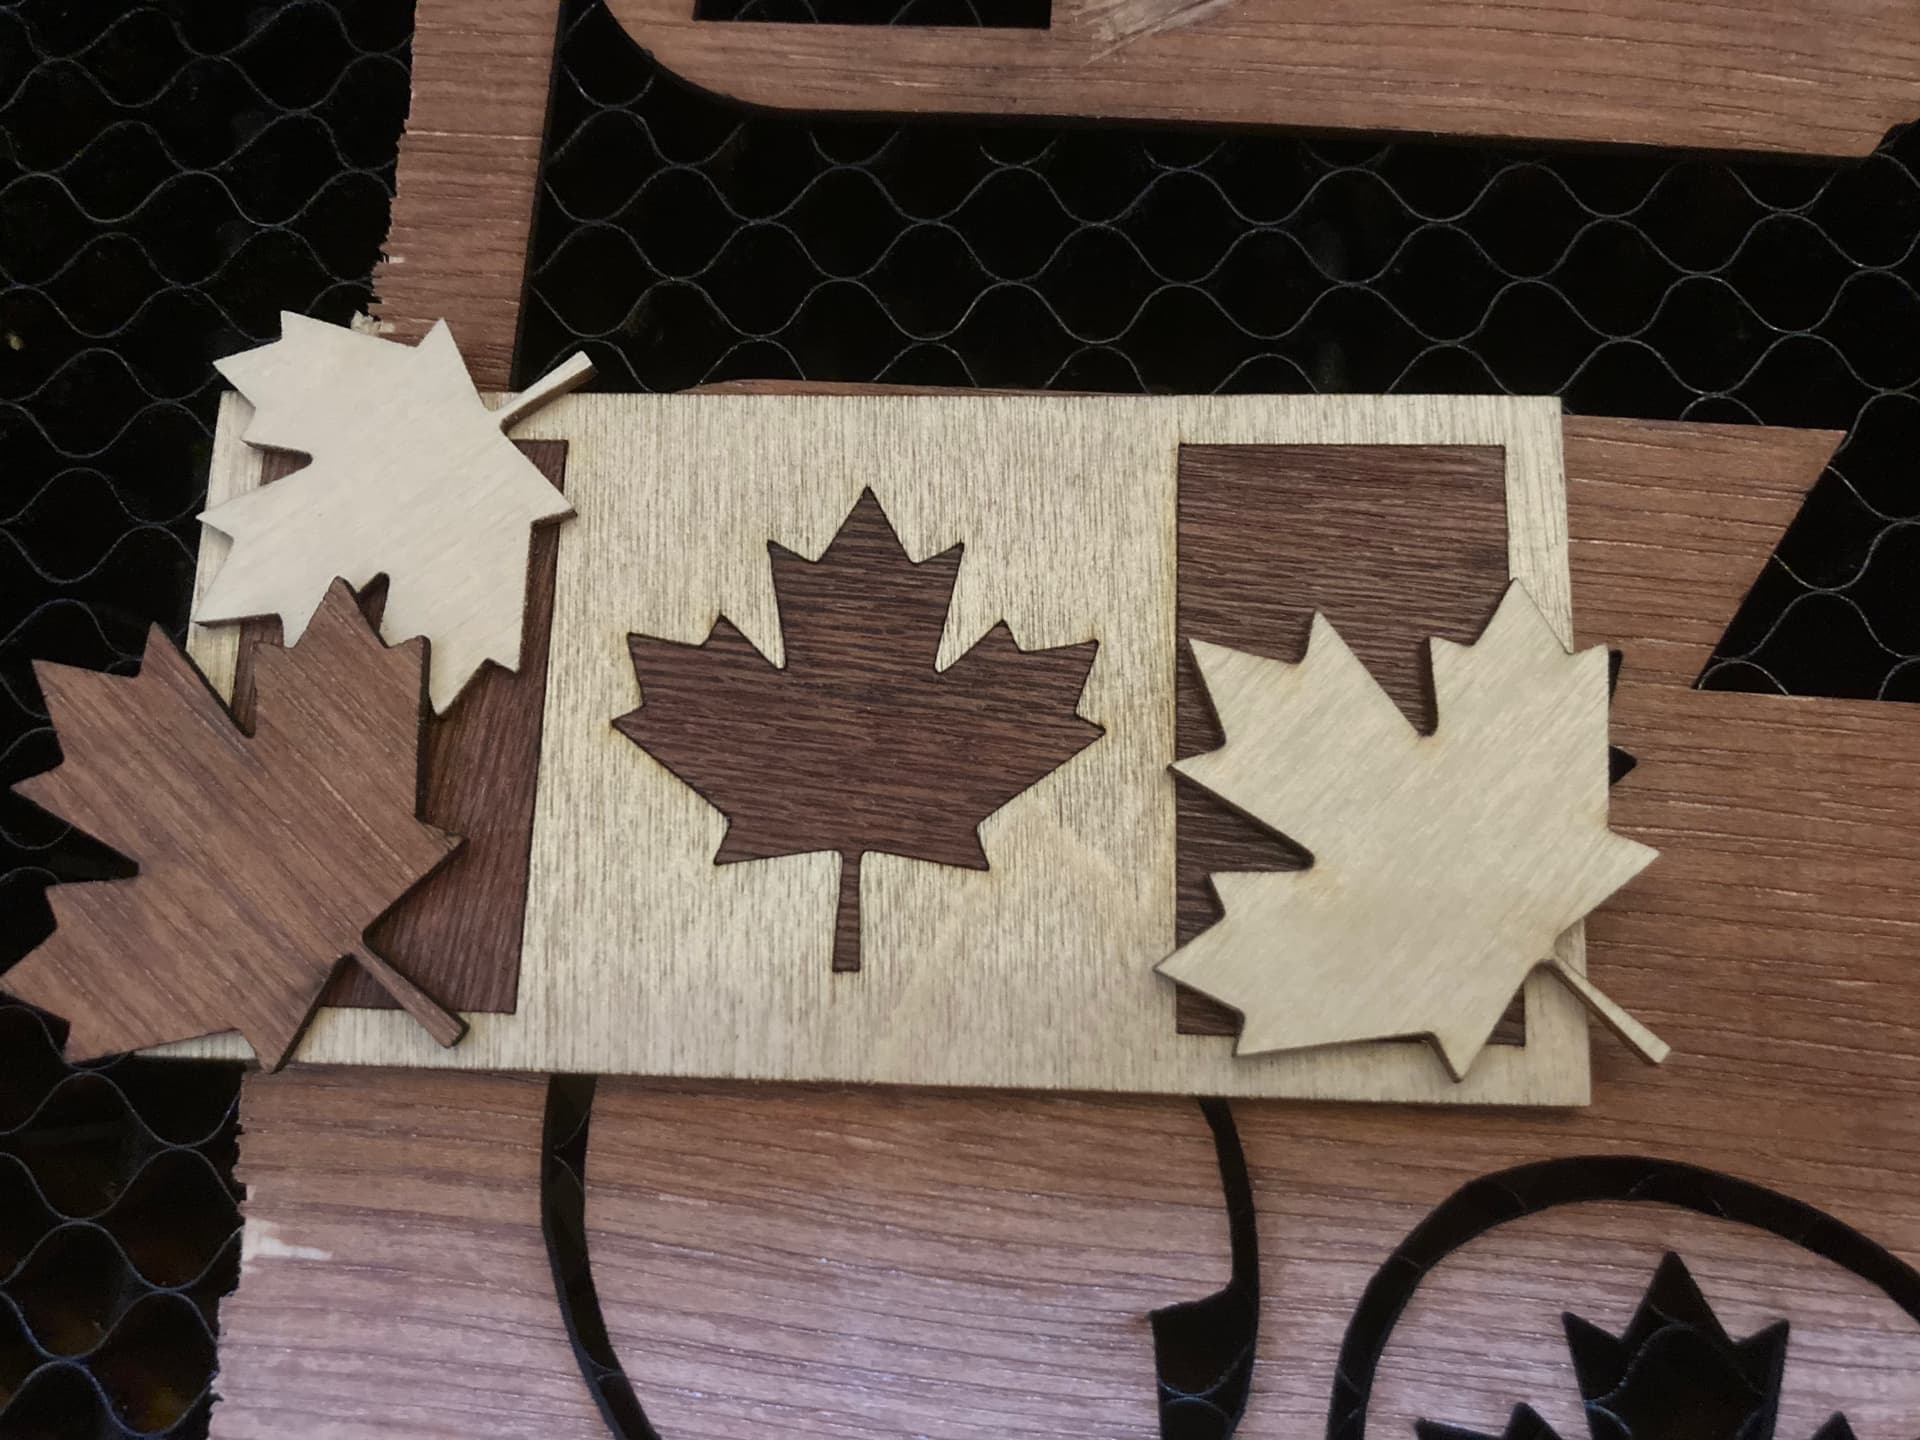
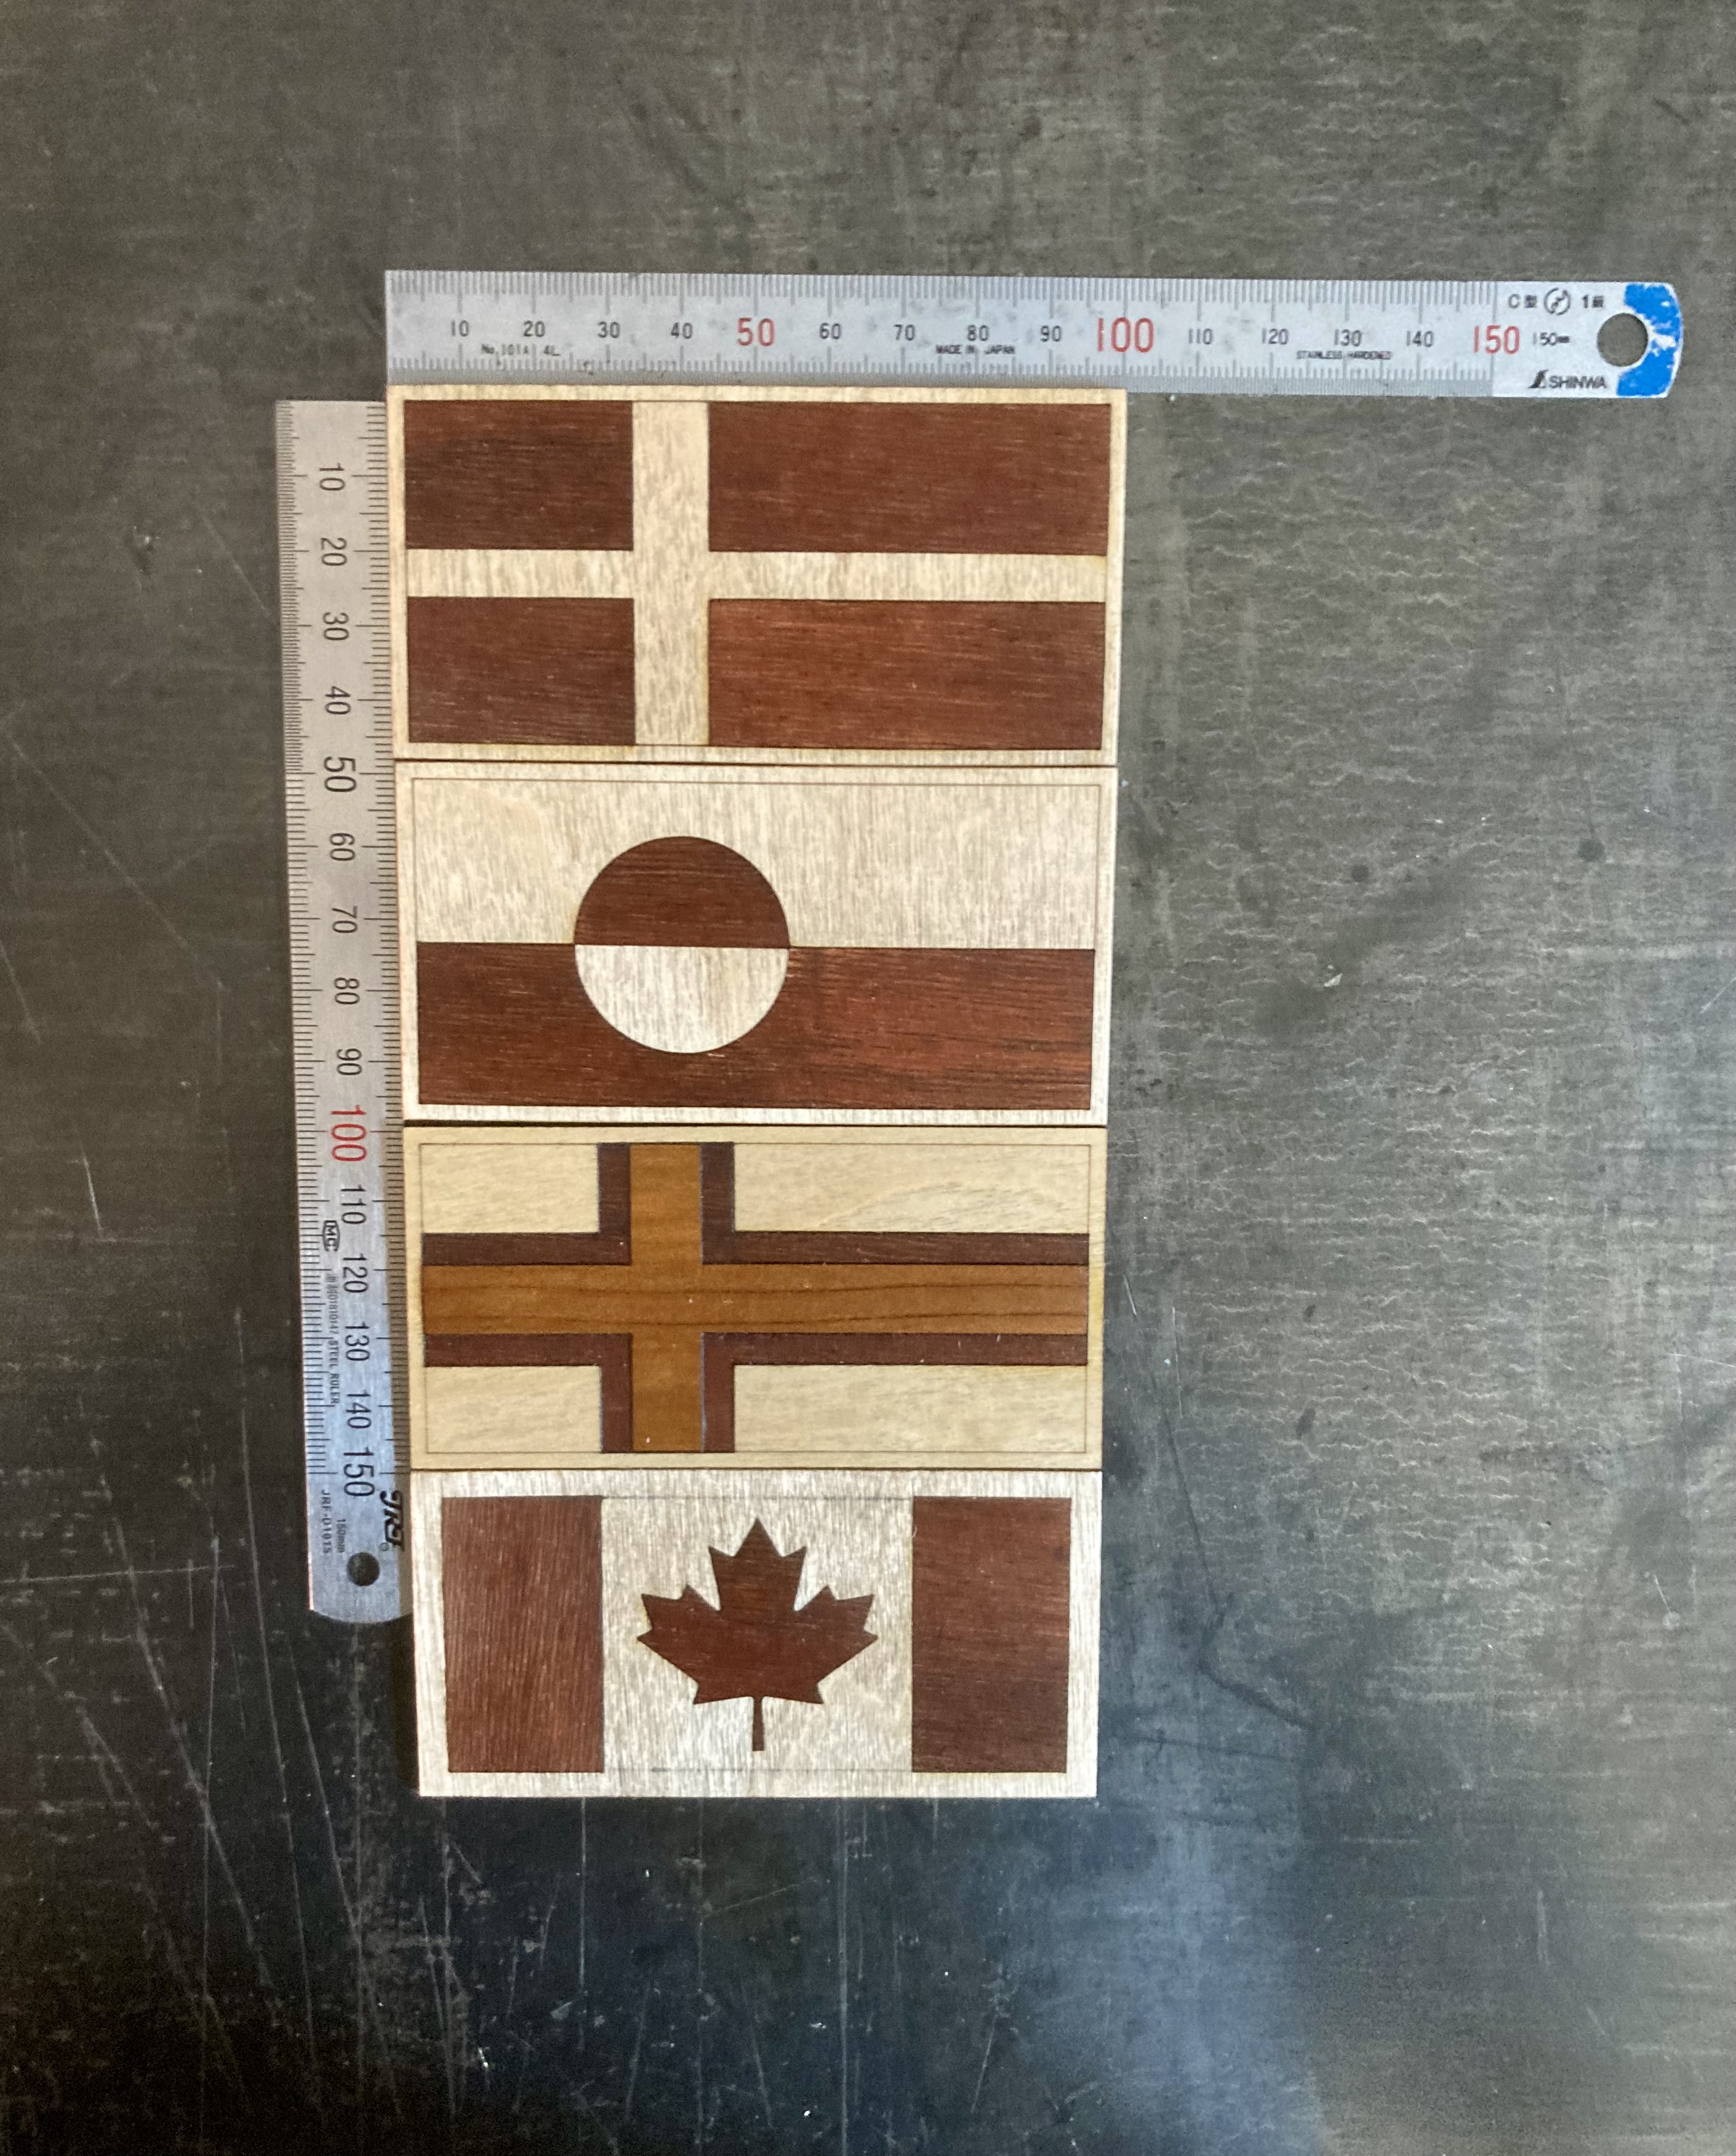
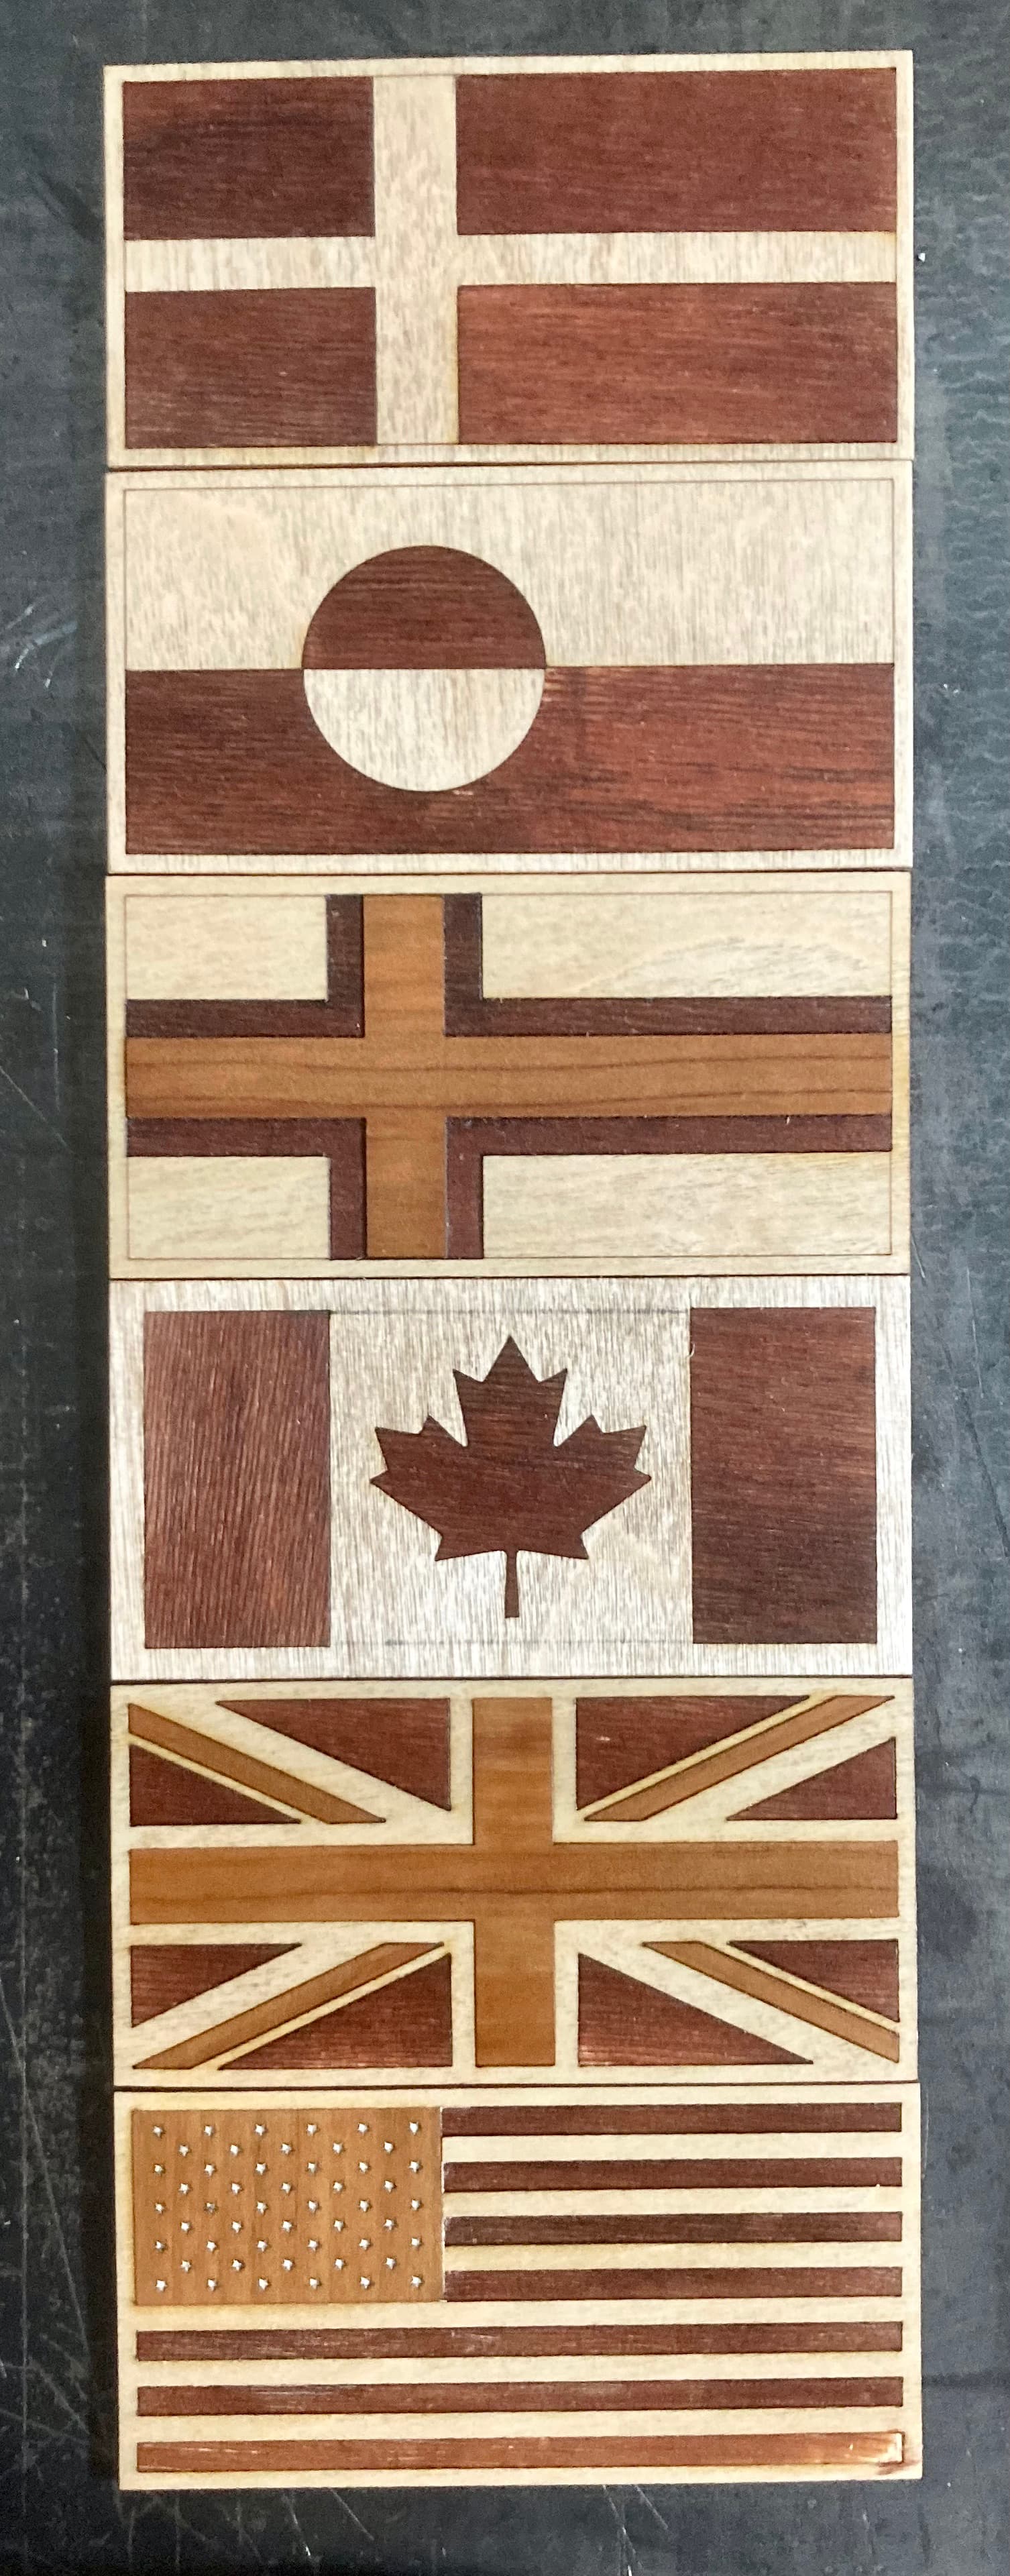
An update, I have added the flags of The Danish Realm, Kingdom Denmark with Denmark, Greenland and the Faroe Islands. The flag of the Faroe Islands is white with a red cross on the blue cross, it doesn’t really show up in the materials I have available, unfortunately. The Greenlandic and the Danish are red and white, just like the Canadian flag.
Very nice! I’m assuming these come off your CO2… That’s very difficult to get right with a diode machine due to the rectangular beam. Do CO2 machines produce a tapered (relative to Z) cut? I’ve tried to do some critical-fit parts with my 20W diode and struggle with both taper and variable kerf.
Yes, it was made with my OMT60W, the good old Eleksmaker I use very rarely. I have had the opportunity to play a bit with a Longer 20 Watt and am impressed by its cutting ability.
It does, but with my 2" lens it’s about 0.2mm on 15mm solid pine. With my thin flags (2mm) it can’t be felt or seen.
Hourglass effect, ( if that’s what you mean) should not be a problem up to a certain distance, on either CO2 or diode machines. However, I see relatively often that nozzle heads and diode heads hang hopelessly crooked on some machines. Models where you loosen and fasten diodes with 2 screws on the front plate, without a prism clamp or dovetail system, to be focused, are the worst. Half a degree off the angle and the cut becomes inaccurate. As I said, this also applies to many CO2’s.
Material that gives a “hard” edge when processing. Eg. I have had good results with HDF/MDF and hard veneer is also fine. It is also ok with one “soft” material, it must then have an ant’s hair more in kerf and a hammer
Colored acrylic is very exciting to work with, but it requires relatively large and thin objects that are not overly complicated. Acrylic usually has a “round” and a sharp edge per cut. Here it could certainly pay to play around with different lenses.
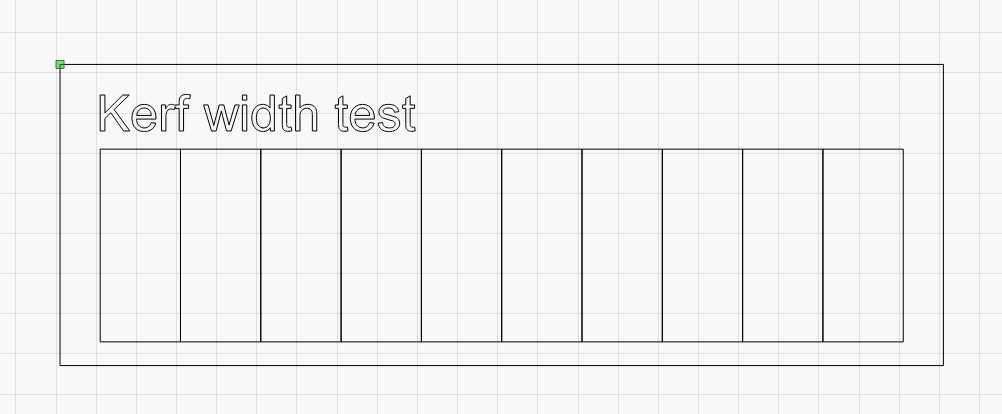
I know you know this, but for others who may not you can get pretty close with your kerf offset by running a test pattern like this. Cut out the 10 boxes and when it’s done squish them all together inside the frame and measure the gap they leave on one side. Divide by the number of squares and that gets you pretty close to dialing in your kerf.
Thanks Carl, this is one of the precise test and measurement procedures. The disadvantage is that it requires sensor blades to measure the correct distance.
For the little flag project, I use leftovers that I always save for such little things. I increase my kerf by 0.025 until it fits tight, it costs a little extra material but it’s “discarded scraps”.
Excellent as a starting point. I think most of us know roughly their kerf settings and then adapt them continuously from project to project.
My kerf is “normally” 0.075 mm, it gives me a tight fit in MDF. (distributed to both parts)
For flags, I have given the whole kerf to only the part that needs to be pressed in, 0.150 mm, and it fits perfectly. I have not tried using the offset function for initarsia, it should theoretically give the same result.
Small update again…
I am not completely satisfied with the usa`flag. I should have exchanged the 2 veneers, they would have fit better with the color and I have been too hard with the sandpaper, lower corner, right side.