Well, at least I think it’s the ultimate camera install .
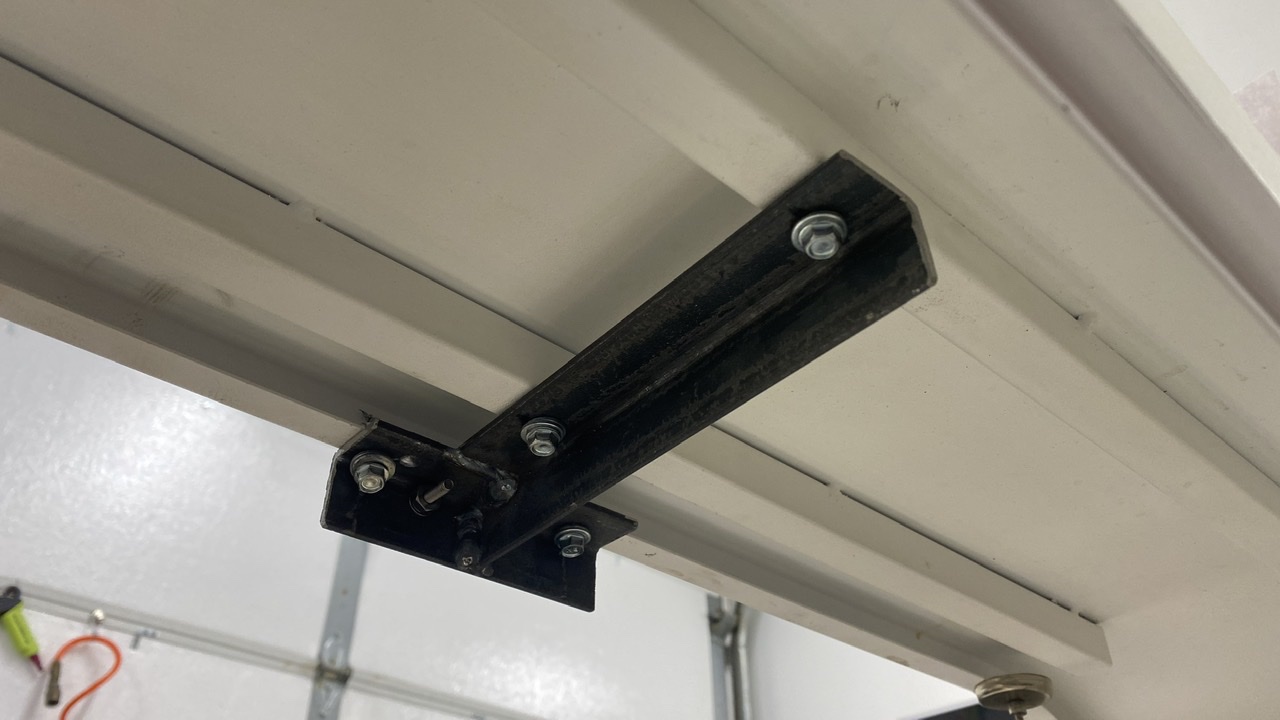
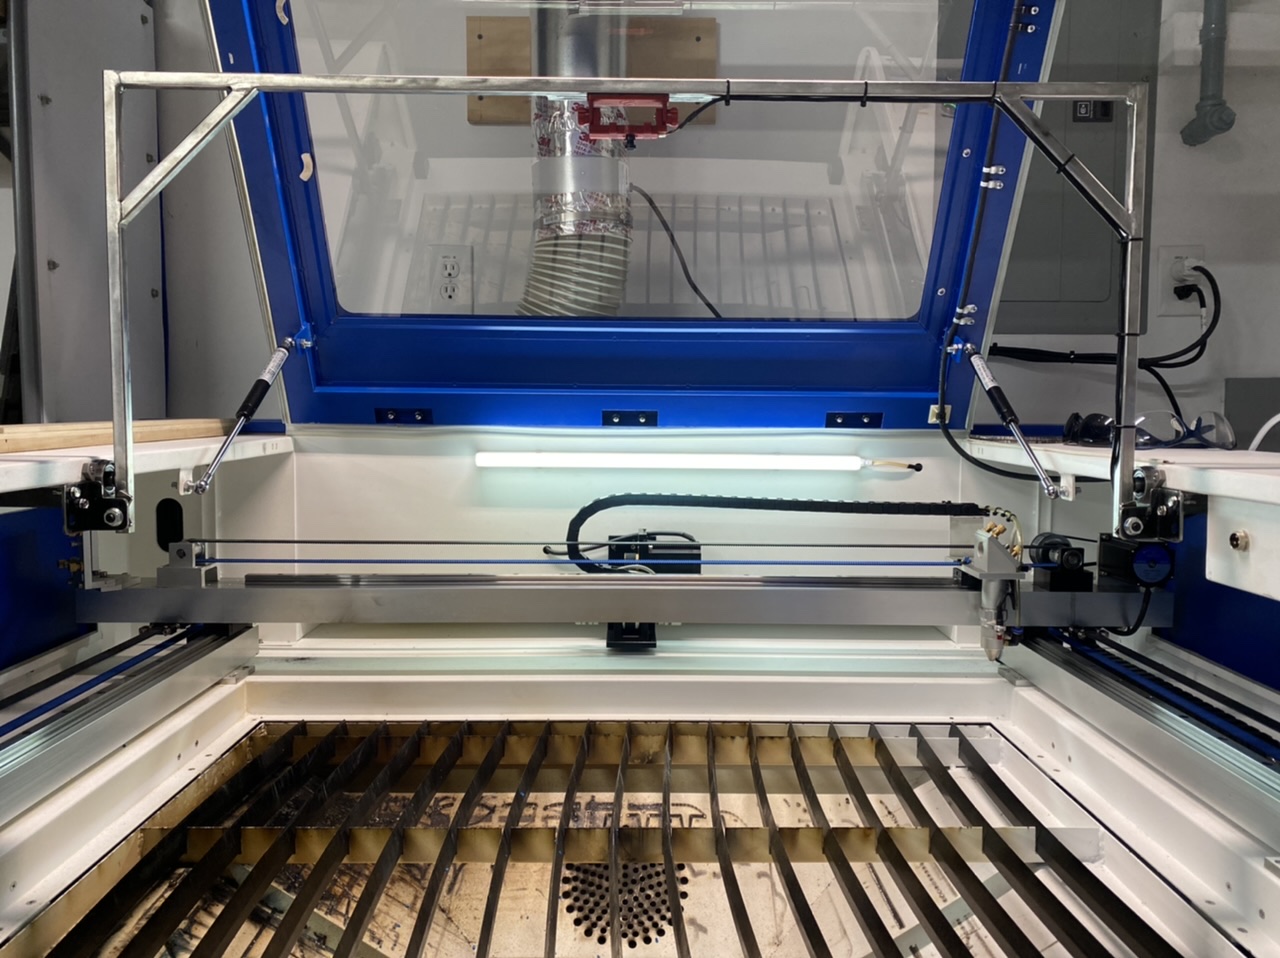
Rather than mount the camera to my lid, I wanted to have a way to have complete consistency with the camera post calibration. Although my lid is very solid, it still moves some.
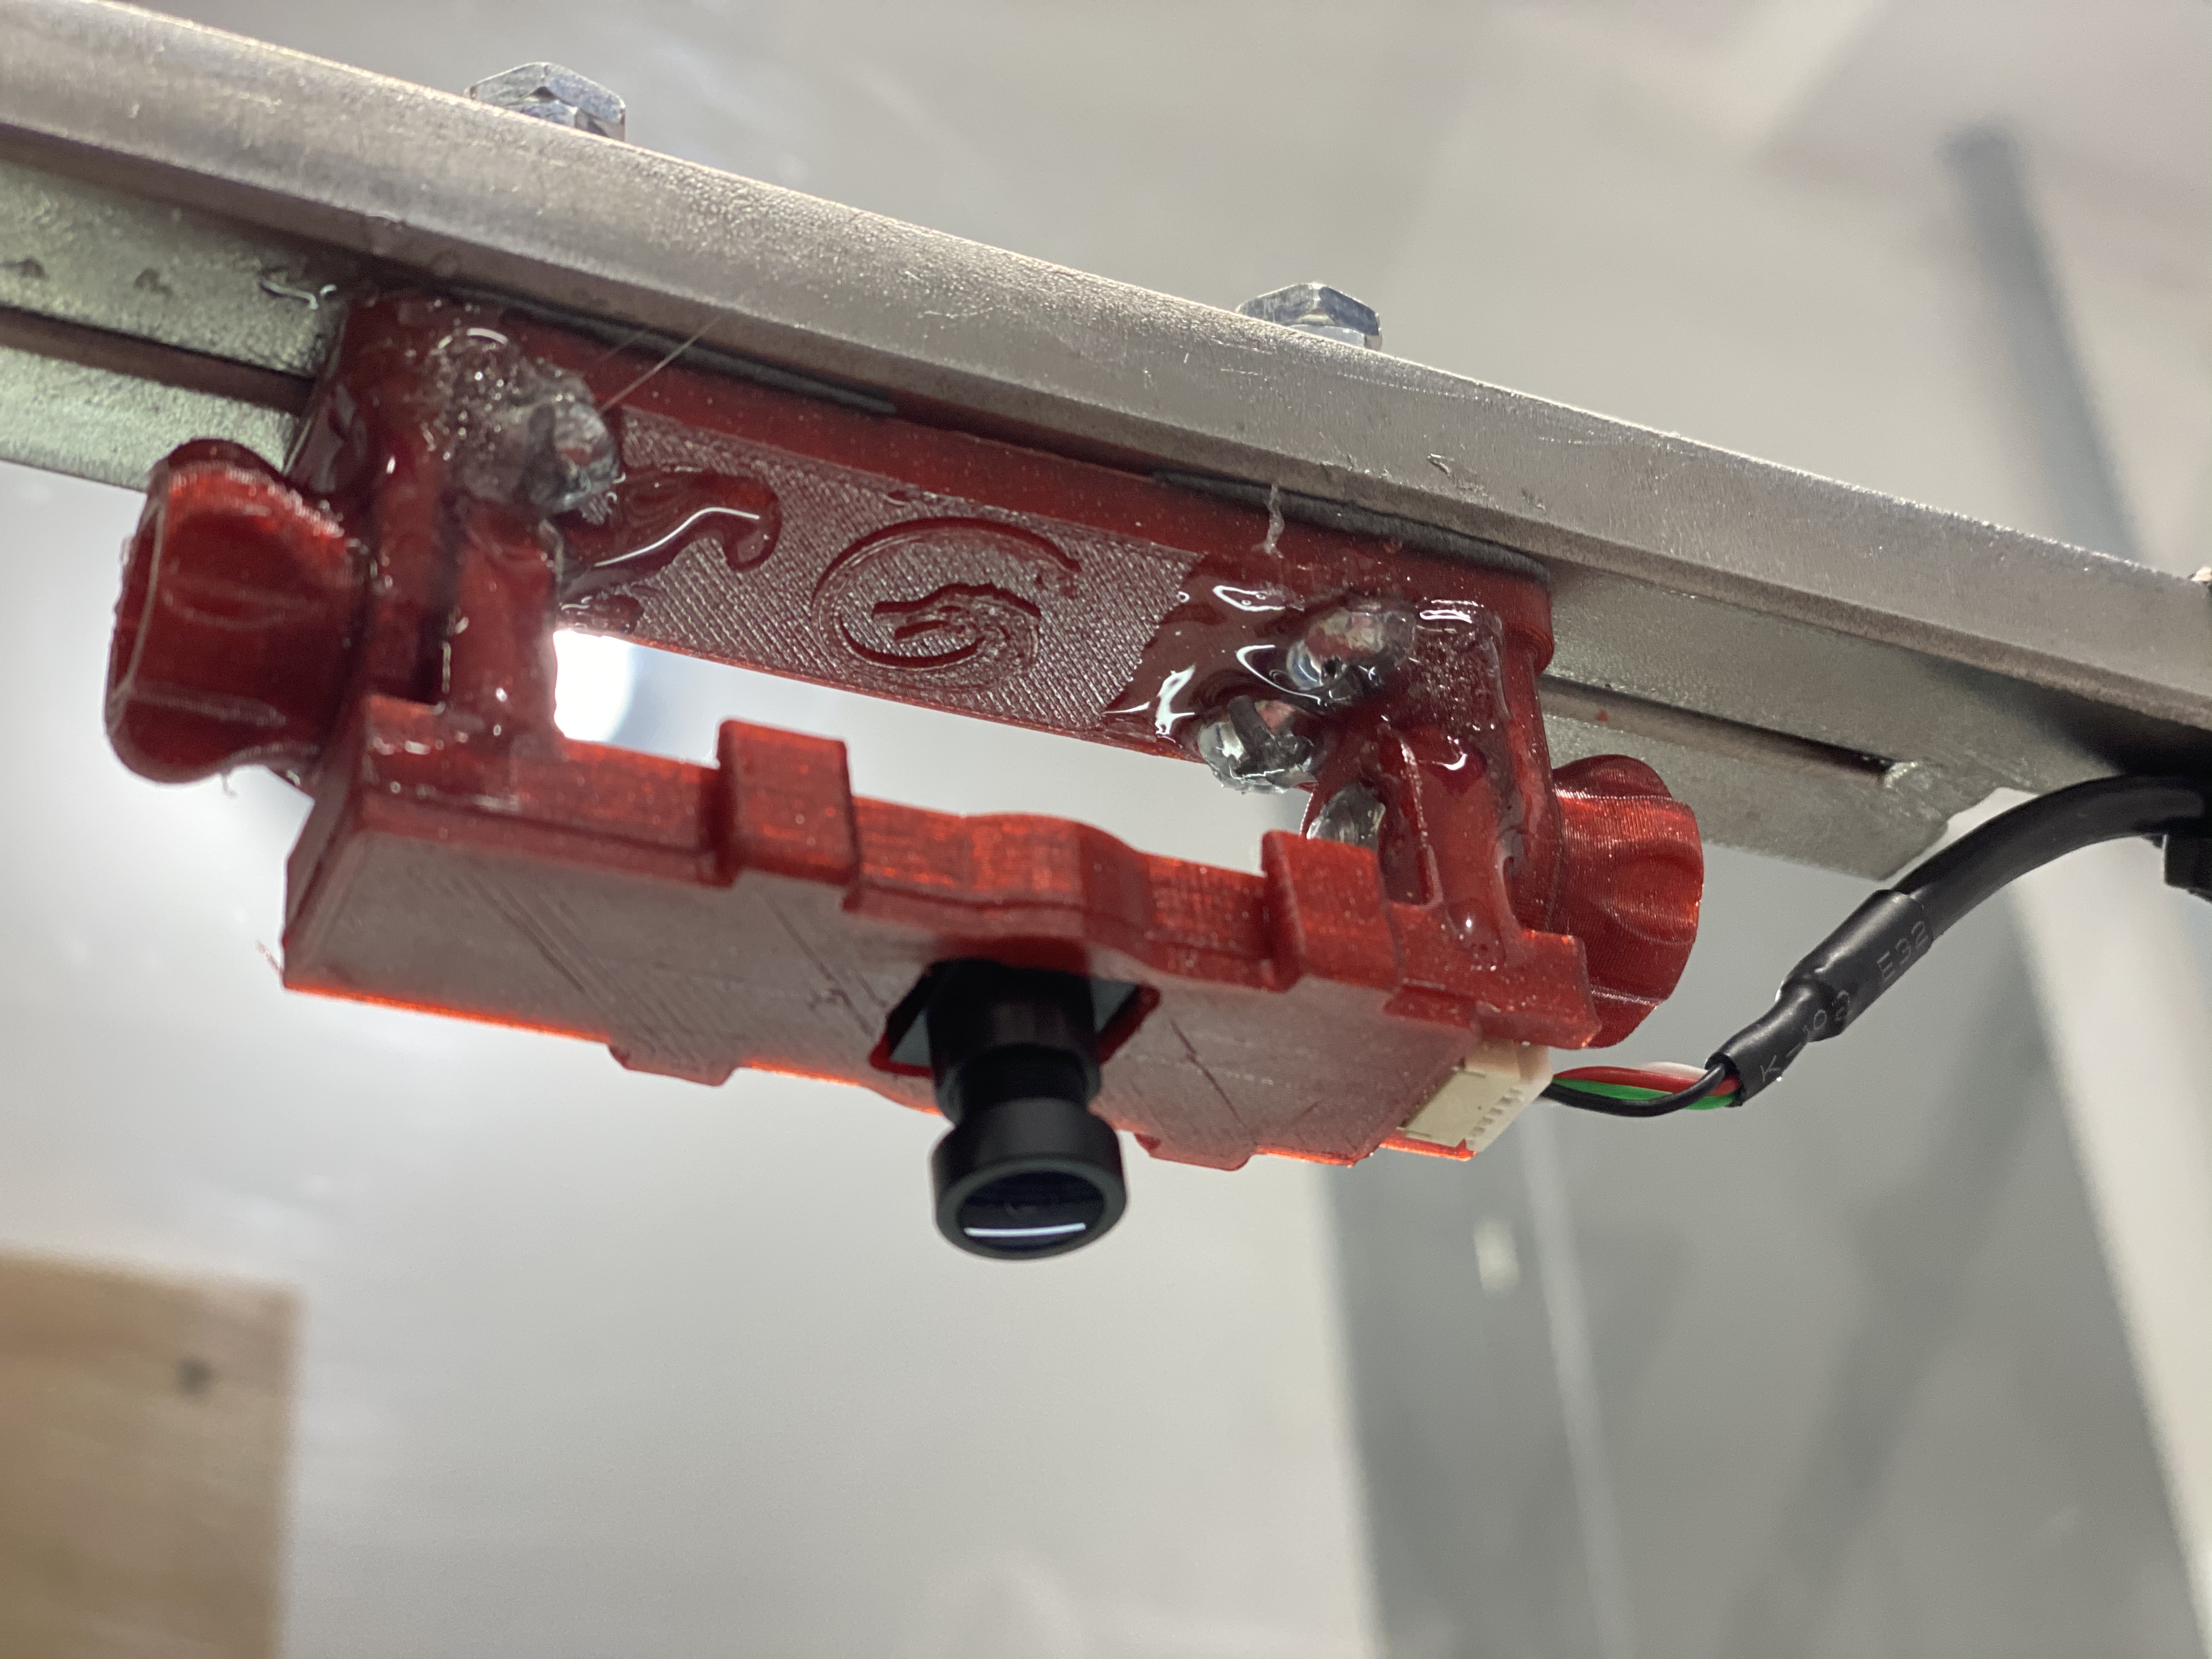
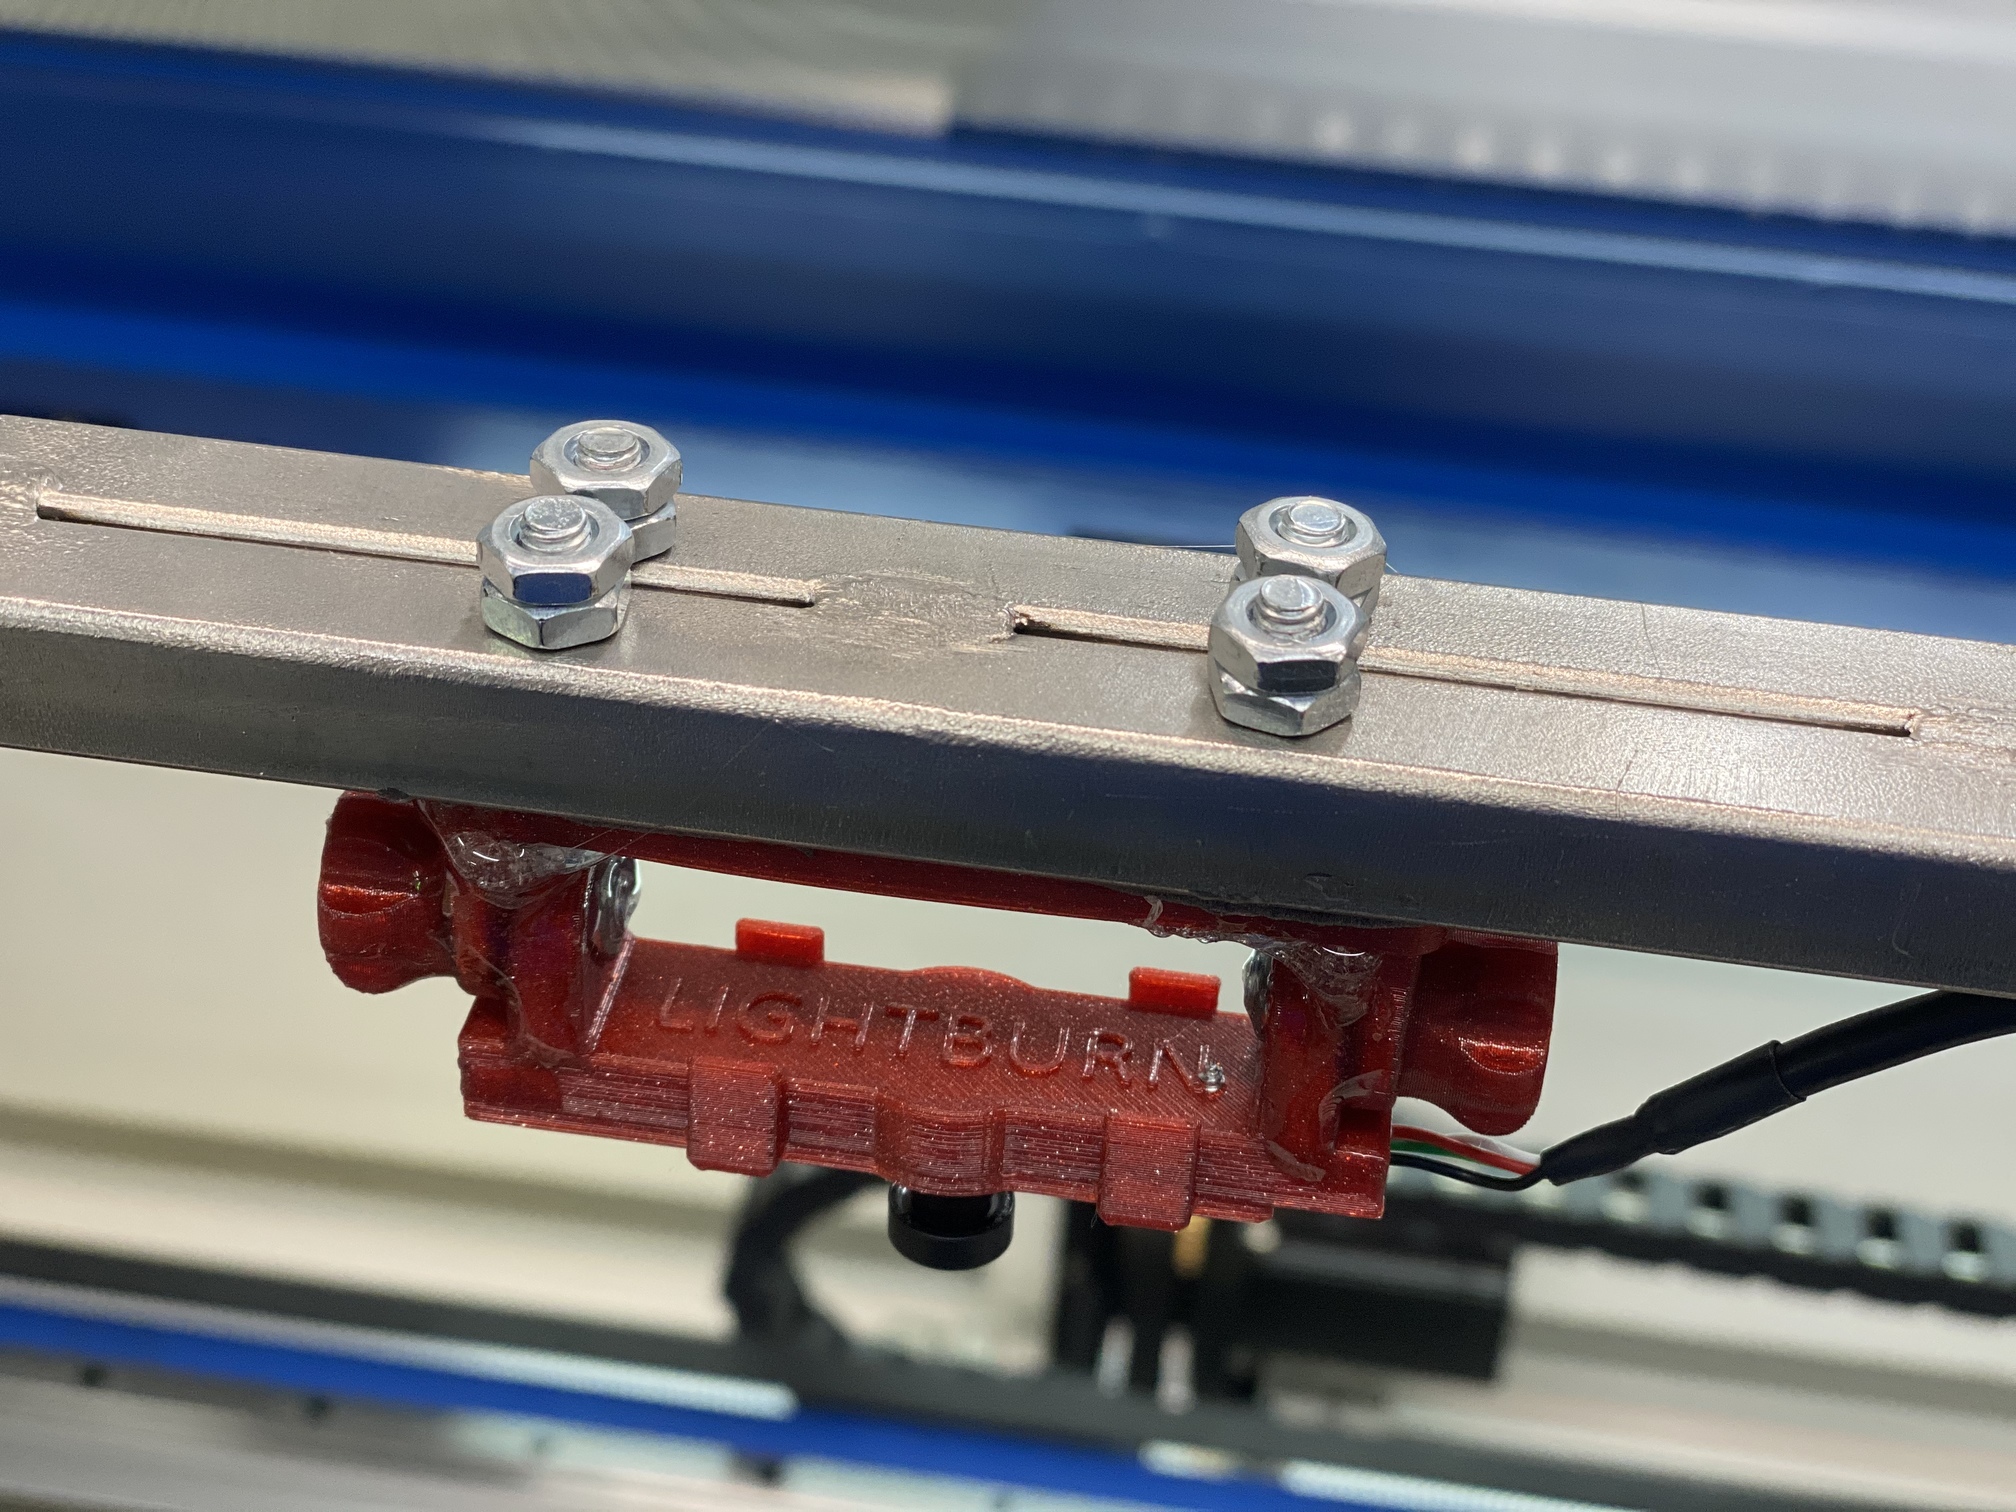
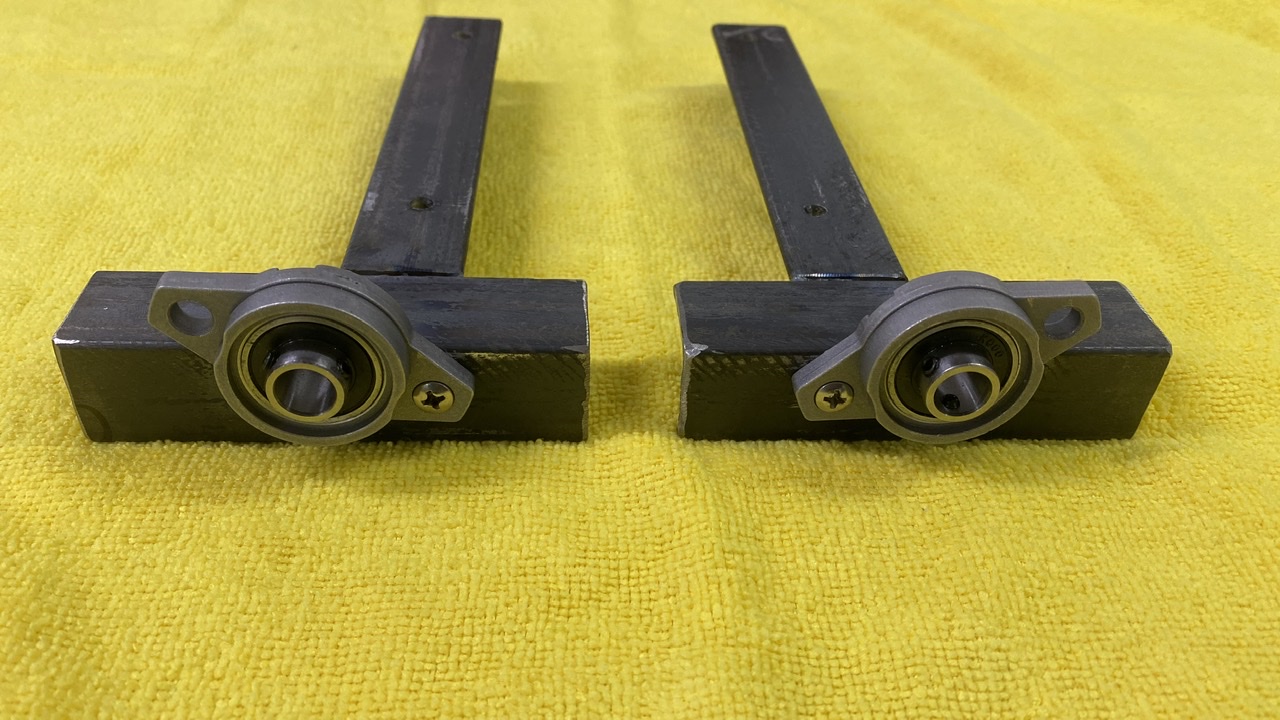
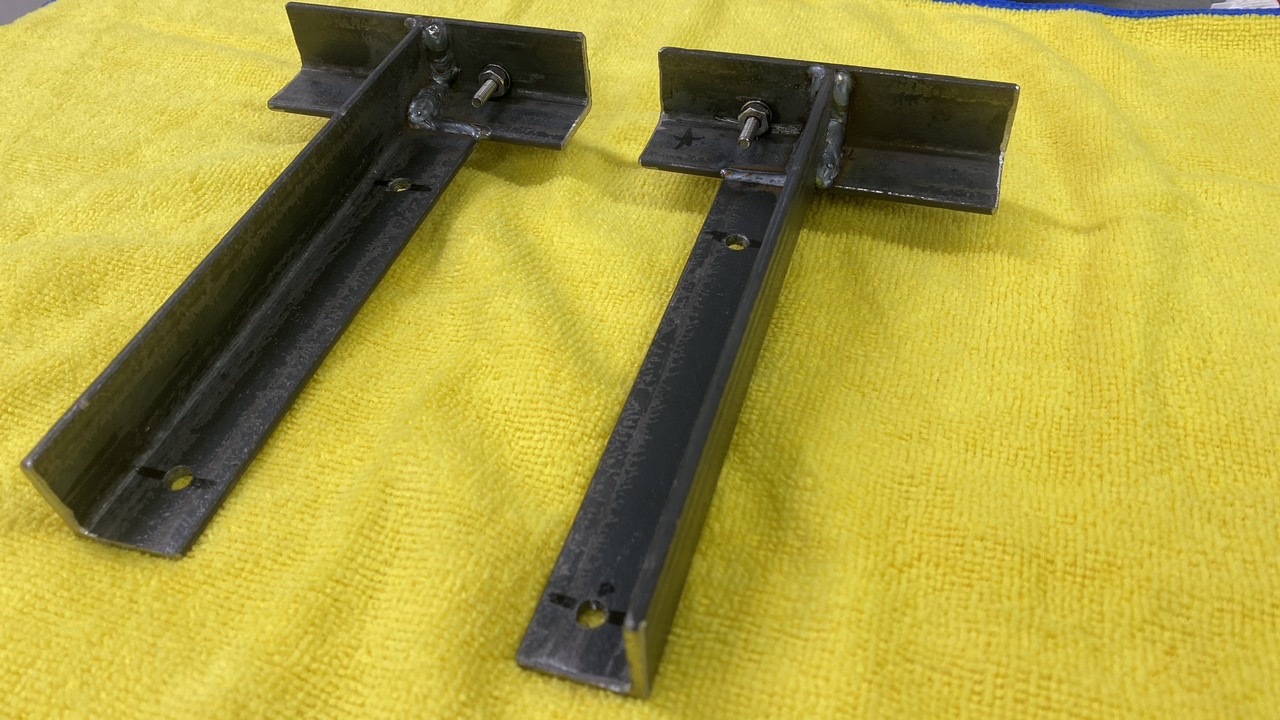
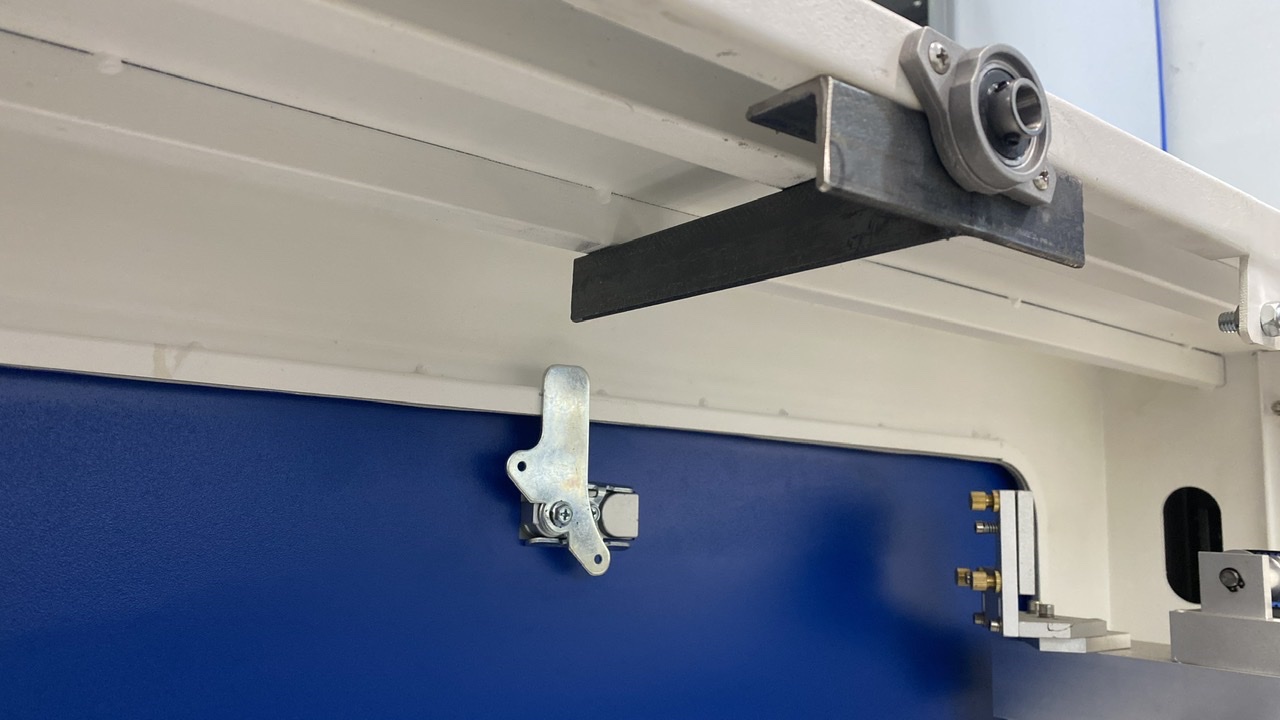
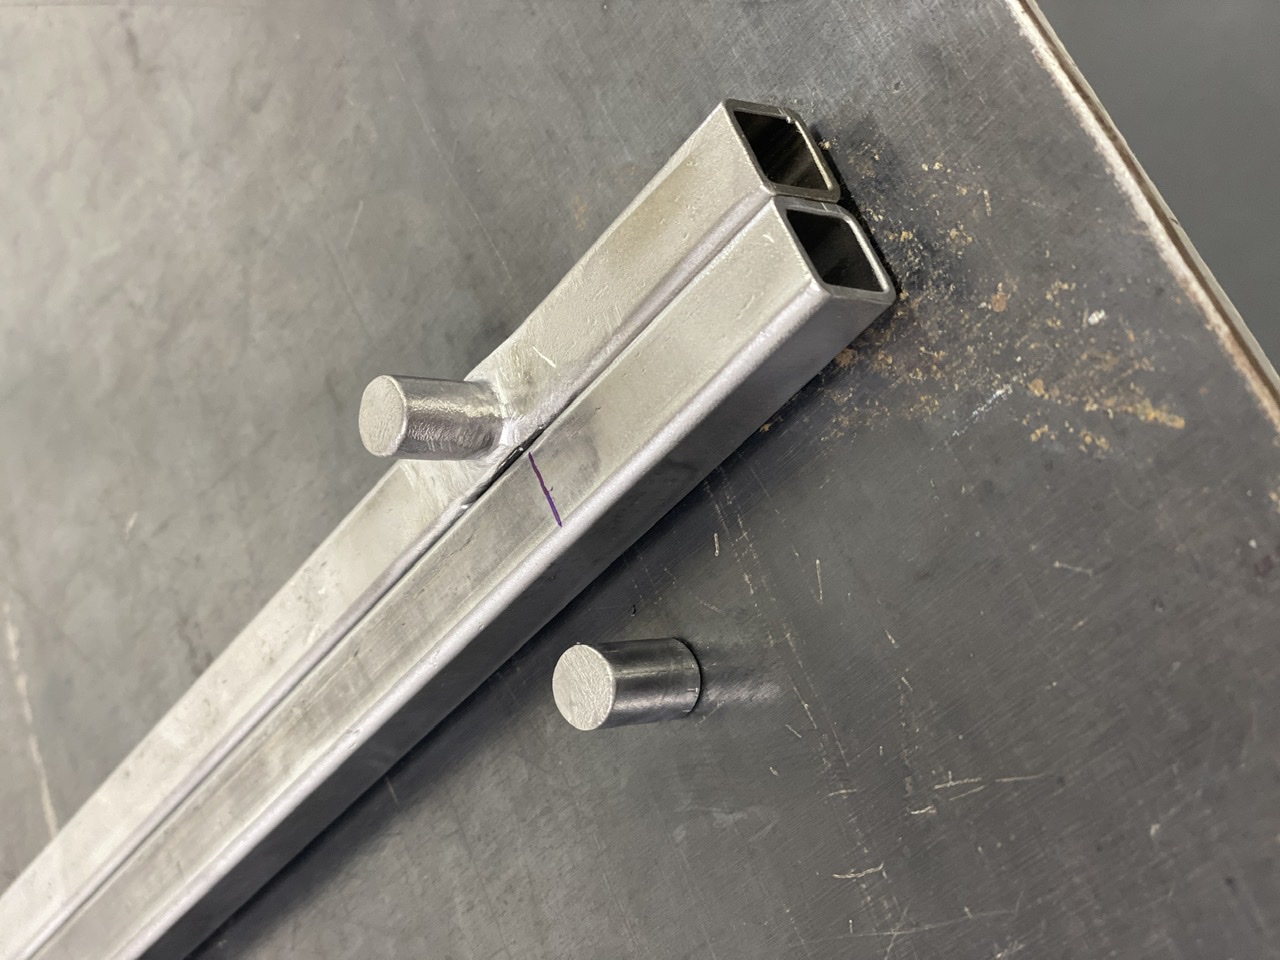
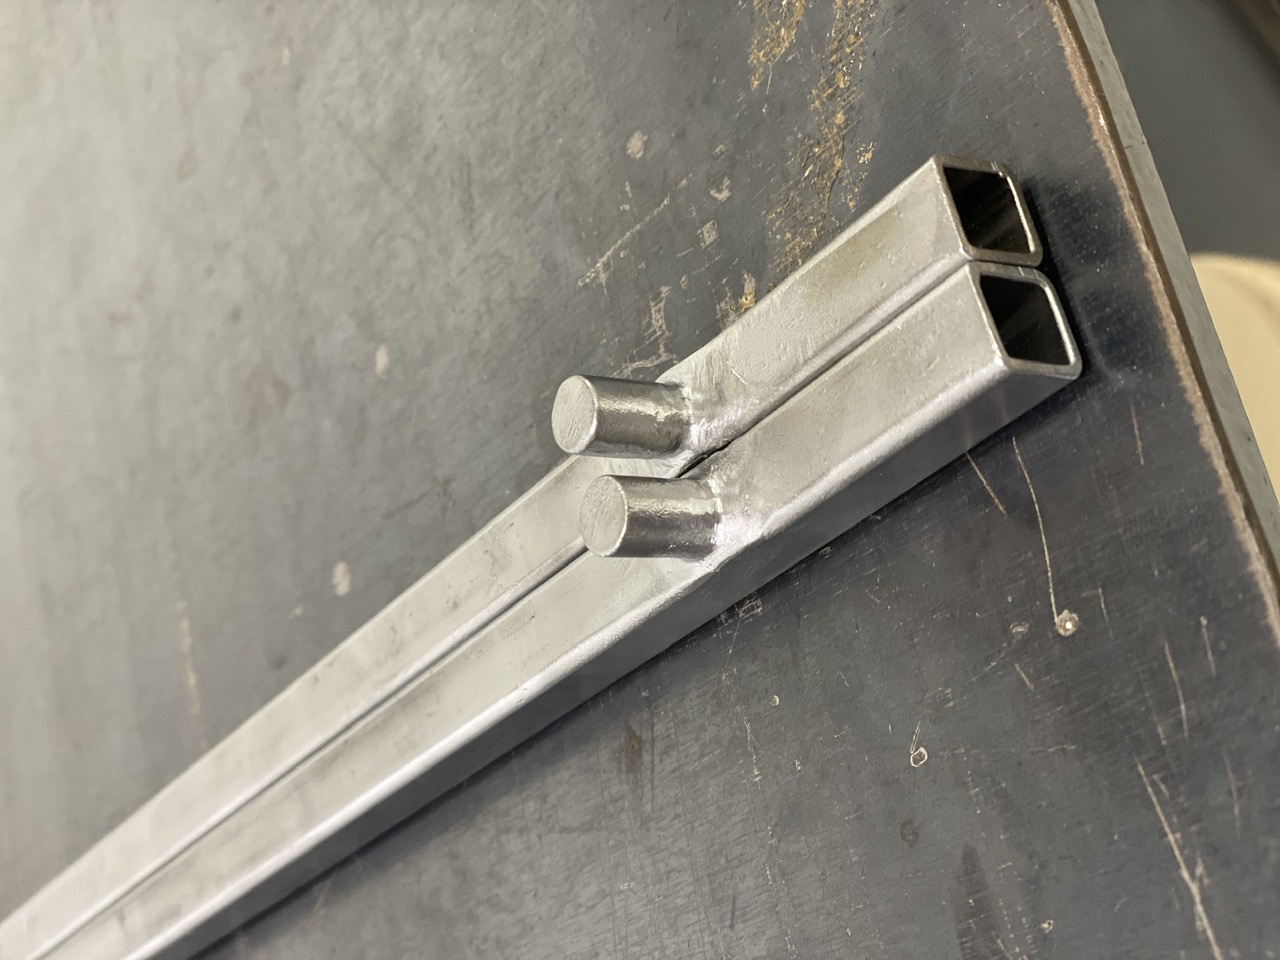
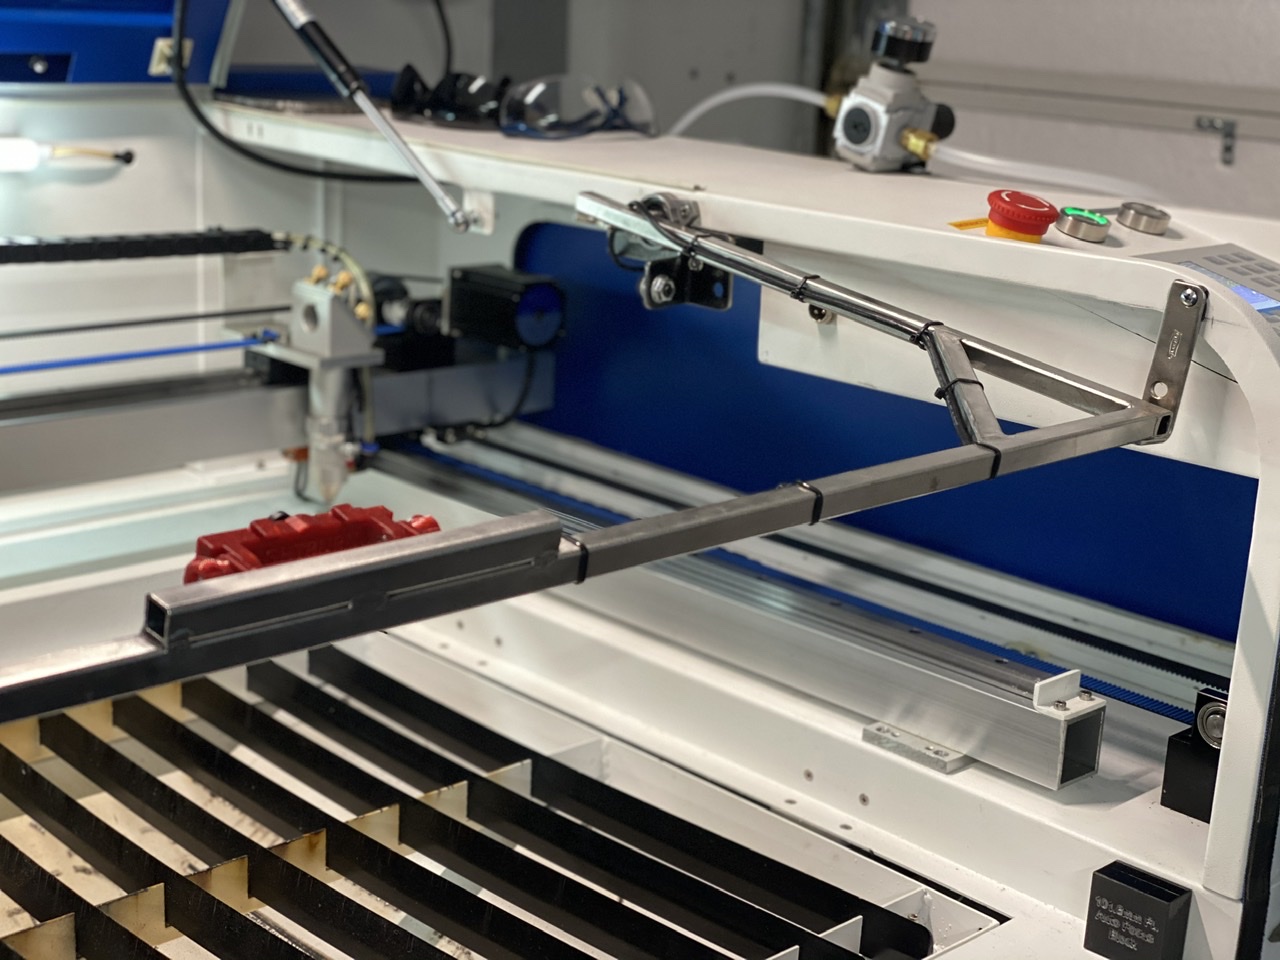
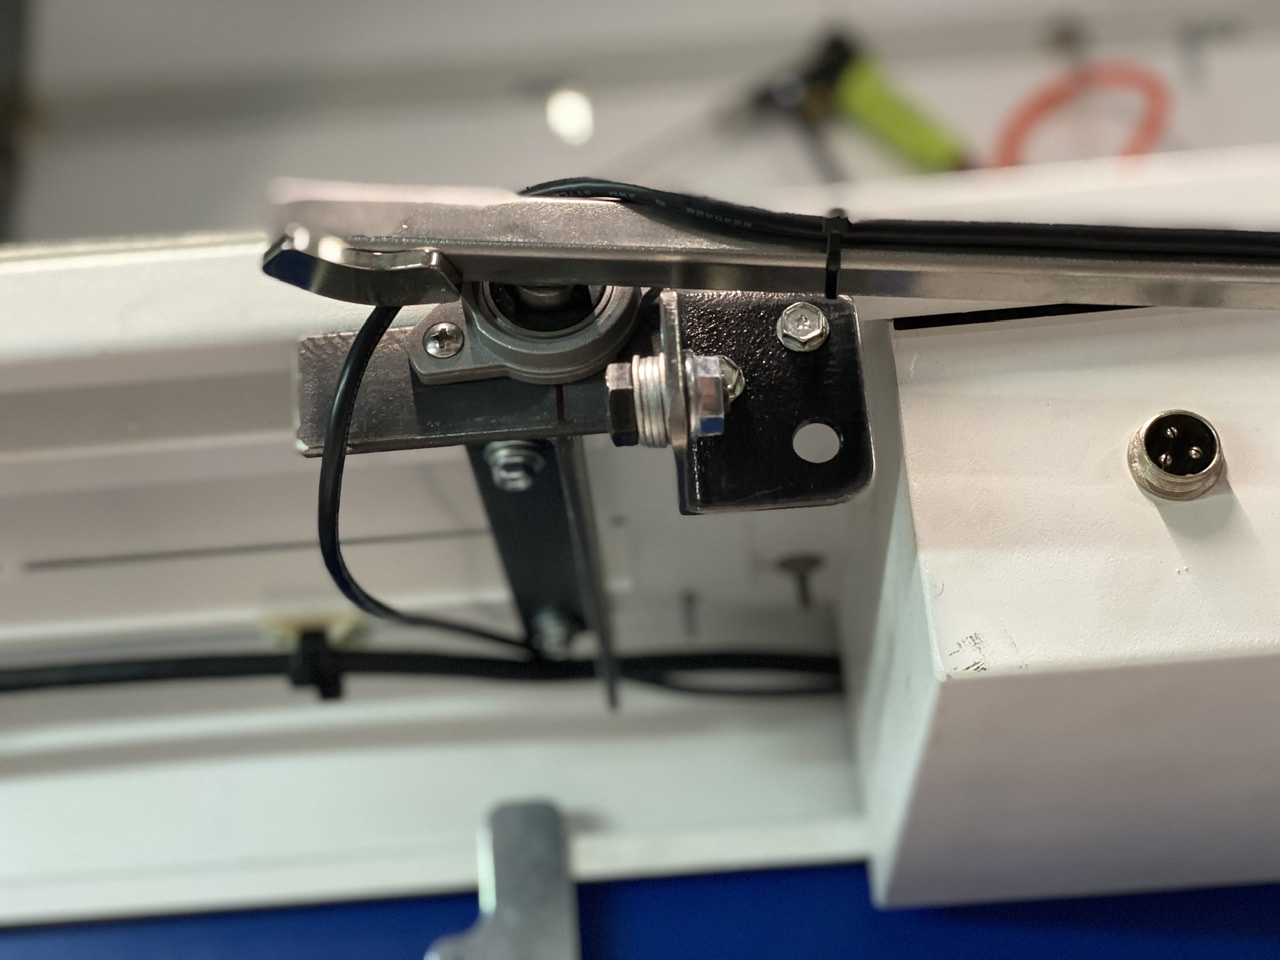
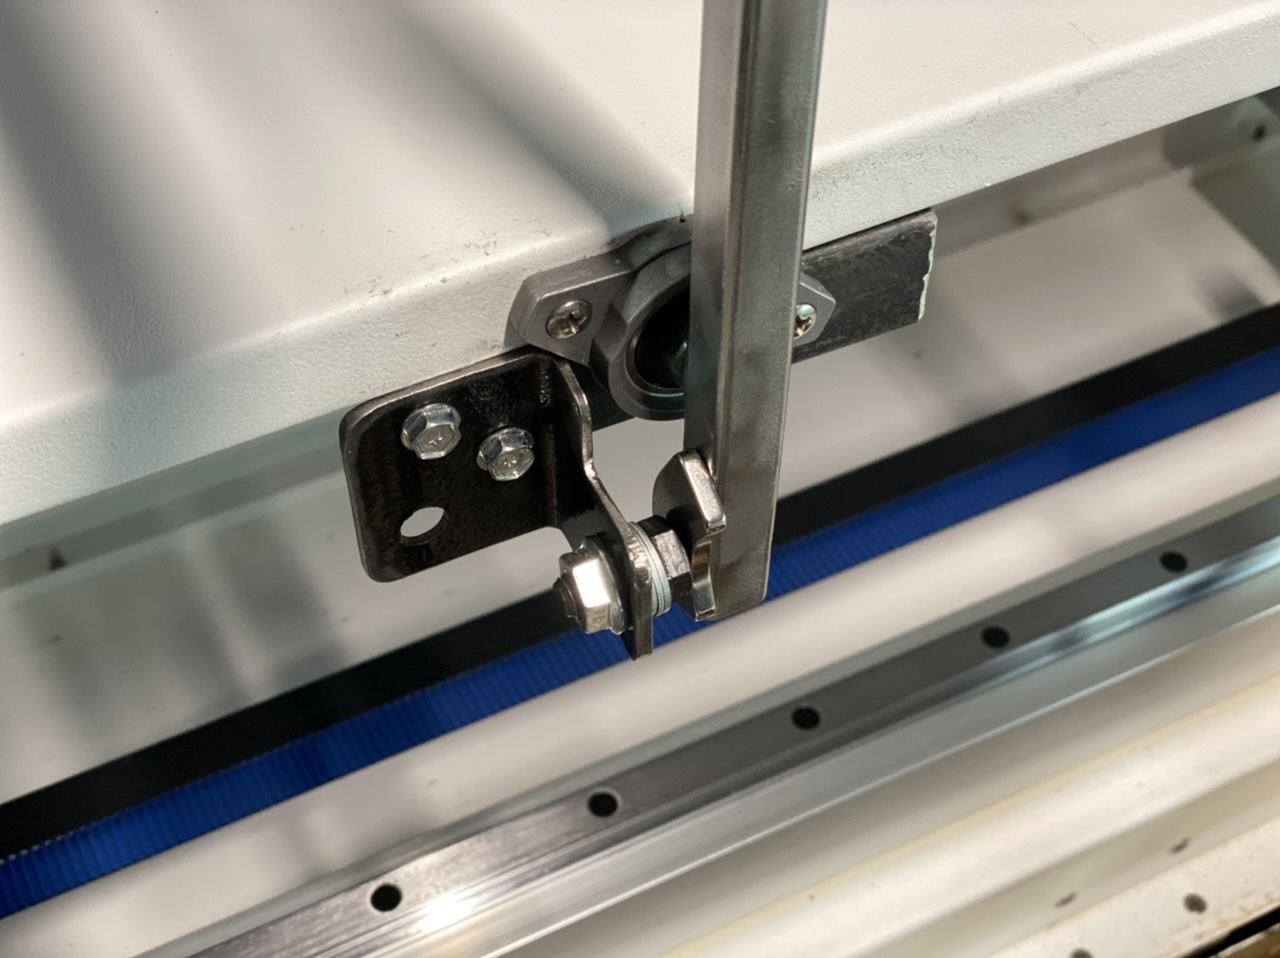
What I designed and built was a pivoting bracket connected to pillow blocks. The pillow block mounts were reinforced with steel bar angle in two directions to eliminate any flexing of the sheet metal due to the lid’s gas struts.
The stopping position of the bracket is a positive hold via rare earth magnets on to adjusted set screws on each side.
All I have left at this point is to add the mechanical attachments to the lid one day when or if I feel like it (so the bracket automatically raises and lowers with the lid). I already have all of the parts for that finished step, so maybe I’ll do it sooner than later.
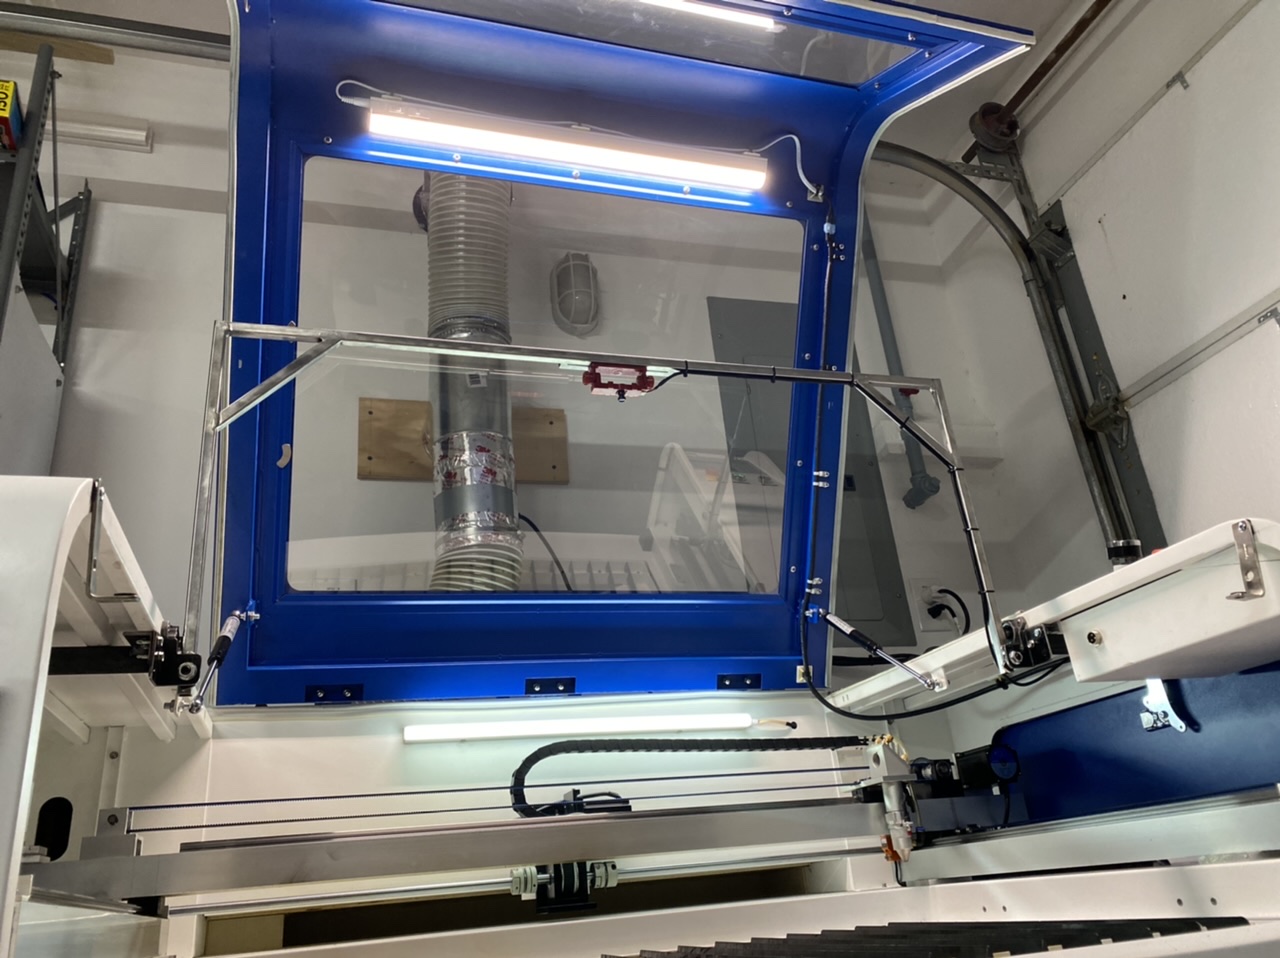
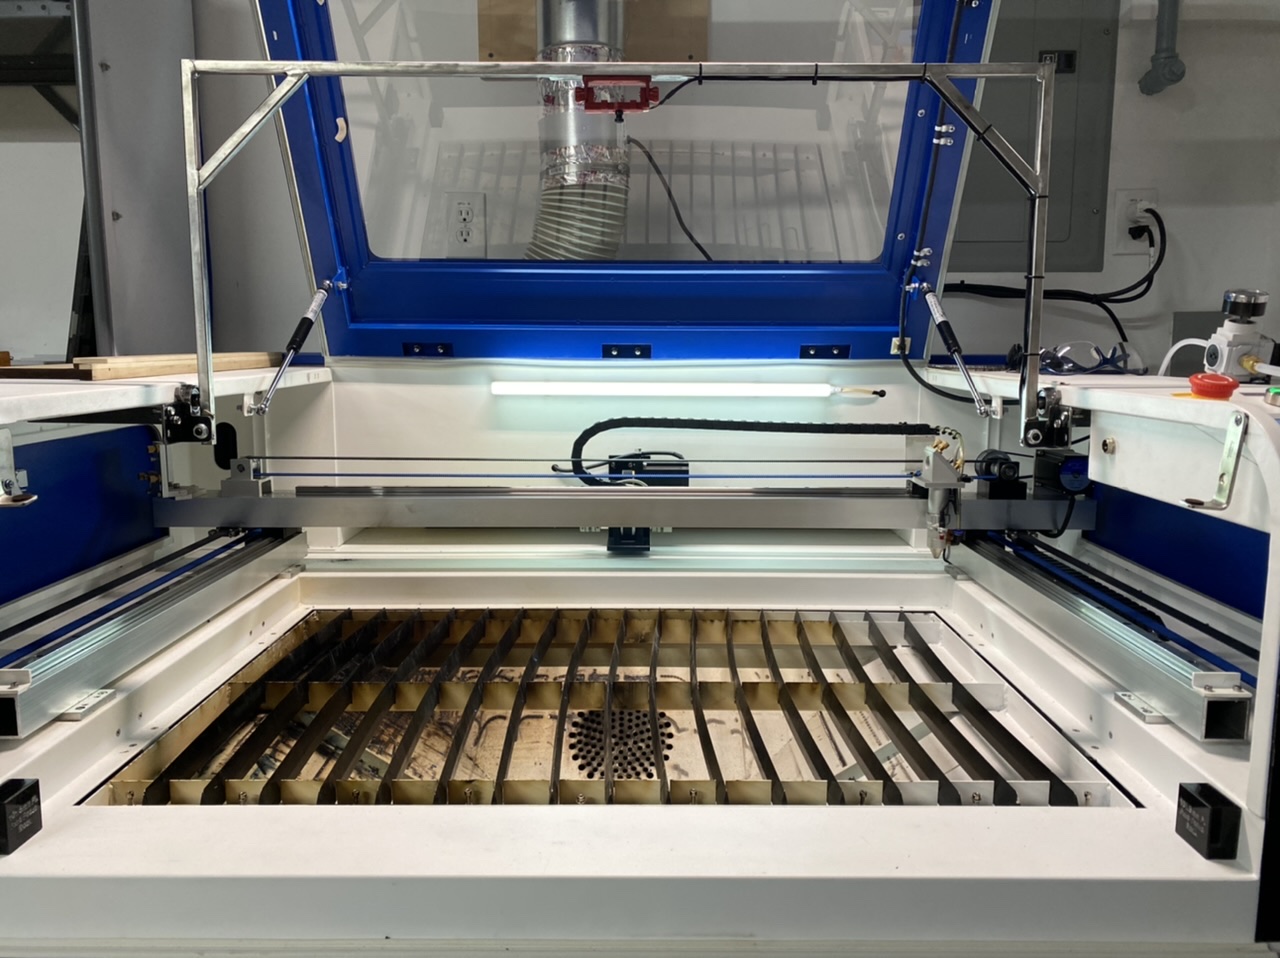
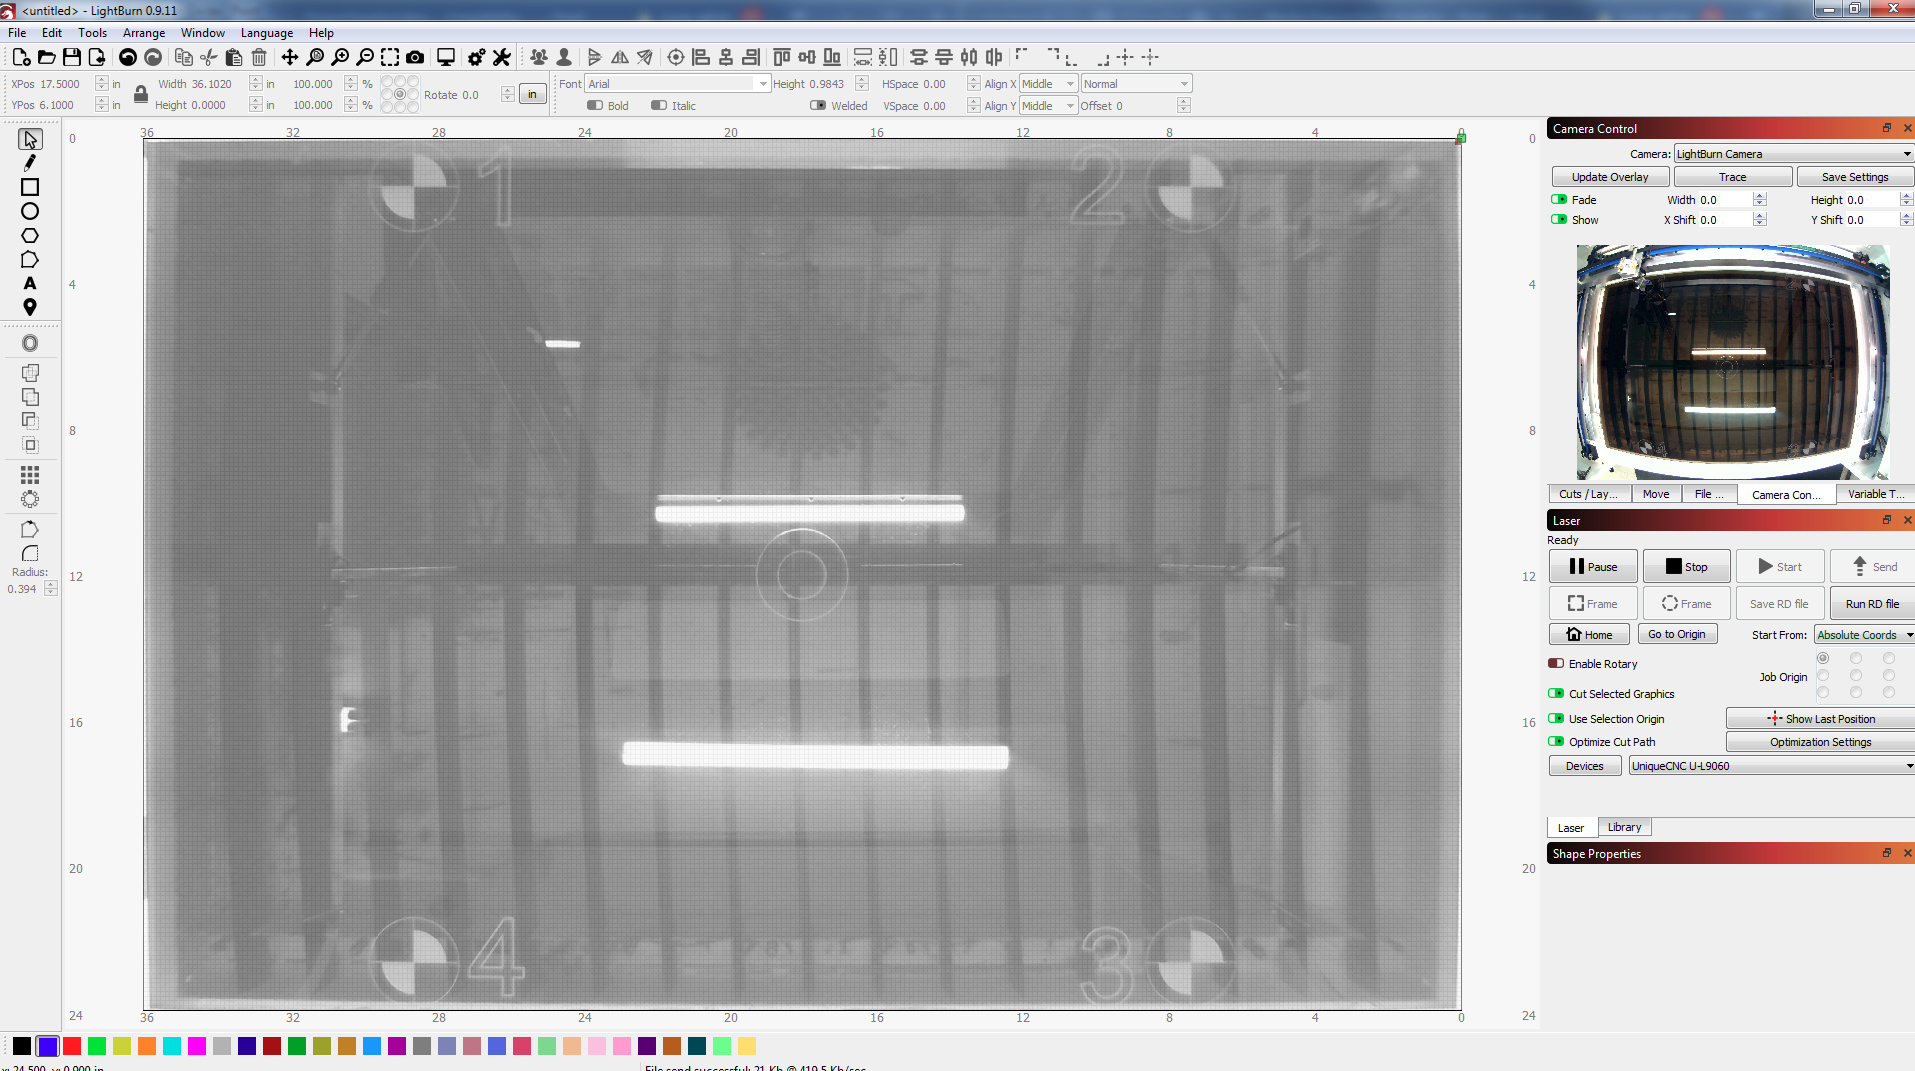
This works, and it works amazingly well! I also added an additional 24” LED strip to my lid for extra lighting and that has been a significant improvement as far as clarity of the work area is concerned.
That’s funny because I have been finding myself doing a lot more peculiar projects lately.
Yeah, if there were some way to make and sell such a kit… I’d never do it. . The amount of detailed work is just too much and I’d get bored making them.
Fortunately, something like this will most likely be completely customized to a specific machine chassis. So I’ll never feel the guilt of my laziness.
Great idea, will look into building that for mine. The camera system works great for placement of cutting and utilizing material to its optimum. Right now I have come up with a shelf on top of the cabinet to get a closer snapshot when trying to trace something because the camera on the lid is to far away. Was thinking about building a bracket that was removable each time to place the camera closer but this idea would be better.
There’s really nothing here except the desire to help someone else who might have the time and skill to leverage what I’ve presented as inspiration for their own endeavor.
I do however have some ocean front property in Arizona, and from my front porch…
But did I mention how well it works? Mainly I’m just impressed with the camera functionality. I’ve thought for a long time “camera shmanra…, who needs that”, but I’m converted to say wow it is a really amazing addition to the arsenal.
Sharp eye! The binding on those bars is an innovative and simple design with great result that locks them in place. Also, the level adjustment on my bed is simple and all part of that system that binds the bars.
Same here.
Many(!) years ago I took my Hasselblad 6x6 and went flying in a F4 fighter jet and could not lift it during 6.5g maneuver. good thing we had enough fuel for few more tries.
Human arm weigh ~ 5.5Kg
Hasselblad 6x6 with lenses and accessories ~ 2Kg
(5.5 + 5.5) x 2 + 2 = 13Kg
6.5g x 13Kg = 84Kg pull up force needed to lift camera and take the shot - actually many still shots with a manual cranking mechanism.
Ah, yes - And to make things worse i also had in addition two 35mm reflex cameras hanging down from my neck.
Not so easy
Where were these tiny video cameras that can shoot 4K/60f for hours on a tiny flash memory like a gopro back then?
Sorry Sas, Old military stuff, you know.
Just imagine F4 pulling 6.5g going vertical through a thick blanket of clouds to a clear blue sky.
Let me tell you this - I would have enjoyed it if i had a 70 grams 4K gopro camera mounted on the canopy using a vacuum suction arm.
This a very innovative way of installing the camera to the laser machine. I am having a hard time installing mine since the area I live in has a limited resources (especially the electronics).
I am planning to apply this kind of fixture toe my laser as well.
Questions:
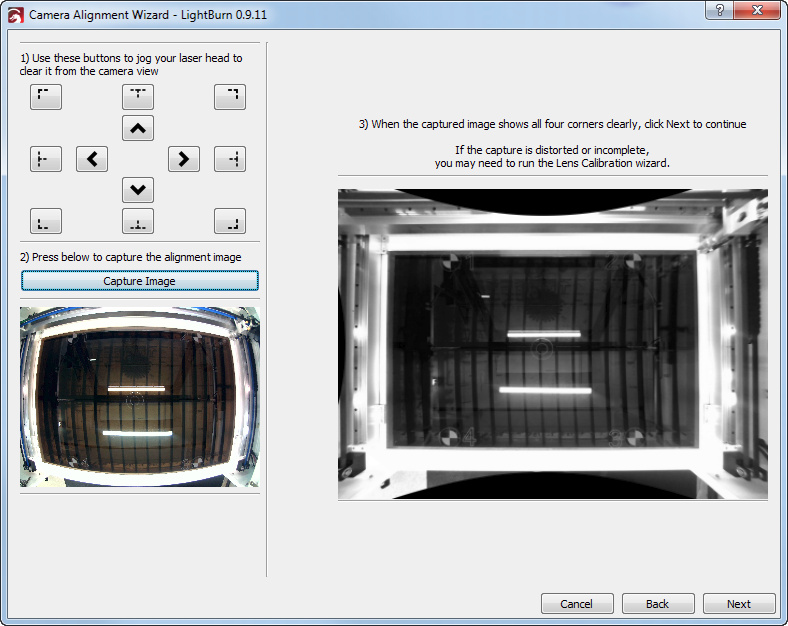
Do you calibrate your camera every time you fold and unfold the camera holder?
No need to calibrate the camera each time because the fixed position of the camera is always the same. That was the driving purpose of this design.
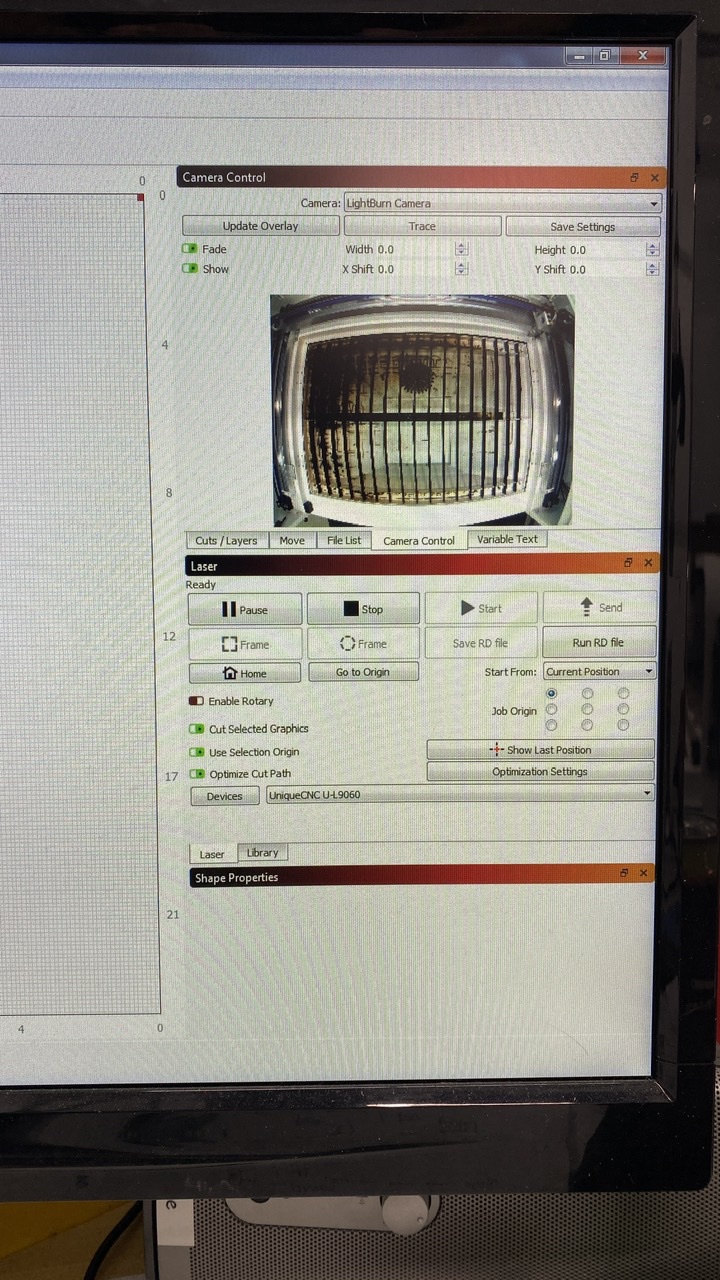
My work area is 917mm x 607mm
It an 8MP 120 degree 4:3 aspect ratio
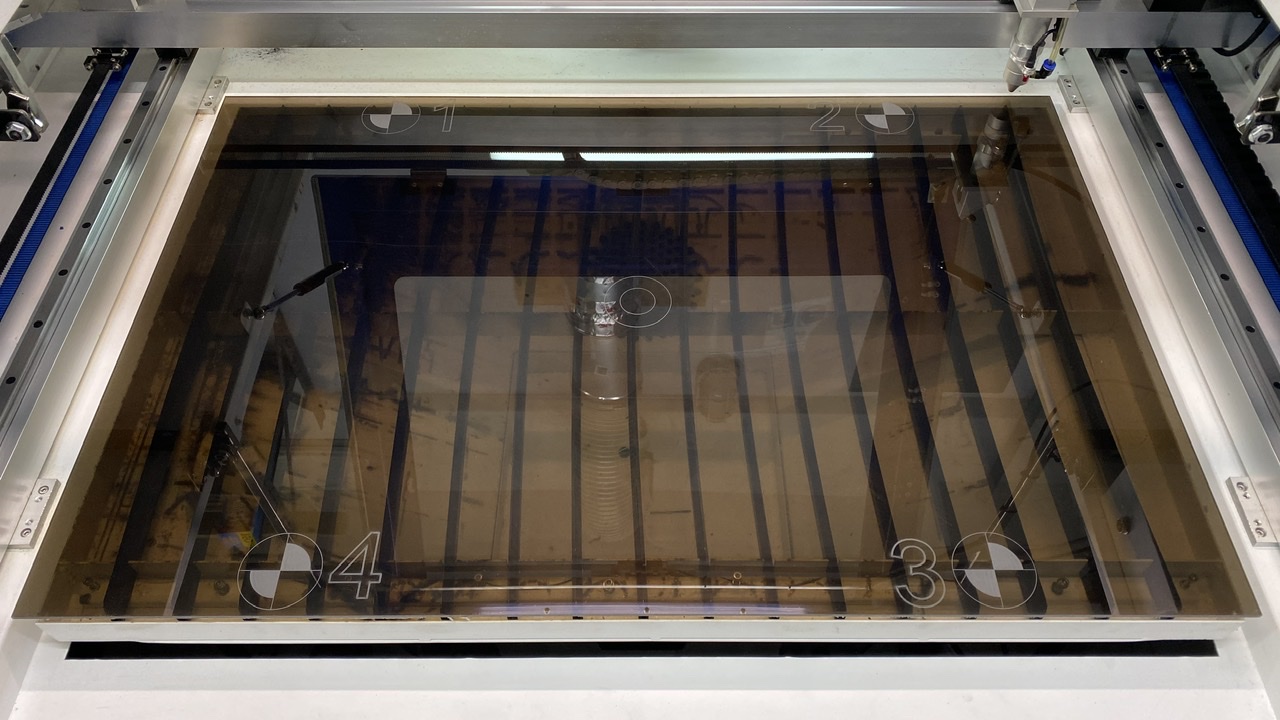
But there is an update to this installation:
After all of the time and effort spent making this bracket to provide reliable consistency in the calibration, today I discovered something was slightly off (by about 2mm)…
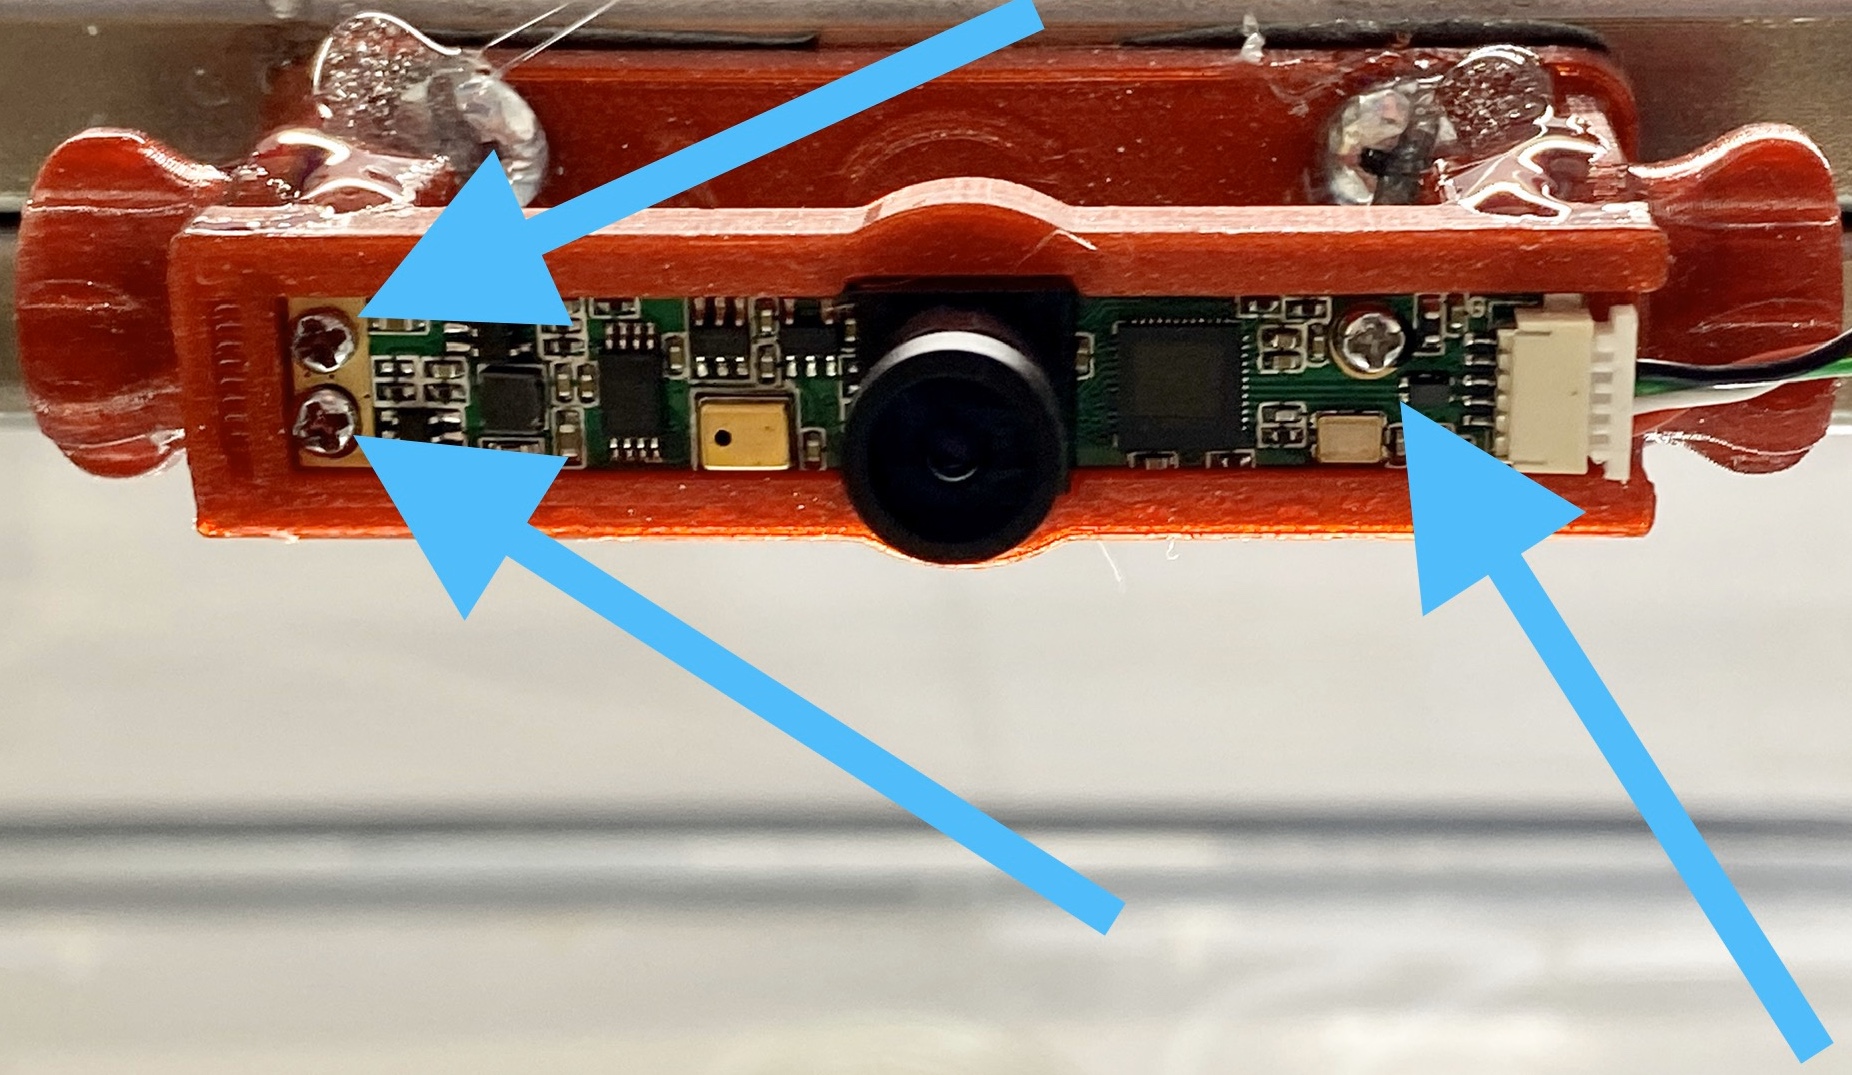
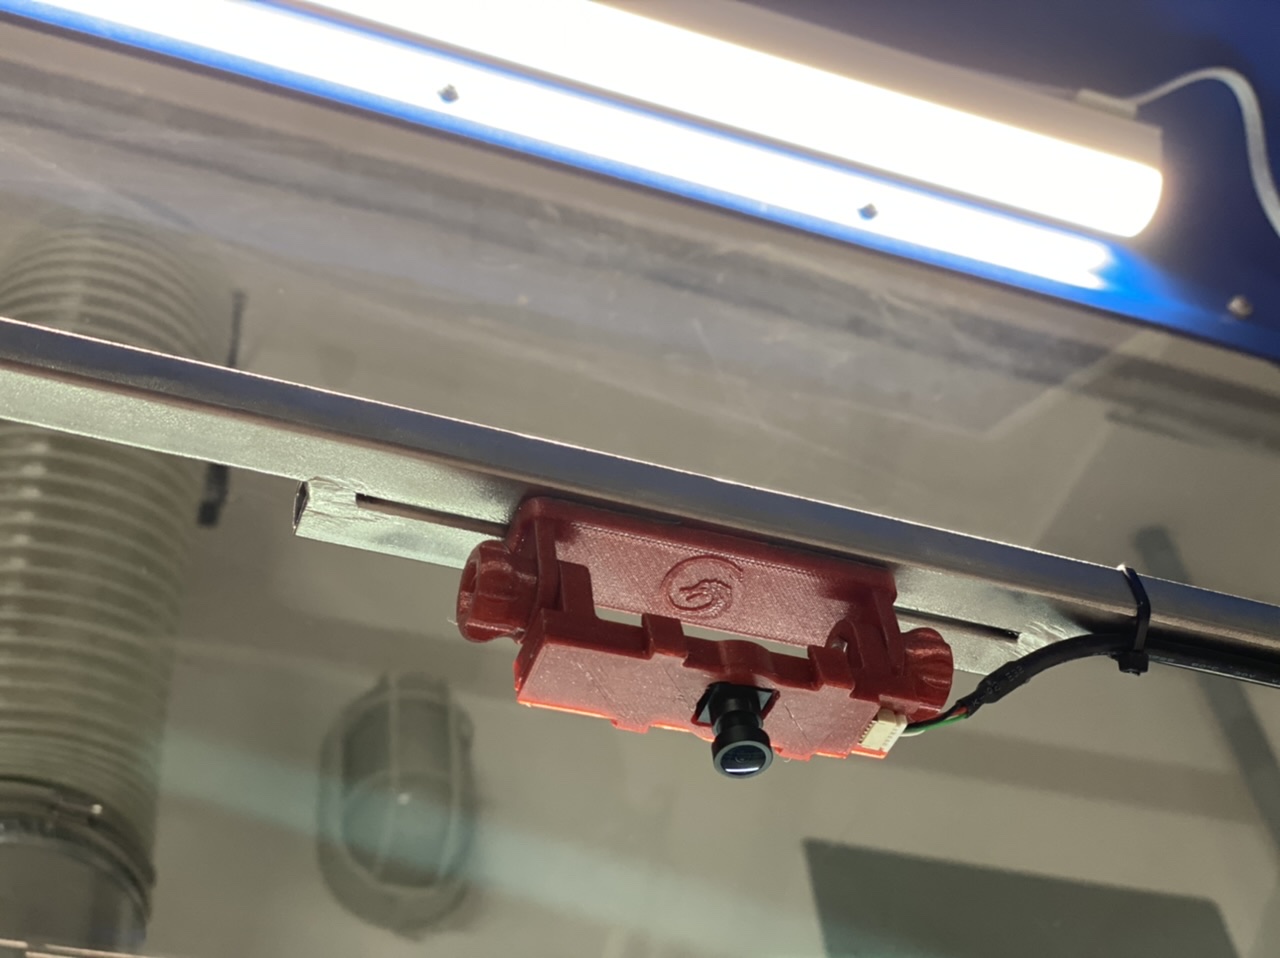
It was the 3D printed mount of all things that creates variability in the accuracy due to a couple of things:
the circuit board needed to be secured to the mount. I did this with some VHB and some very small screws designed for this purpose:
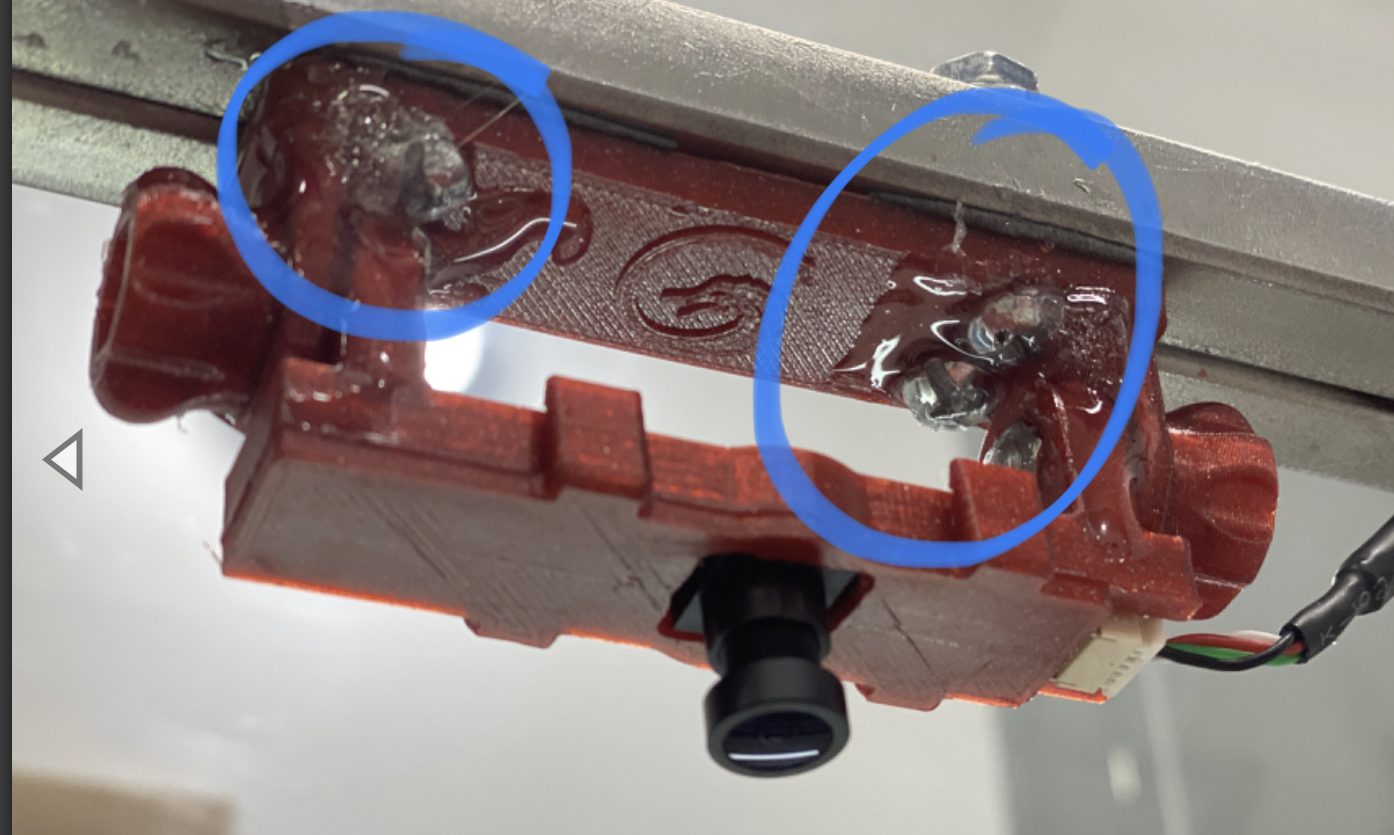
the VHB that holds the camera mount apparatus (that came with the mount) has the slightest amount of cushion that allowed for the tiniest bit of movement. I corrected this by bolting the mount to the bracket:
I ended up cracking the mount due to the honeycomb internal construction which I ended up repairing and filling with epoxy. Then I just ended up going bonkers with the epoxy and secured everything, so now nothing will ever move!
 .
.


 . The amount of detailed work is just too much and I’d get bored making them.
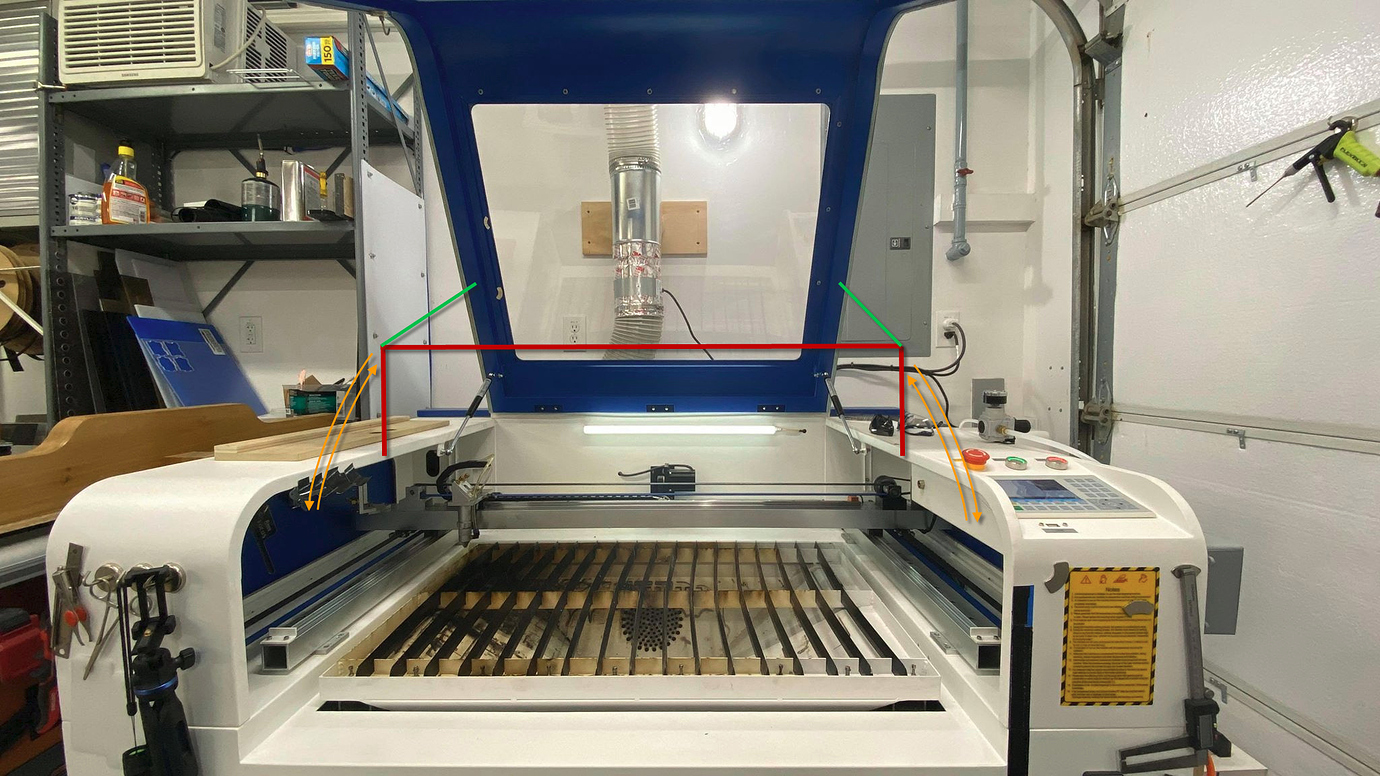


 eye lens adjustment is not working. Ha… that’s funny to me