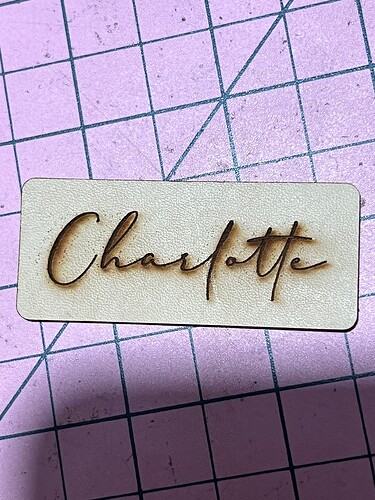
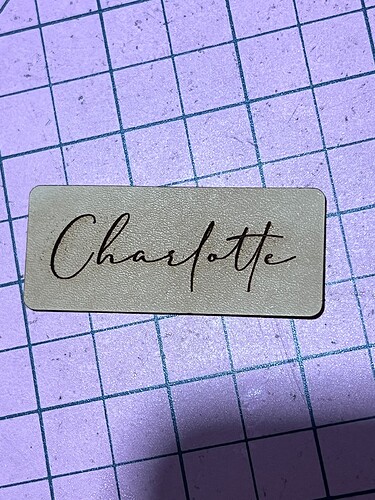
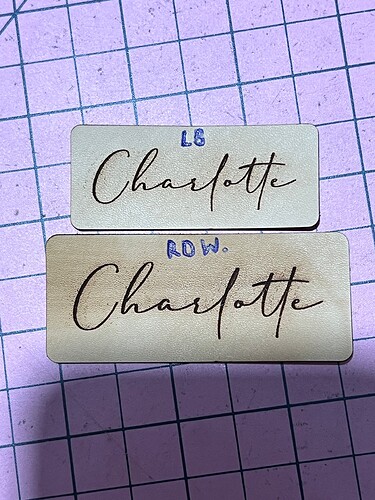
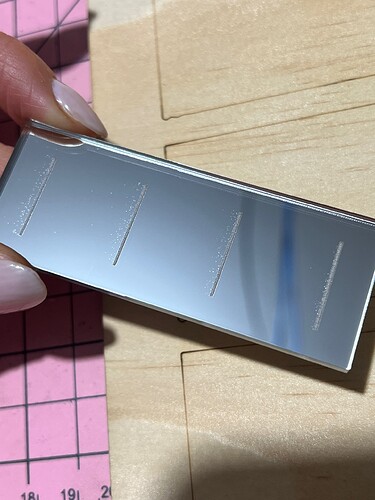
@NicholasL if you look at the image where she lowered the speed from 300mm/s to 150mm/s the scattered dots are closer to the text. So the dots are happening relative to the overshoot based on the speed.
@Kimberley. The material is mirror Acrylic? I have some similar material approx. 2.5mm thick. They are sample swatches of various tints that I got from koenig here in Melbourne.
I’ve never tested it. Although you did say it happened on leather as well, I wonder if it’s worthwhile me doing a test engrave on it just to see if it has something to do with the material backing itself?
@stixstudios thank you. I have tried on the following media:
Trotec mirror acrylic
Koenig acrylic
wholesale acrylic panels
Leather.
All the same unfortunately! ![]()
@stixstudios she also says that it does not do this on other machines connected to the same computer using the same LightBurn app. Nor does it do it on the same machine when she uses RDWorks.
Well that rules out the mirror acrylic being part of the issue then.
@stixstudios yup ![]()
I just tried the leather via RD Works and same issue with the dots. Honestly… baffled.
Does this bodor machine need to be thrown away?? Haha
@DougL tried RD works with the leather… and I have dots ![]()
Is the cone at the end of the lens mount tube removable? Can you remove the cone without detaching the lens? If so, it might be worth giving that a go to rule out any internal reflections from the cone.
@stixstudios yup tried that. Same deal ![]()
Please turn off bidirectional fill and engrave the 3 narrow vertical rectangles again as you did for DougL but this time space them out a little more eg 20mm between them, I want to see if there will be a secondary line of dots offset to one side of each filled line.
I’ve been reading through the thread, and when I first got my CO2 with Ruida controller, I had the same issue. The tech swapped the power supply twice, and the third one worked without the extra dots. He blamed a faulty batch of power supplies from the manufacturer. At the time we had a 40W, and the final power supply that worked without the added noise was for a 60W.
Just my .02…
Joe
@cyberslug thanks for your input! Did you have dots from the beginning? I’ve had this bodor for 2 years and it’s only just started doing it ![]()
@NicholasL thank you. I’ll try that tomorrow ![]()
Just when he brought / installed it. He worked for 3 or 4 hours testing / installing before he got it fixed. After that no more dots ![]()
@kimmicks07 don’t all the interior dots go away when you set the scan mode to “Fill all shapes at once” or does it continue to speckle the interior area between the letters?
The other thought I had was to recheck all the wires and especially the grounds. When you replaced the power supply you probably just unplugged the connector. Instead, do these steps:
- Unplugging-pluggin all connectors
- Loosening and retighten all screw connections
- Gently pull on terminations to see if anything is loose.
- Ensure that frame grounds have continuity to the frame.
@NicholasL here are the results to your test. Dots just on the left
Just wanted to chime in.
This post got me tinkering with my machine again since it is the same exact problem. last night I put ferrite beads on power and signal cables including the the ones coming from the X motor as well as the high voltage line to the tube. I was hoping that it was perhaps some noise. That made no difference whatsoever. I already have a filter socket installed on the power line and I’ve tried running a filter cap between the controller and the PSU on the “laser on” wire. Triple checked the ground continuity between every part of bare metal in the machine.
This is definitely not noise, it has to be either the PSU, or the tube.
By the way @NicholasL did the same test and got dots on the left side as well.
@Bklynghost what’s your machine setup( make/model wattage, controller ) and does it use the 24V and 5V from the laser power supply or does it have a separate 24V for the motors?
@kimmicks07 you didn’t mention it but did the manufacturer technician have you run a test file from the controller memory keeping your computer/USB disconnected from the machine?
@Bklynghost besides making sure metal cases are grounded to the chassis you also need to verify your chassis is grounded and your electrical outlet is properly grounded. Most critical in this setup though is that the controller(Ruida) and controlee(LPS) has very good signal ground between them and ideally not via a 3rd connection. ie Ruida ground and LPS ground(near 5V ) should be directly connected.


