I tried it with Ethanol and other types of alcohol and it evaporates too quickly here in the desert.
I then went to a water mix and was applying it via an air brush. Sound similar to what you are doing.
I keep trying variations, but it’s seems very power sensitive. Trying to get the fiber to work as well with the TiO2 as the other lasers.
@JerseyBigMike I see where you’re going. I use air pressure for clean lenses and to remove the bad air… if I cover up where I’m burning, it won’t help me get the debris out of the area…
Well my diode laser has a fan on top that pushes air down adn cools the laser and exits around the nozzle for the air assist so there is downward air flow even with air assist off and it was one of the main obstacles I saw trying the powder coat with the laser diode I use.
I was using the powder coat attempt to get consistent and multi colors – these days I do an epoxy fill, been very happy with those results esp on cutting boards that I’ve done.
How deep is your burn on wood for the epoxy fill to adhere? My diode laser would be hard pressed to make deep cuts into anything harder than pine.
Do you sand the pieces to flatten and remove the excess epoxy that spills over?
So far I’ve been filling Bamboo Cutting boards and I would say it was less than 1/4" deep.
Yes, you have to sand the piece afterwards.
I have a Sculpfun S30Pro max 20W optical power but even the 5W I had before would burn deep enough into bamboo that this technque works.
We are getting sidetracked here. If people want to continue this discussion about epoxy fills, let me know and we can start its own thread instead of hijacking this one.
IMHO, I vote for the thread to be split to one expressly focused on the epoxy fill that you use… I’ll follow along… never know when it or something similar will be needed.
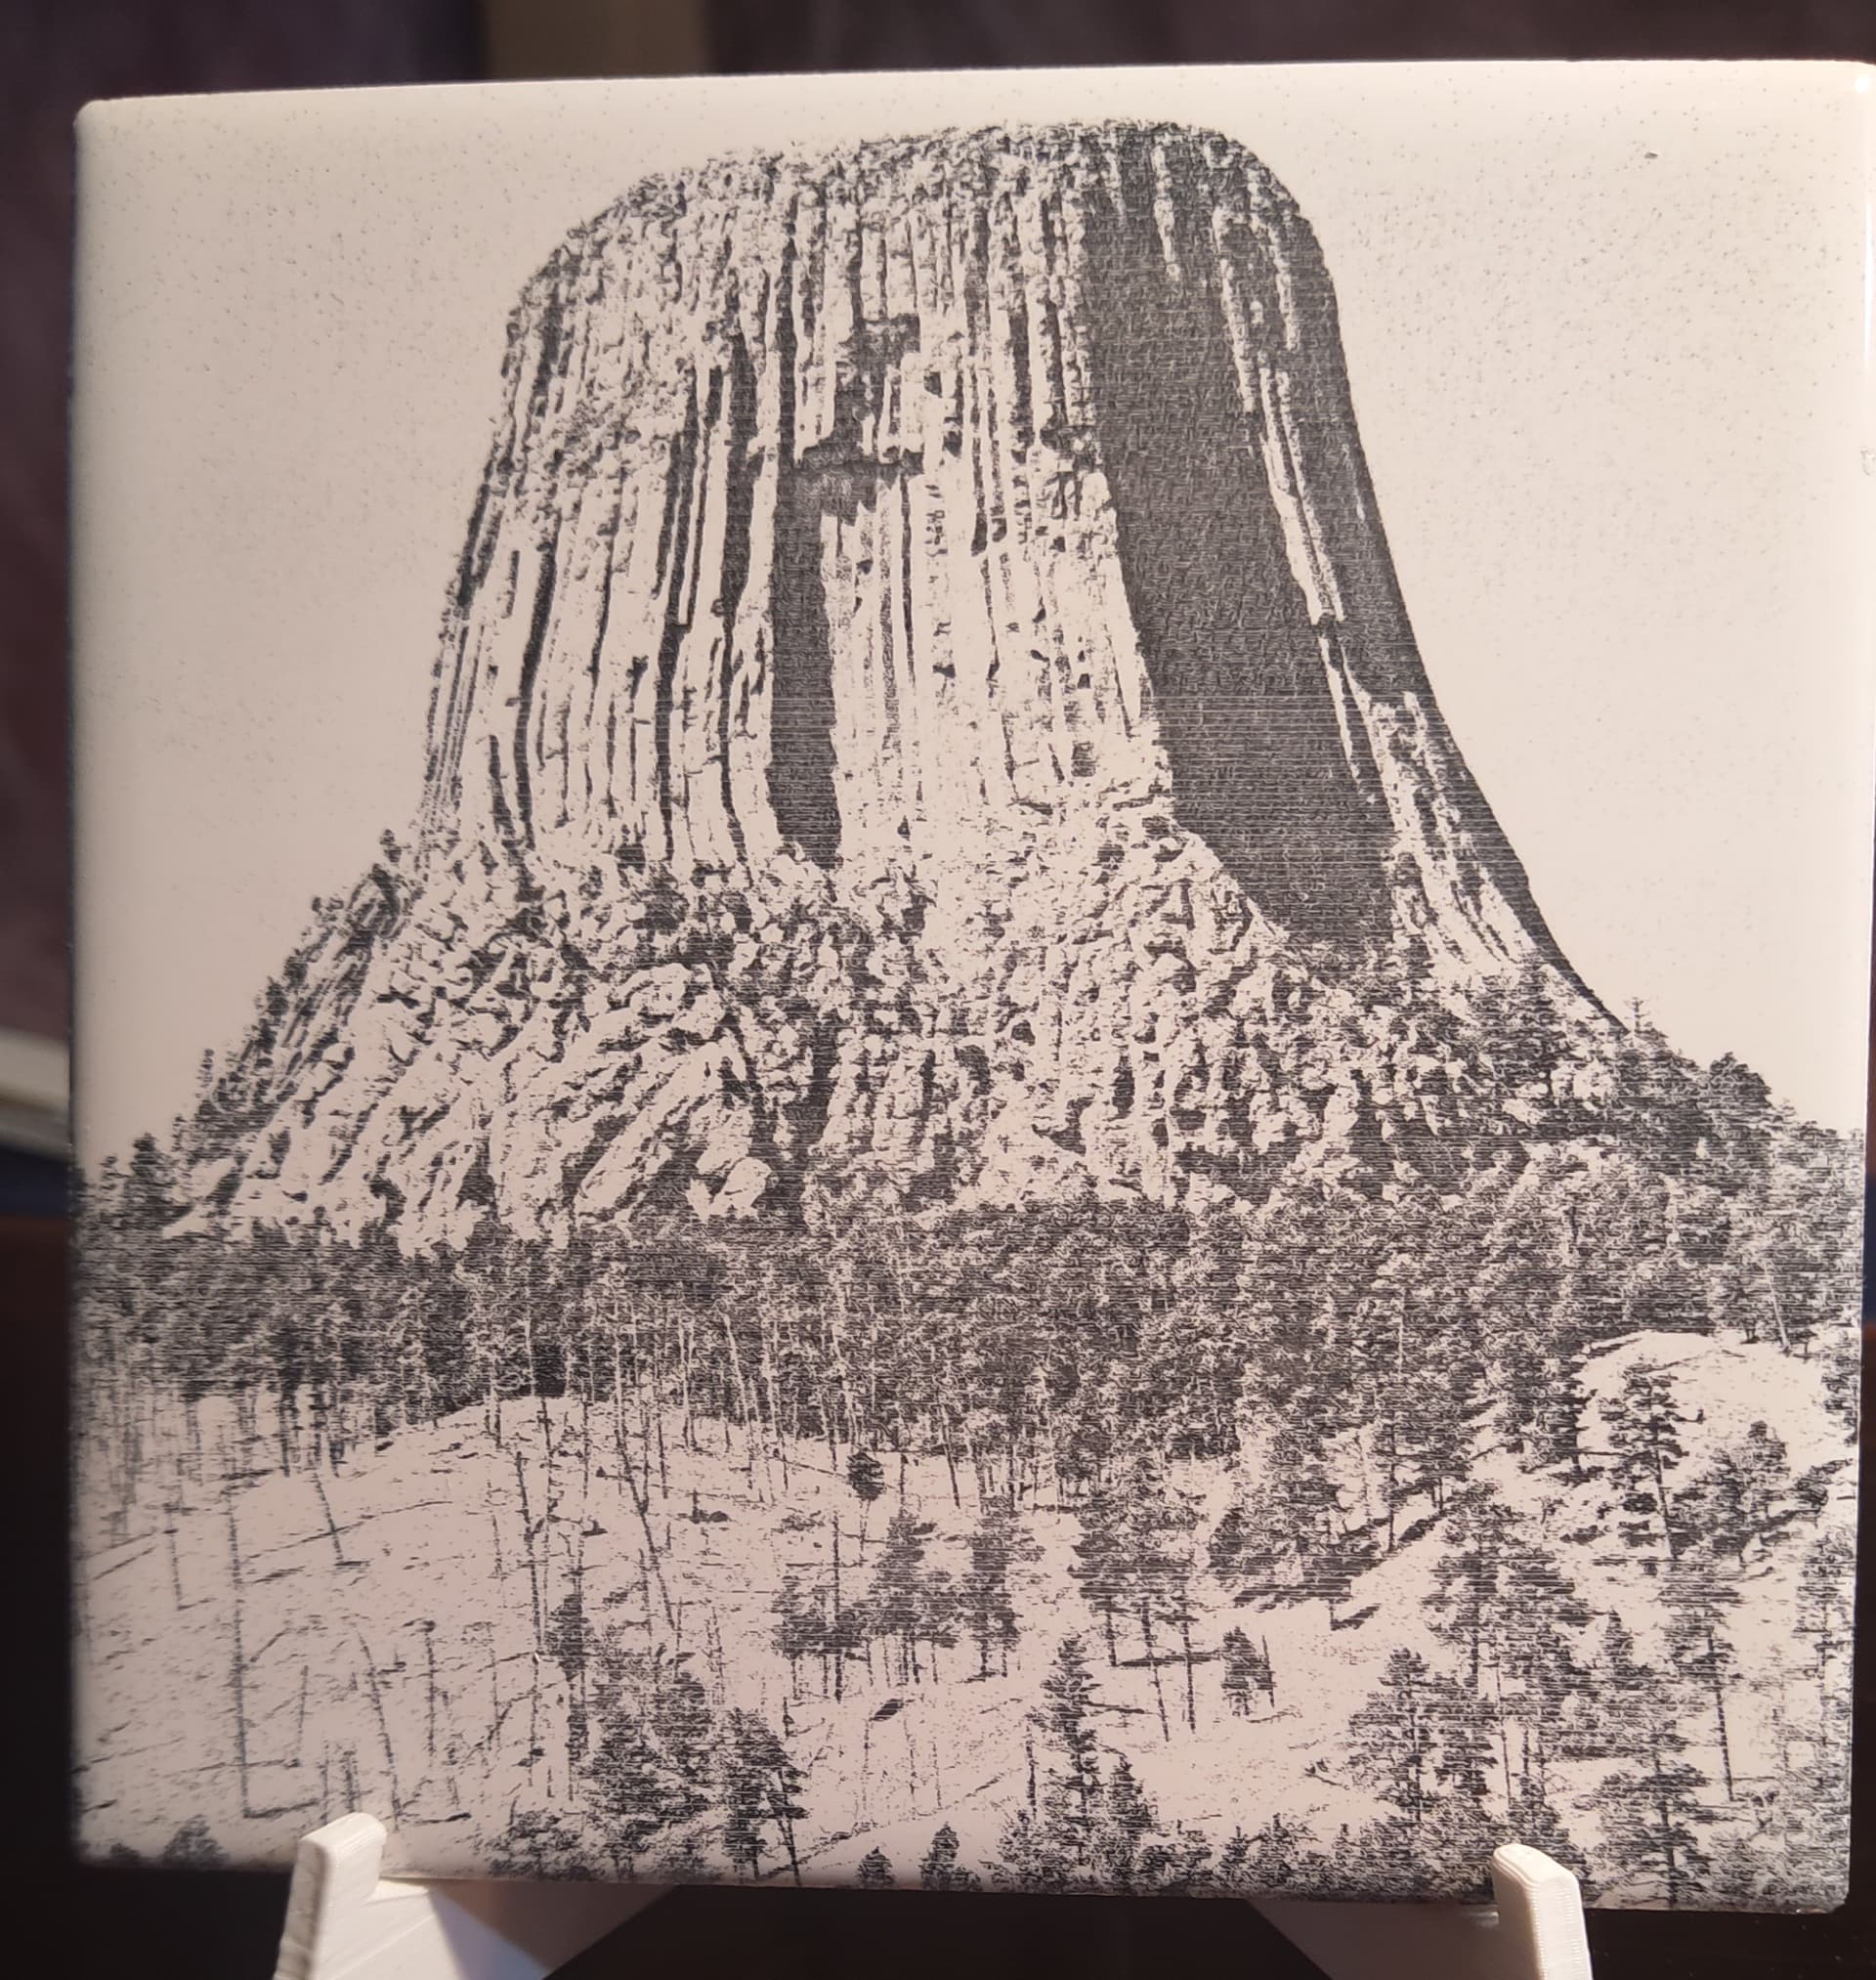
Well, got my new tiles on Sunday and got to work.
I have not had any problems with vector or text files and wanted to work on images.
I have also updated the mix the first post about it.
Trashed a lot of tiles, however, I think I am getting there.
Image files take a lot or tweaking to get right, and to be honest, I do not think I have it 100% yet.
The camera exaggerates the banding a lot, it looks a lot better in real life.
I did this tile at 2500 mm/m at 40% on a 10 w diode.
That seems very fast. Is that 10w output? I etch at 1200mm/m 80% power. My laser is a 20w machine upgraded to 40w by Atomstack. I don’t know what the laser head puts out. I guess it is much less than 10w.
Pour 100ml of white acrylic craft paint, (cheap at any dollar store or walmart) into a container after mixing very well. Non toxic and cleans up very easy with water Then in another container put in 25ml water Now mix in 2 1/4 teaspoons (us) titanium dioxide and mix very well. While stirring the paint, slowly add the water and TI02 mix. after that I used a 3D printed mini paint mixer from thingiverse to mix very well. I use a 1.5 inch foam brush and it flows out and smooths the thicker areas.
Looks great… Are you making batches that are larger than you are posting, like 125ml? I’m still waiting on the acrylic paint… live in a small town … not available locally… not driving 200 miles for it…
Thanks for updating the formula… this would be helpful for the rest of us…
Stick a link in here to the post # with the changes… If you look at the url, it’s the last digits, so you could post the url and add a /4 at the end… Or go to that post and copy the url directly… there is no confusion about which post you are referring.
There are already 50 posts and it will grow… just makes it easier to find the right post… One of these is over 220 posts, so finding a single thread isn’t easy… this takes you right to it.
When painting the tile I load up the brush pretty good to the point I have to keep turning it to keep the paint from running off.
Then use the diagram to paint and I do not have to get any more paint on the brush. It don’t take much.
I try to let it flow and dry by it’s self, but am working on a tile drier that will dry the paint from the tile up. Detail’s on that coming soon.
Do you use a pre-wet (water) sponge brush or just dip and go?
I have a heat gun and use it to quickly dry these tiles… You can see where it’s thicker, as it takes longer to dry with the food coloring, it really changes color as it’s drying.
I’m also doing some of these with the fiber… it’s inside where it’s warm, next to the pc…
I have done both ways, and there doesn’t seem to be much difference. It is pretty thin to begin with and probably why there is no difference.
If you find it is not flowing out flat after 15 min or so, thin it out a bit more with water.
I always let it flow out before I speed up the drying.
I’m very pleased to see your new mix has been so successful. I’m really looking forward to trying it, but as I made a bulk batch of my PVA it will be some time before I get to ordering any more titanium. I will be following this thread with great interest. Meanwhile I’ll just have to use second best.
Mike I believe you are probably streets ahead of me now with this process. I am losing track of what has been tried and what has been suggested. Somewhere in the back of my mine is the use of a microwave to dry tiles. Where that came from or who suggested it I can’t remember. Maybe that would help speed up the process. I presently have about 20+ tiles painted with PVA and stored with paper tissues between them ready to laser, so am now thinking of the final stages of finishing off the edges of the tiles that have a raw face showing. One of my projects that has been on hold due to the cold weather and my health, is gnawing at me to get finished. It’s a picture I split into six parts and now lasered will be the base of a wooden tea tray. All apart from a final coat of paint and gluing the tiles in place is done. Just need some nice warm weather to let me get out to my workshop. What is the final destination of your lasered tiles. How do you finish them regards the edges and the underneath? My wife uses a lot of mine to stand pot plants on.