Hey all. So I have a 15w universal engraver and trying to do photos. I’ve had minimal success but all one shade. I’ve seen some spectacular results on this forum and there must be waaaaayyyyy more to it than I imagined. Obviously you are using multiple layers for different shades and lines but that would take hours and hours.
Not sure where you’ve gotten this idea, but it’s not correct. If you import a picture and don’t change anything but power and speed, you should get a usable image, if your laser is properly configured.
You’ve provided no examples of what image you’re trying to burn, what settings you’ve used, what the outcome looked like, or how your laser is set up, so I can’t make any specific recommendations.
You are not a pain. We want to offer you help, we need information to do so. Our response is intended to inform folks that one needs to provide a modicum of technical information about the environment and setup they are working with for us to offer any answers of value.
Apologies if that was too blunt, but I was suggesting that if you gave a bit more info that I could provide more help in return. And the suggestion to import a picture and just change power and speed was a real one - If you do that, the system defaults should give you something usable if everything is configured well. It won’t be perfect, but it’ll be a starting point.
If you show a picture of what you got, and the settings you used, we can likely point you at suggestions for how to improve the result.
ok thanks, well as stated, it’s a 15w universal engraver running GRBL (diode)
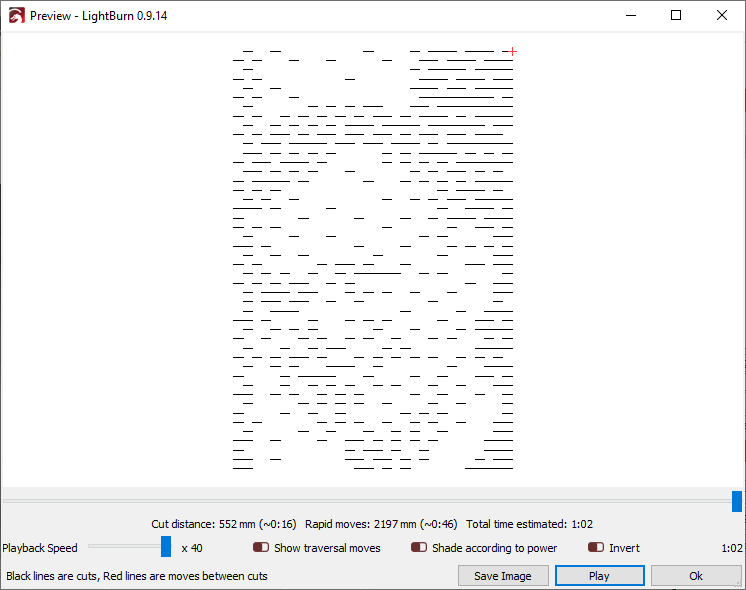
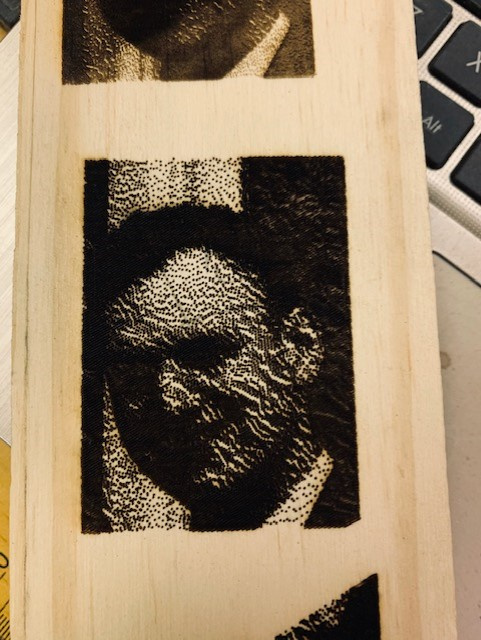
I’m totally new (although very familiar with cnc router). Here is the pic i’m starting with. All I get in lightburn is a series of dashes. Hopefully the picture uploads.
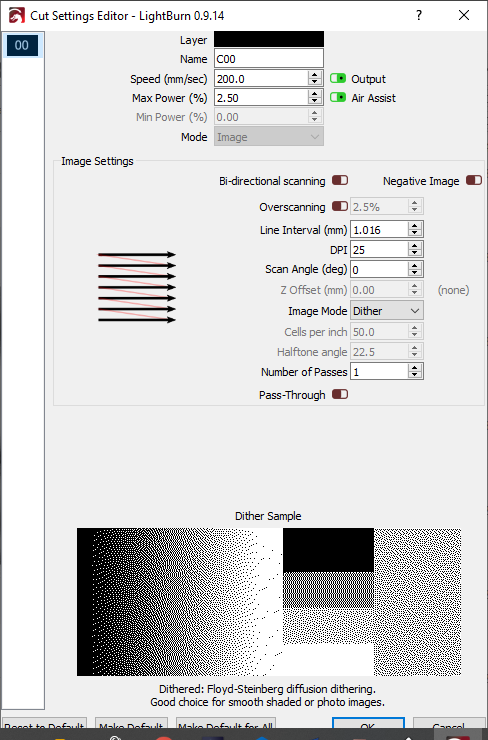
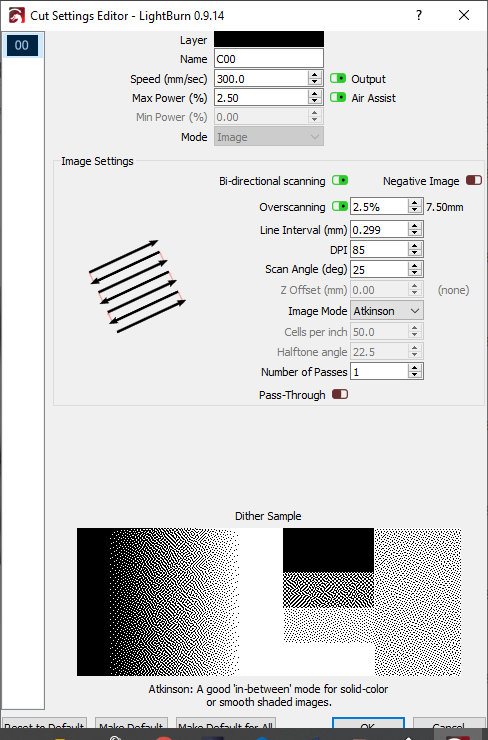
150 mm/sec, 12.5% power is a start - what was the ‘Interval’ value set to? If you double-click the image entry in the Cuts/Layers window, you can see other settings, like the dithering mode, DPI, etc.
You’ll need to use way more than 12% power. If it’s GRBL running on an 8-bit controller, you’ll likely need to go quite a bit slower too - 8-bit GRBL will not run dithered images at that speed because it simply can’t process gcode fast enough. If you have a 32 bit board like a Mini Gerbil, Cohesion 3D, or Ortur, that speed would be ok.
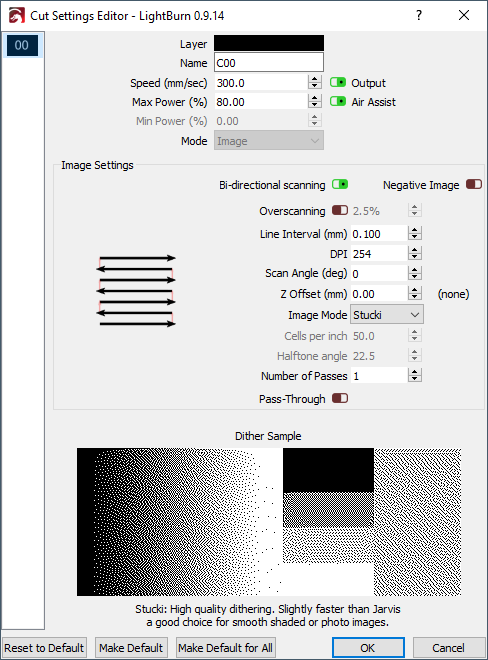
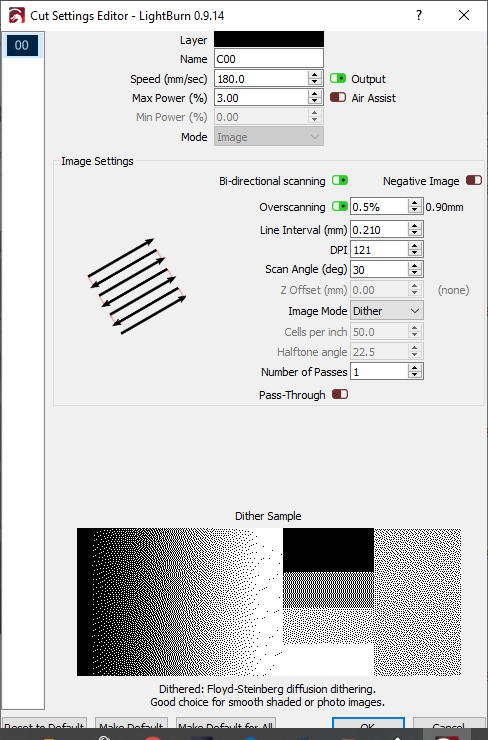
Here are the settings I see when I double-click the layer entry, with everything but the speed & power set to defaults:
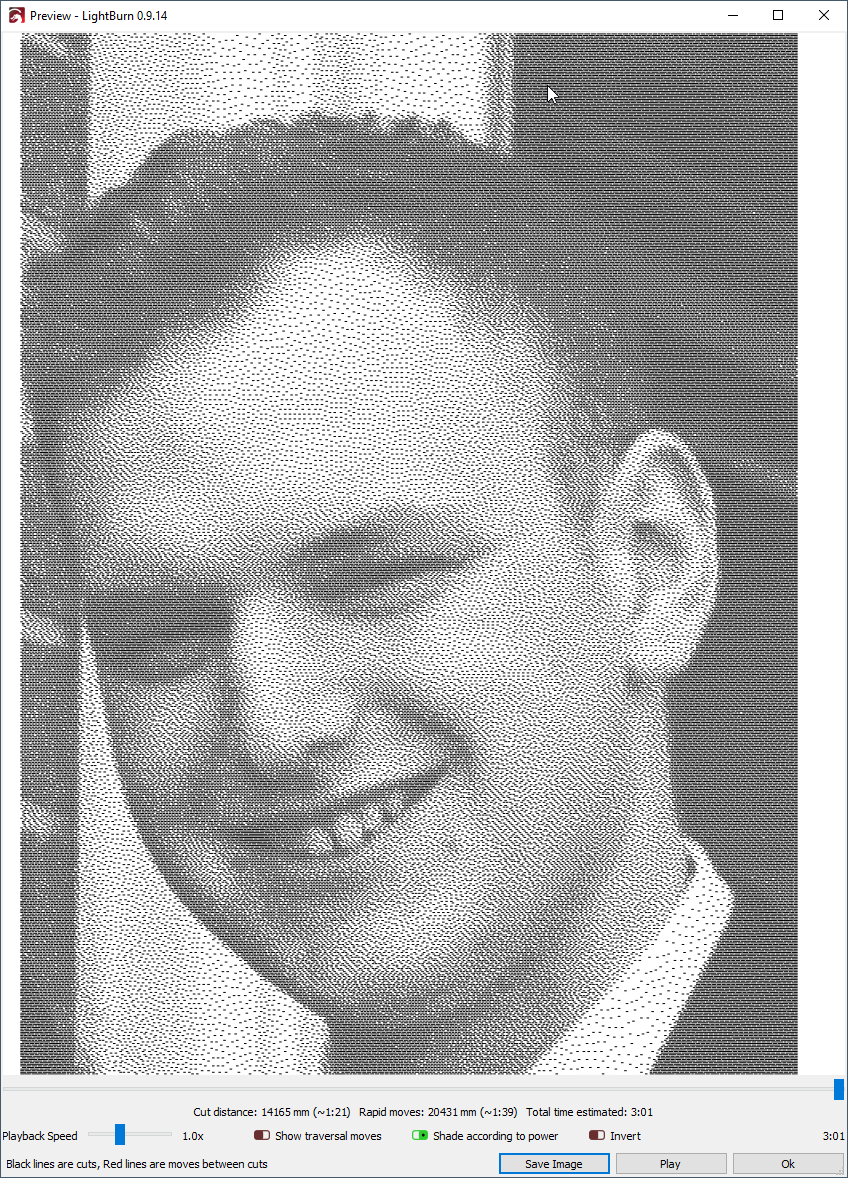
It’s worth noting that the preview is showing what path the laser is going to take as the job progresses, but it’s not a true representation of what the final result will be - it’s to spot check that the path looks right, but to see the final product you have to actually run it.
If you look at the ‘Interval’ section of your posted image, you will see that it is set very low producing large gaps between each line generated. Bump that number up to match that of Oz’s suggestion.
LightBurn will produce photos of that level of quality, but it doesn’t do it automatically. There’s a bit of info here to get you started: Image engraving guidelines
That thread links to a discussion where some other examples are given. Your DPI setting above (85) is still very low for a diode laser, but experiment - you’ll find settings that work.
There is something brutally mis-configured with your machine if you’re getting that result at 3% power on a diode laser going 180mm/sec.
In the console window, type $$ and press enter, then copy & paste the text it emits back here so we can have a look. You should be running about 50mm/sec, 80% power, 250 to 300 DPI, with about 2.5% overscan.