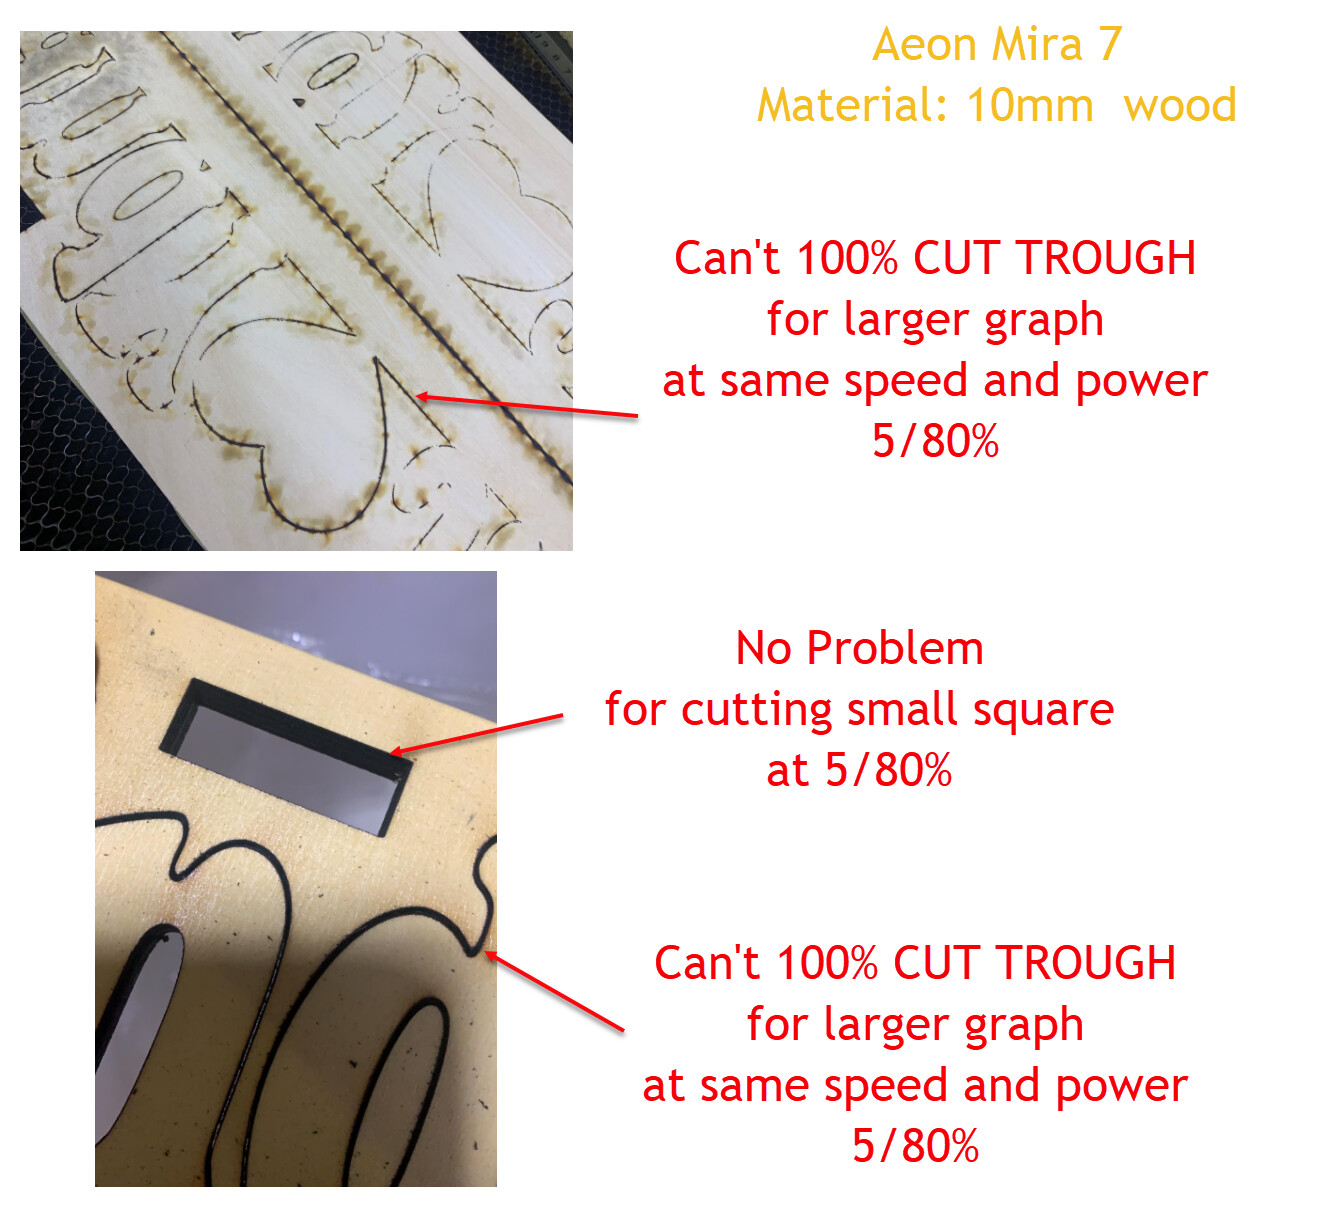
I am using an Aeon Mira 7 with 90w laser tube, I use the same power and speed for cutting 2 objects, but only the small objects (the square in the photo) can completely cut through while the bigger object is just partially cut through. I would like to seek some advises, whether I have some wrong setting or what are the potential reasons causing this issue.
I want to do 1 pass instead of 2 passes because when I doing 2 passes the edge will be burnt. I am new to laser cut, do you suggest 2 passes is better than 1?
For my case, theoretically, if I can have a complete cut on the small square as shown on the photo, it should have the same result for bigger graph, any idea why it can’t have a complete cut.
Not sure absolutely, but it maybe that in the smaller sections the laser is unable to stay at full speed because of slowing down for the corners, but in the larger sections the speed can remain high because there are no sharp corners and the higher speed is preventing cut through?? The controller is supposed to adapt the speed to maintain even power, but you never know. If you make the speed lower for both small and large does it cut both shapes? Or you could prove this by making a large square and a small square to see if it the corners that are the problem…
Just a thought.
David is right, you may want to check this out in more detail by doing this. My machine has a very similar quirk, corners seem to get cut much harder on “line” mode than straight lines.
This is an issue with the speed and power setting you have chosen, and how Ruida deals with ramping power for direction changes.
Ruida has a ‘Start Speed’ or corner speed which is the point the tube will start to fire and ramp power to the max setting as it accelerates. Below that speed, the laser will use min power and if that is set low, you will not get a beam in the corners. If you want to go slow for cuts, set both min and max the same.
I recently provided another response to the same question here:
As for the marks you see on the back side, these are from flash backs, or when the beam penetrates the material and then bounces or is reflected off your honeycomb bed underneath, causing a quick flash or burn in that spot. You can observe this as the job runs, you will see the flash happening as the cut progresses. If you raise the material up off the bed, on pins or some such, you can reduce this effect significantly.