Originally had an issue with laser not turning on and was advised to activate M03/M05. In GRBL that tab not available switch to MARLIN tab is available but Machine won’t connect to computer checked the driver for the com port all ok. What do i need to do to get this software working with the computer
Still have an issue with laser not working Machine responds to commands but laser doesn’t operate
Have checked the M03/M05 box to activate
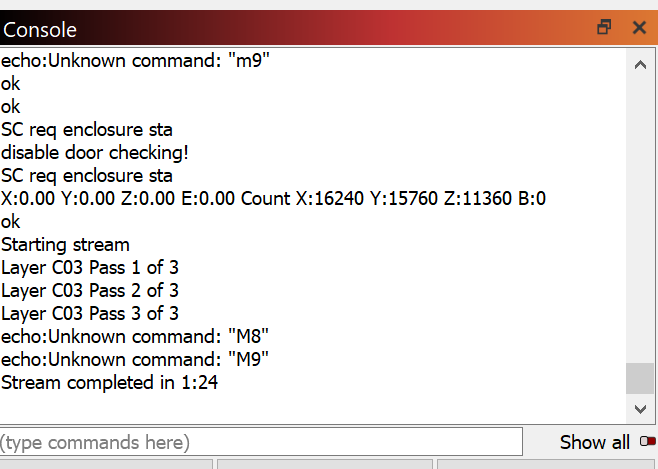
Comes back with error M8 M9. Tried to uncheck box in Device set-up but i wont let me. Is this the issue and if so how do I move forward?
It doesn’t seem to be erroring on the M8 and M9 errors.
Try enabling “Enable laser fire button” in Device Settings. From Move window push the Fire button. Increase Power of Fire button incrementally. Do you see a light?
Just now reading this from a Snapmaker site:
Command Explanation M3 P100 Laser on / Spindle on 100 is a variable ranging from 20 to 100. You can customize the value. M5 Laser off/ Spindle off
If the wording on the variable range is true I don’t think LightBurn is currently setup to handle the power levels correctly which may be why it’s not working. LightBurn uses “S” commands to set power level. This documentation indicates setting power with “P” commands and requires it in the range of 20-100.
If the manual Fire attempt didn’t work try running this command manually in Console:
M3 P20
Increment P value by 10s if you don’t immediately see a light. If on, turn off laser by issuing:
M5
If that works, try this:
- change the “S Value Max” setting in Device Settings to 100.
- save the g-code value for a project
- manually edit the g-code to replace all S commands with ‘P’
- run modified g-code in LightBurn
See if you can produce a run with that.
Thankyou very much that seems to have fixed it
Which part did you try?
Sorry for the delay in reply, had to go to work today.
The software you advised I downloaded. Running this highlighted an issue with the COM port. Windows said everything. Uninstalled the driver and re-booted the computer. Installed the driver I was sent a link for and everything fired up ok.
I ran it last night under lightburn and whatever setting I used the laser was working 100%.
tried the same file in Luban everything worked fine. Lightburn burnt everything to a crisp regardless what setting I used reducing power to 20% made no difference. I now need to find what code I need to enter so that the laser will adjust to the layer settings.
Workflow for connecting and operating LightBurn
LightBurn Settings
Device Settings
Width 230.00mm Height 250.00mm
Origin setting(Origin)
Lower left
Z axis control
Enable Z axis
Other Options
Enable Laser on when Framing button
Enable Laser on when Framing button
Enable Out of Boundary Warning
Return to End Position
Communication
Maximum S-value 255
Baud rate 115,200
Transfer mode buffer
LightBurn setting 2
Unit/grid
mm/min
Move setting tab
Move: absolute machine zero to move OFF
Laser setting tab
Start location: Absolute coordinates
Job origin: lower left
Cut/Layer
Support (mm) 26.0mm ← This height must be entered as Snapmaker’s default standard height!
If you forget and enter 0, it will crash with the table.
So ultimately sounds like it was primarily an issue with the driver. Which is interesting since you had some level of connectivity earlier.
It’s possible that the lower portion of my previous post addresses this. Looks to me like Snapmaker is expecting a ‘P’ power settings vs the standard ‘S’. If that’s the case then I don’t see LightBurn working directly as-is. You should confirm whether or not you can modulate power with the ‘P’ as I describe.
I followed your instruction With the exception of CUT/LAYER not sure where to find that command where is it located. I did have a crash into the table yesterday so it must be set a 0
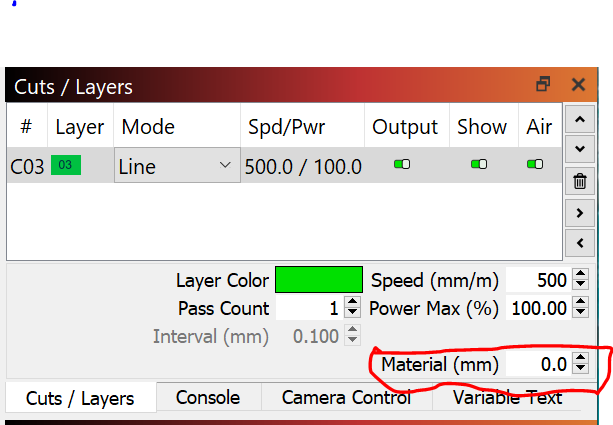
IIs it the box marked in red
Are you referring to @Blockmodule’s post? I don’t think I had anything referring to cut/layer.
The instructions I was referring to are these:
Try using M3 P20 in Console and variations of the P value to see if you can module power.
I can regulate power using the P command. but whatever I set wit P will be used in the program. If I set P100 and the LAYER at 20 the laser will run at 100. If I set P20 and Layer at 100 laser will run at 20. Also the fire command cannot be set above the P setting
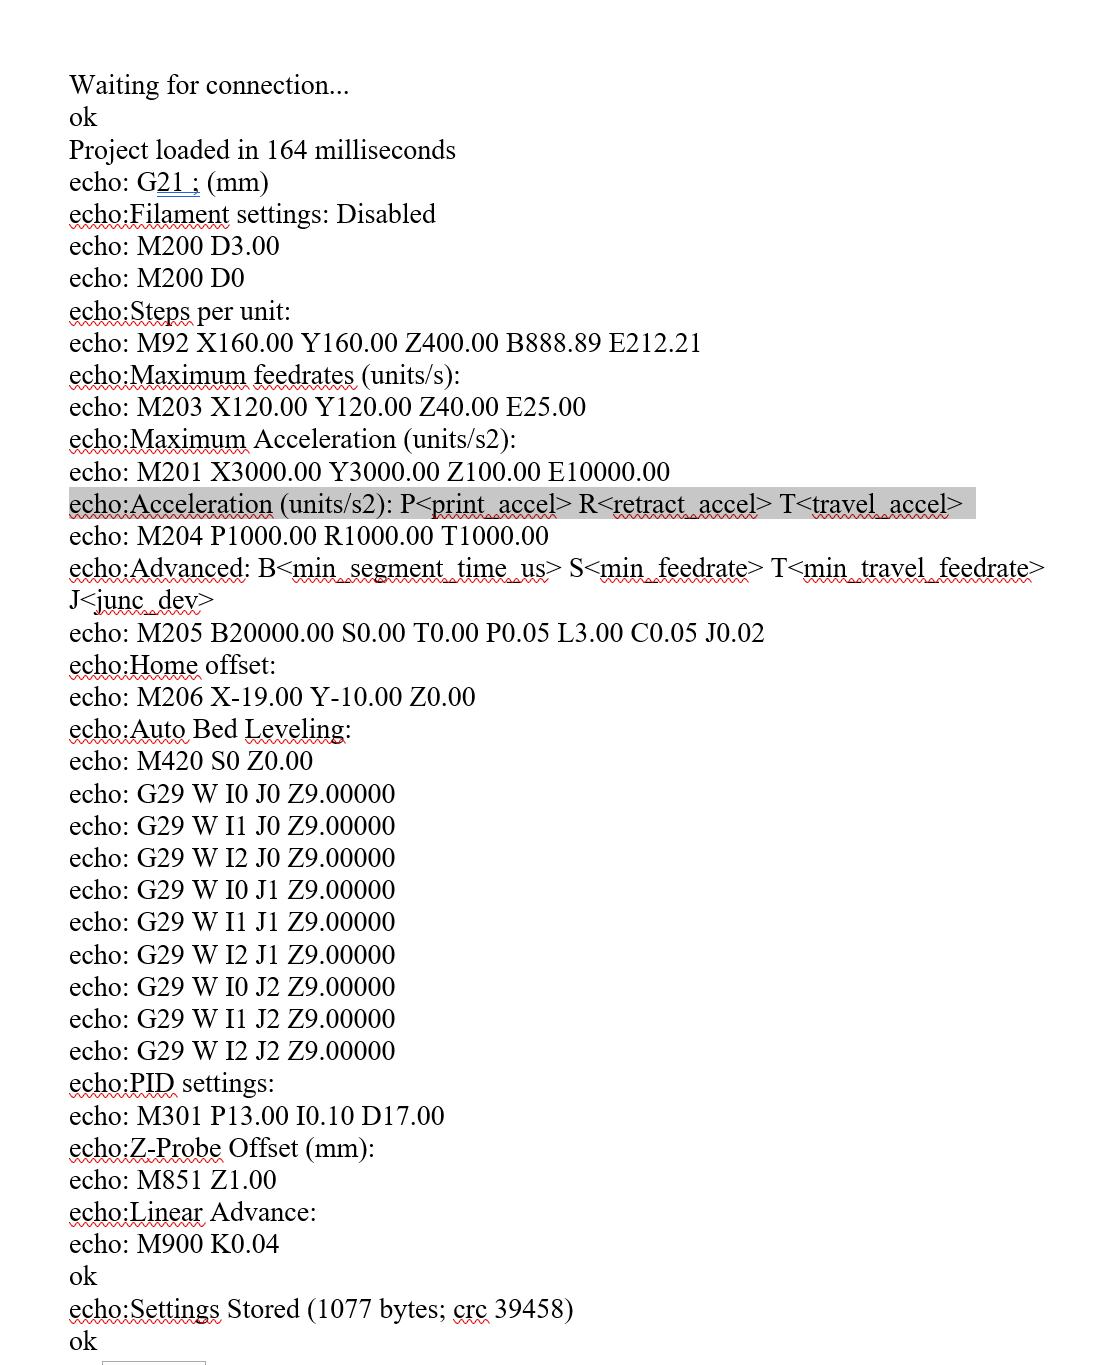
I have attached a copy of the code I am running. I followed the instructions but I can’t find the S commands that need changing Am I looking in the wrong place? I just seem to be going round in circles trying to solve what should be a simple task. I admit I have Zero working knowledge of code and I do appreciate your help it just seems so frustrating to fix what should be a simple problem
Nothing you do will make LightBurn work directly. The issue is that your laser is expecting the commands to be formatted in a way that LightBurn does not currently support as far as I’m aware.
So going back to my earlier post, did you change “S Value Max” in Device Settings to 100?
If not, start there.
Then try these steps:
- create a design of any type. Set your cut layer settings appropriately. Make sure you frame and setup the job as if you were ready to run the job.
- In Laser Window push the “Save Gcode” button. Save to a filename. I suggest saving to .txt for ease and potentially uploading to this forum.
- In an external text editor open the saved file.
- Edit all occurrences of S## to P## where ## is the power value. Don’t change the power value.
- After making the g-code changes push “Run Gcode” in Laser Window. Pick the edited file. This will run the laser immediately so make sure you are ready for this.
If you’re unsure of what to do with the g-code file once saved post the file here for review.
Working on it will come back with results
Well that seems to work I taught a circle centred in a square and laser operated as expected
CIRCLE IN A SQUARE.gc.txt (1.5 KB)
Now question, do I have to do this every time I load a file or will Lightburn automatically update across all layers
Not sure if I understand the question exactly. LightBurn is kind of out of the loop on the g-code change. When you run the g-code it’s basically blindly sending it to the controller. So every time you want to run a new job you would need to do this unless LightBurn gets updated to accommodate this capability.
You may want to put this in as a request to the Feature Request site to add the ability to control power with ‘P’ instead of ‘S’ or if @LightBurn decides to take this on for his own reasons as he sometimes does.
I don’t know how prevalent this feature is in the Marlin world or how useful it would be to others to get a sense of priority.
Is there a reason you haven’t chosen the SnapMaker device profile, instead of Marlin? That profile adds the P commands needed.
eep! I was about to do the same and stumbled upon this randomly while browsing. My mistake was following an old guide in the forum that says no profile exists and to setup a manual one. It was over a year old and I knew they changed the snapmaker gcode in last 18months to support inline power changes so knew to read more. Phew
Is the snapmaker camera support on the roadmap or never gonna happen levels, I only ask because now that the 10W laser is out it takes the camera picture in one shot rather than 9 composite images…?
Thank you for drawing this to our attention. I’m going to re-open the old thread - put information in about the new(er) device profile and lock it again.
Great catch and thanks!
Hello, I am same like you. I connected SM2 to lightburn 1.4.02, machine is recognized, I can move it but laser turn on very low and dosent burn the material. I want to know if you found the issue and what is the exactly GCODE for start/end.
Thank you