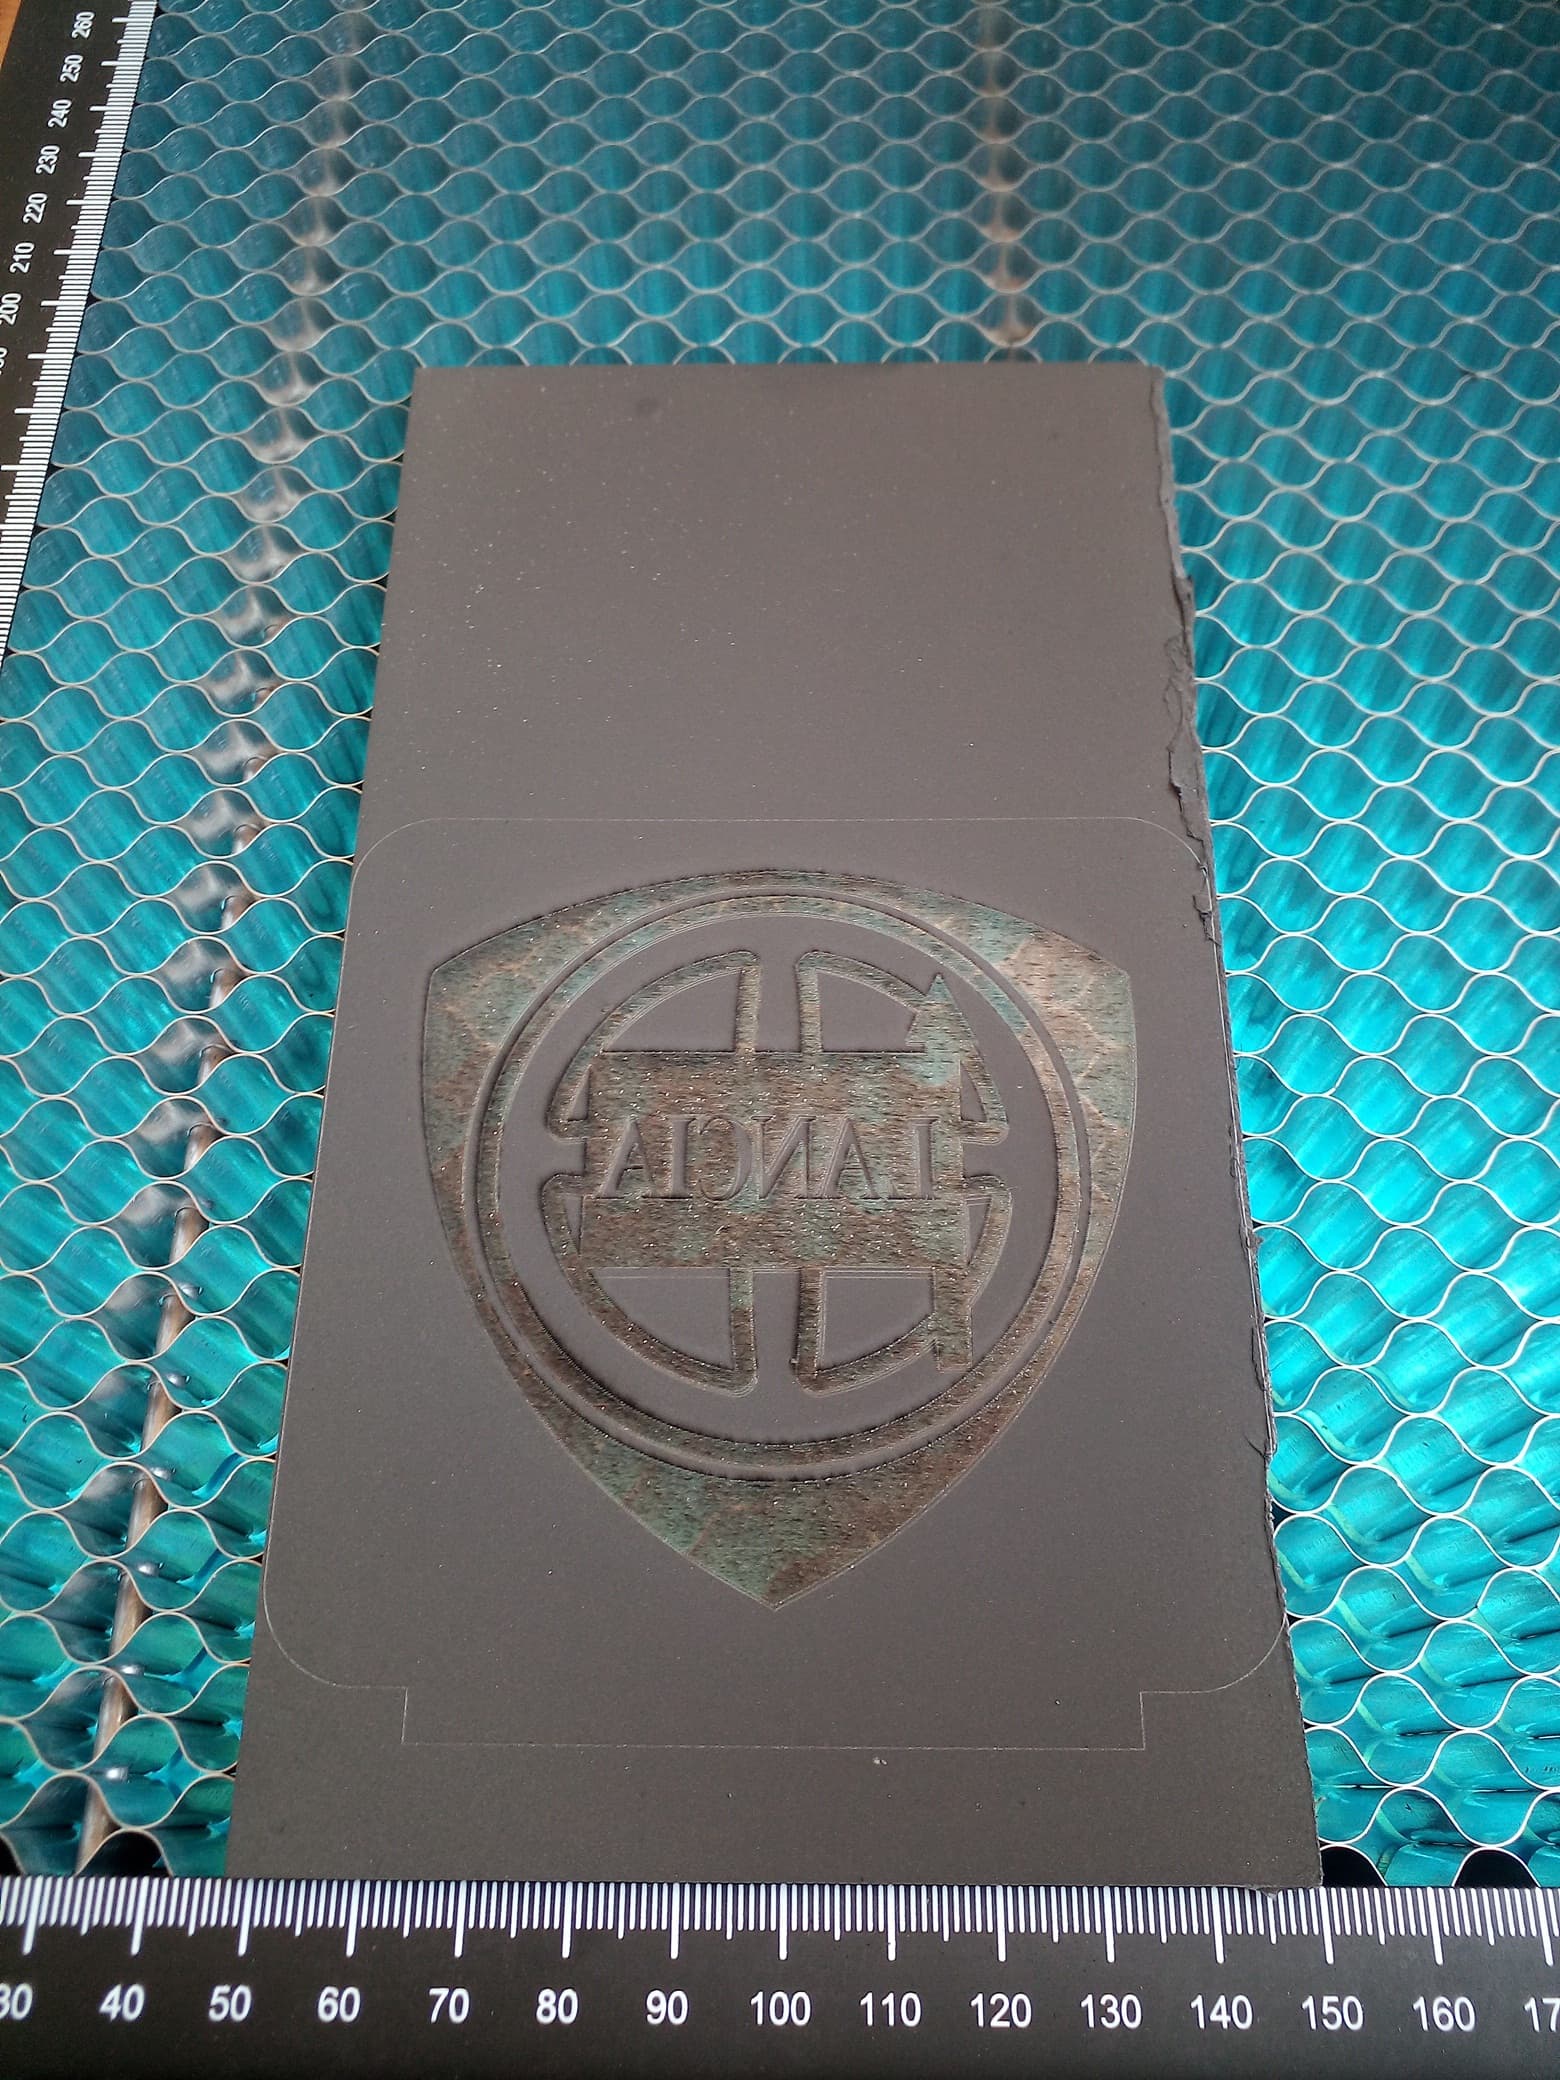
The idea was acrylic but I think I was deceived and they sold me polystyrene at the price of acrylic, but it might even turn out to be a good alternative. Anyway, this is the material I have to test at the moment.
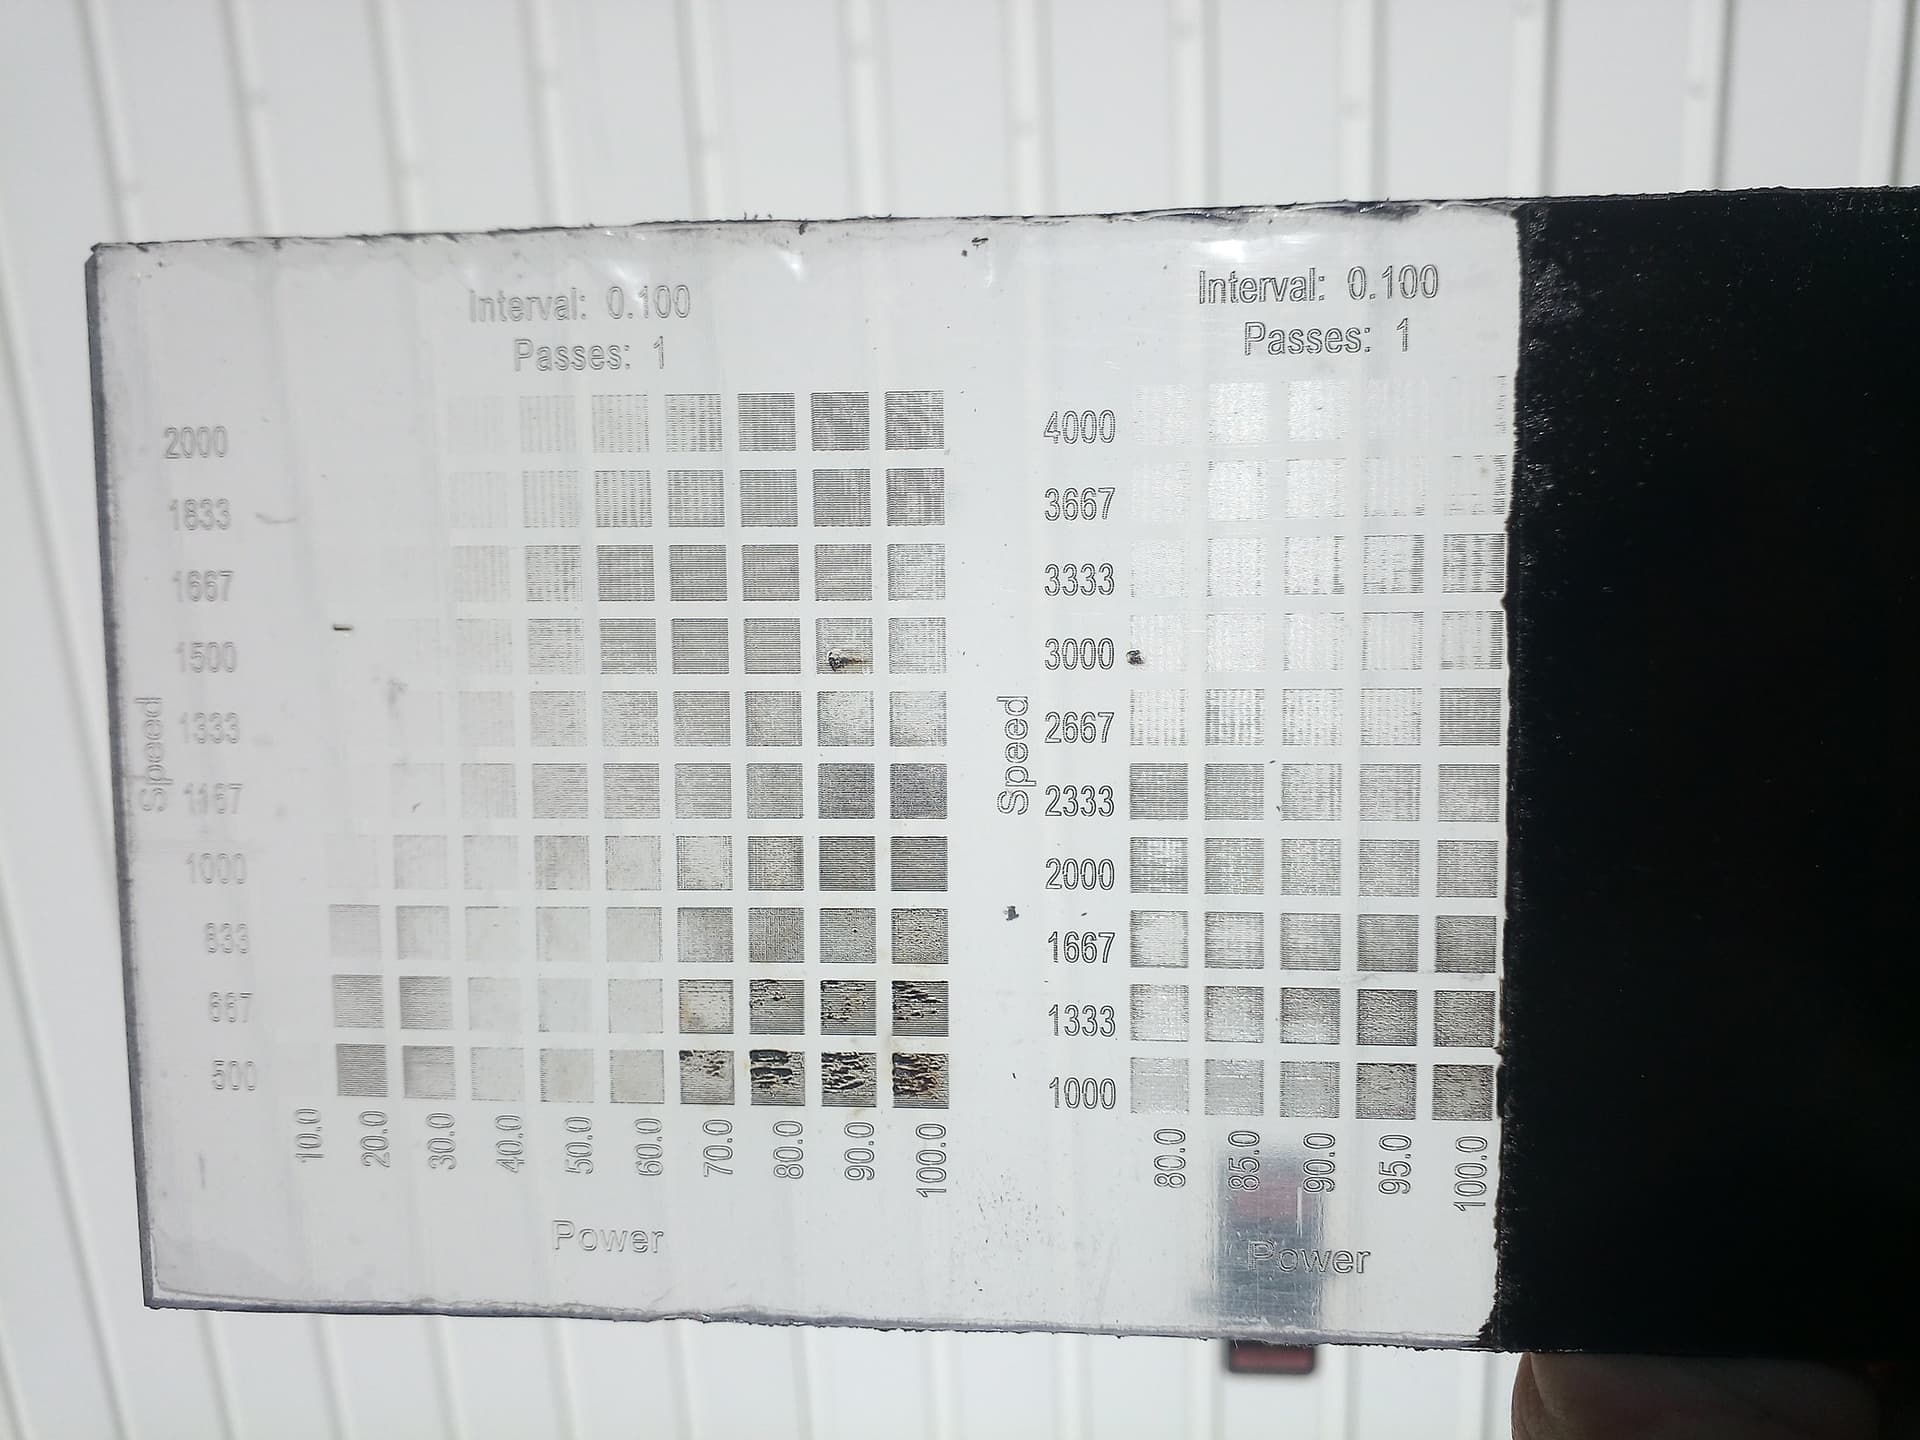
Last Saturday I was busy running engraving tests on transparent polystyrene with my 40W 450nm laser led diode.
The suggestions (I look for acrylic) are immense on the web but not all of them I have at my disposal.
As mentioned in the 1st topic I opened, I am using acrylic spray paint and currently use isopropyl alcohol to clean. (paint thinner and acetone damage acrylic)
Cleaning the paint with isopropyl alcohol costs a lot and leaves soft marks (from rubbing so much) probably for two reasons, it is not the most suitable solvent and besides, the paint had already cured for a little over 12 hours. I believe that if I let it cure for only 1 hour, engraving and cleaning it afterwards will be much easier. (Something to try in a next test.)
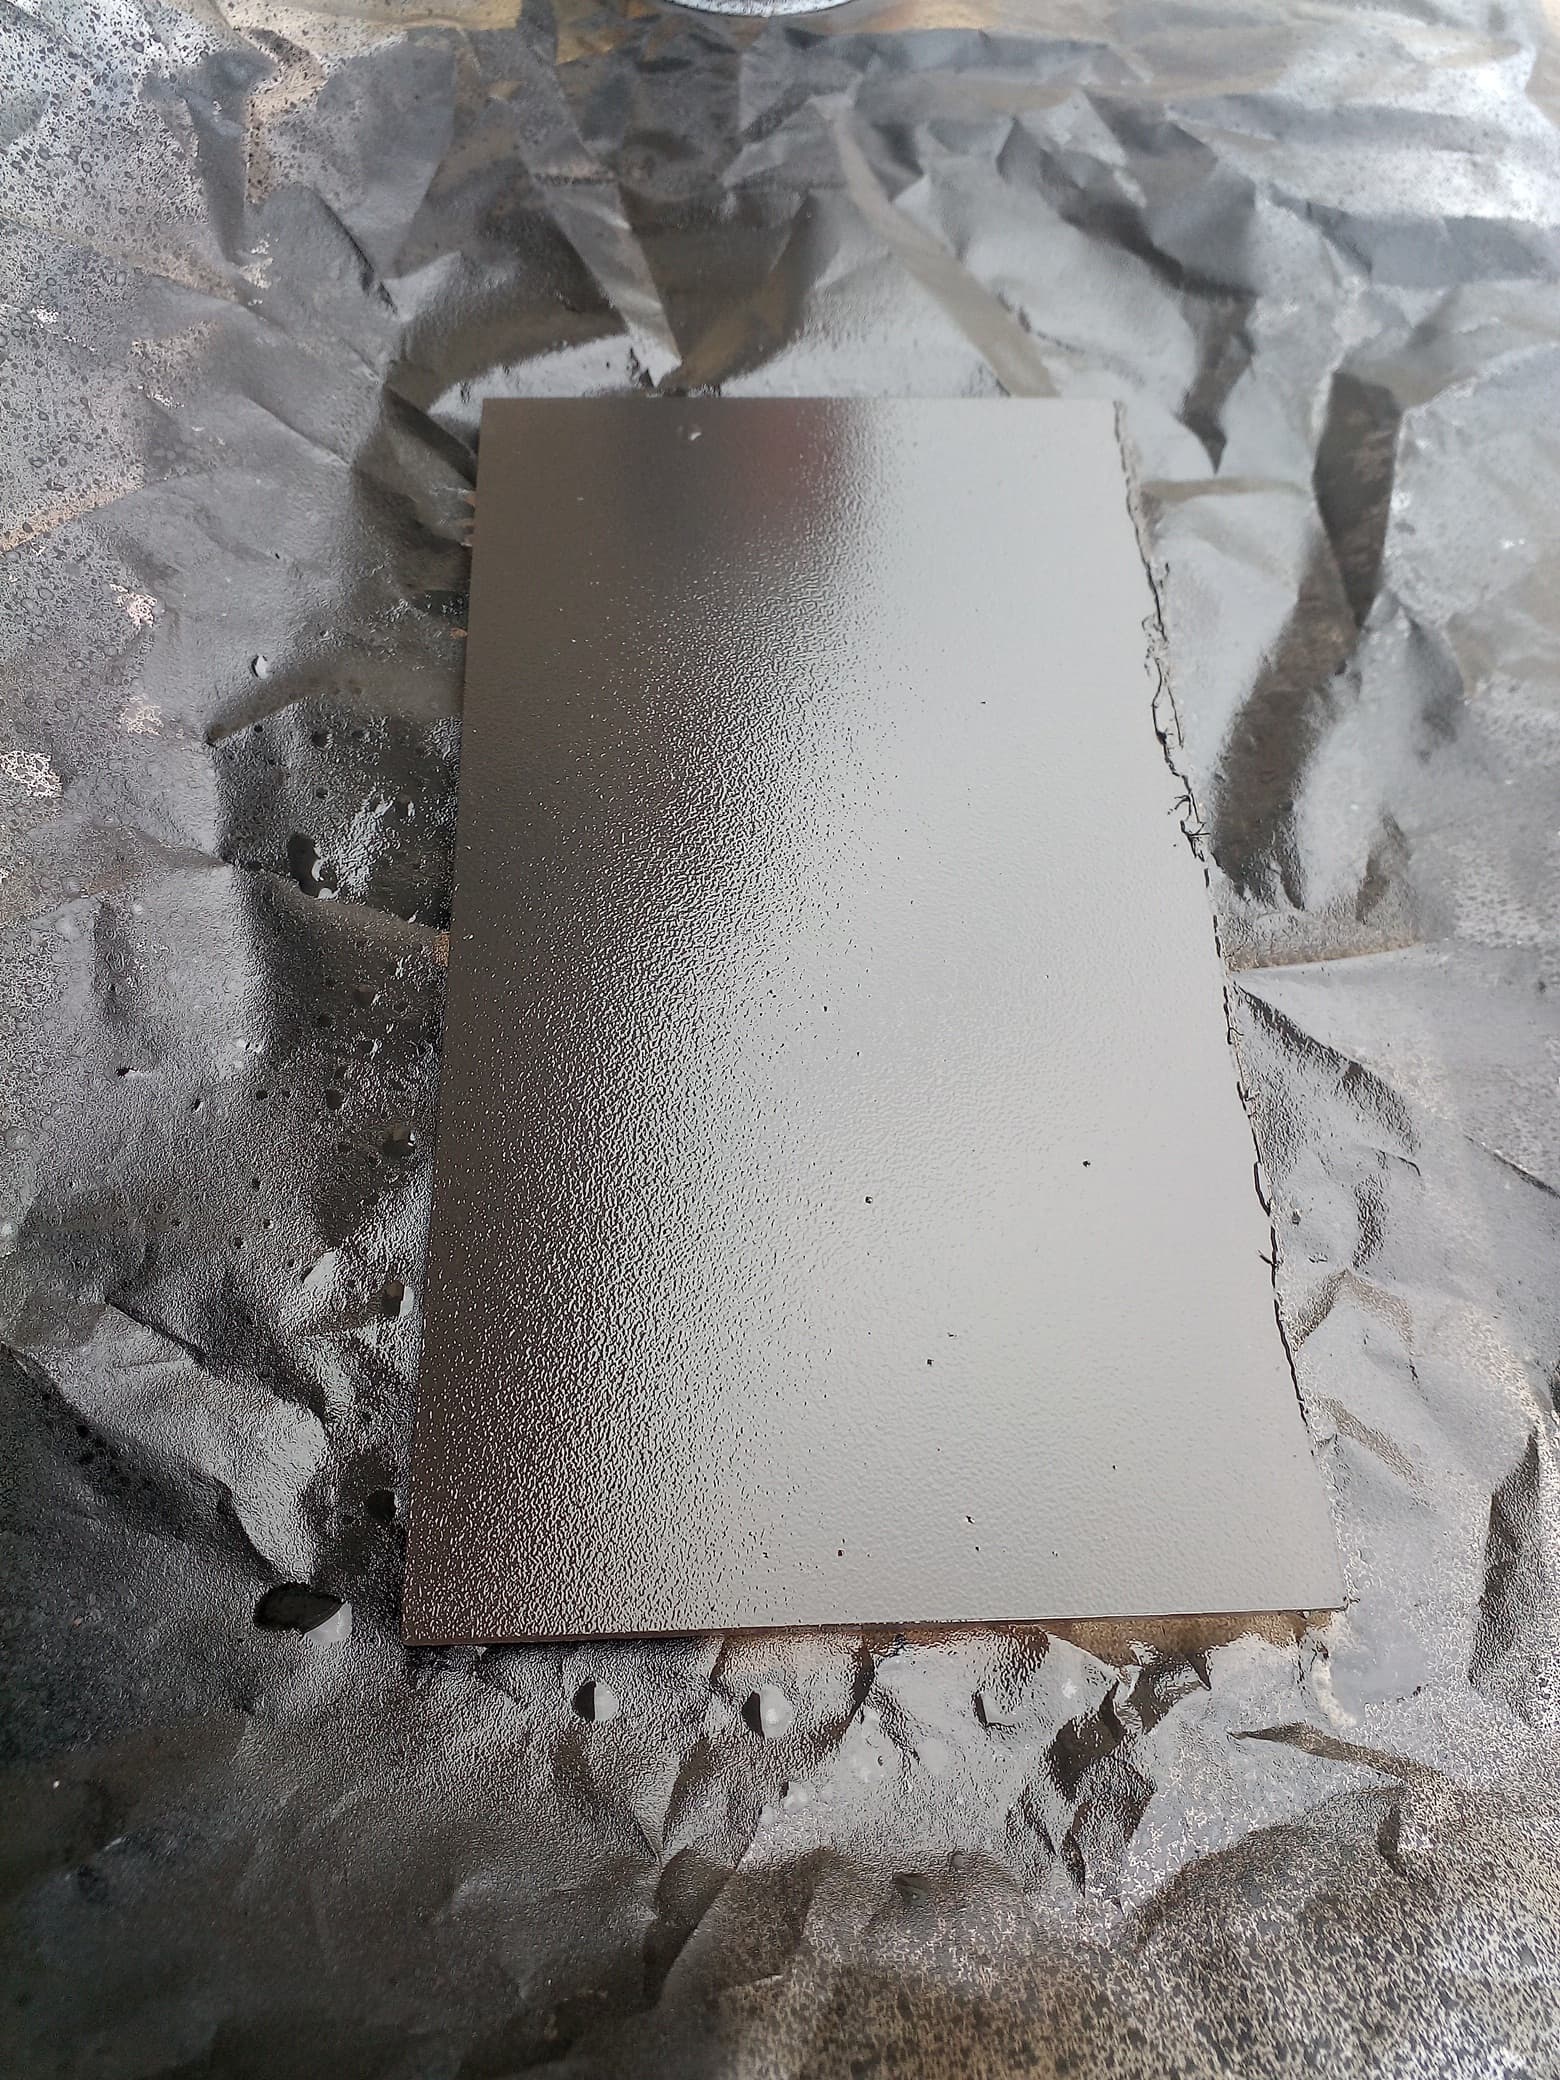
This first image is a detail that looks “clean” on the second image.
You need to get your machine working correctly as nothing will be right with some of these issues.
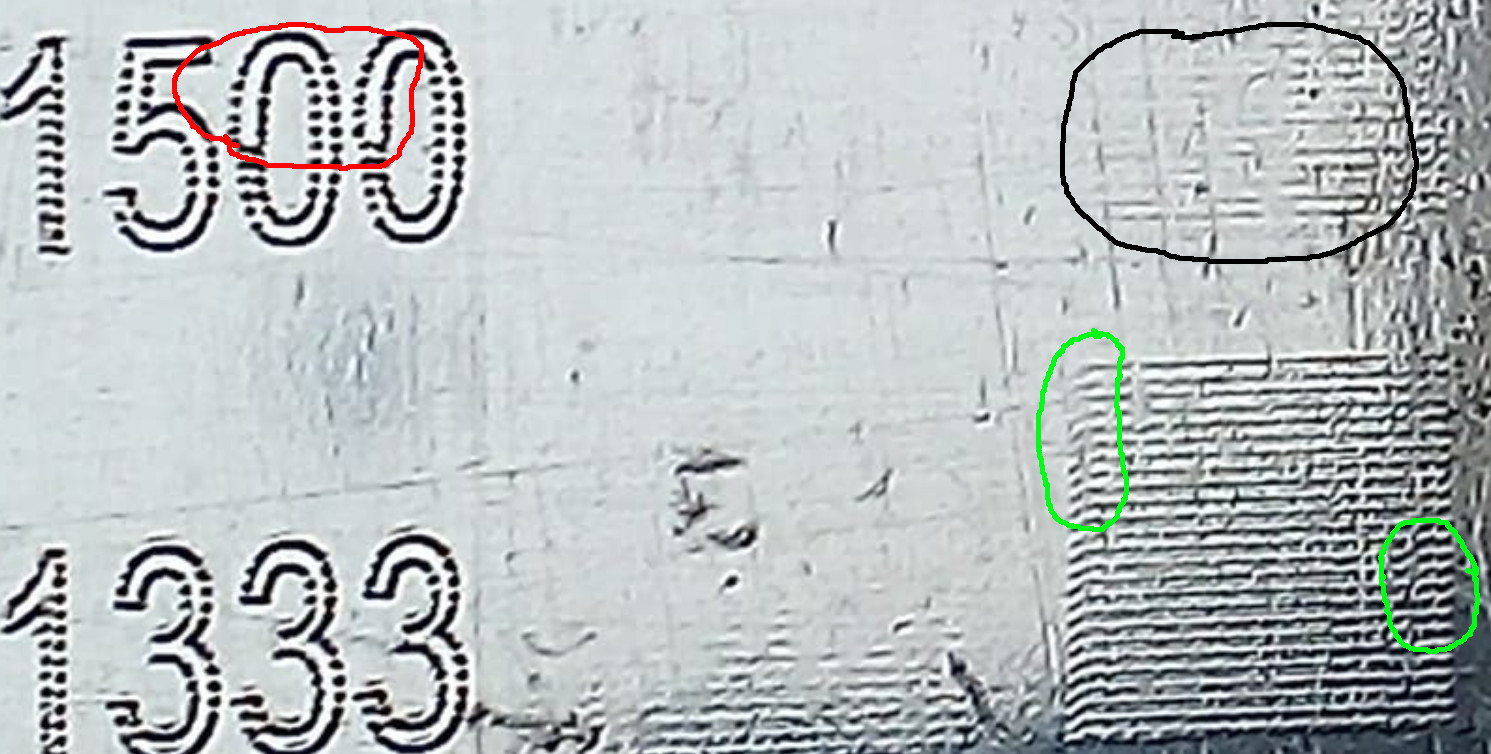
I cut part of one of your photos as an illustration…
Red - these should be completely filled or? there is no consistency to these…
Green - there should be no wiggling at the start and end of the scan lines and they should start and end at the same place.
Black, why is only part of it lased? If you compare this with your tile, you will see the tile has completely covered each square… this isn’t the case…
Some may be the fact that with a visible laser, with a clear or visible material, will pass through it. Meaning you can’t directly lase it.
I doubt its from rubbing the acrylic… isopropyl is a known acrylic solvent, it will dissolve acrylic… it’s pretty slow, but it is a solvent… google it yourself…
If you rub the acrylic without the alcohol, I doubt you’d see anything like what you see when using a solvent… even a weak one.
Good morning Jack!
Your “CSI” eyes scare me
Thanks a lot for the pointers. I just don’t know if I’ll find the right words to explain what I can explain.
Let me try to answer your questions with the colors you use to identify de issues.
Red - I think it’s my fault in the definitions.
It’s supposed to be line only, probably the settings for text in Lightburn’s “test material” tool need to be set for “cut”.
Green - I don’t know why this happens.
Will the laser doing “fade out” or “fade in” the power before finishing or starting the line?
A mechanical problem doesn’t seem to me to be because it happens throughout the all test. I’ll have to confirm the laser settings… Any idea what it could be?
Black - This zone is where the laser barely engraves the material.
The photo doesn’t help much either. Behind it is a white gate in corrugated sheet metal that scatters light and spoil the photo.
With the test plate in hand and at the light this defect is not noticeable.
That is true.
I am aware that I will never achieve the engraving quality that I could get with a UV laser with a visible light laser. Anyway, that doesn’t stop me from trying to get the best possible result with this type of laser.
I agree with you if it was acrylic, as it is polystyrene I’m not so sure.
I believe that polystyrene is softer to scratch than acrylic and this ends up being reflected in the final result.
I’m looking for other ways to mask the material so that I can engrave and clean it more easily.
Permanent ink (I don’t know if there is a specific name in English, but it’s the same ink used in markers) if it were possible to apply a uniform layer I believe it would work well because any alcohol easily removes that ink and wouldn’t have to use isopropyl anymore.
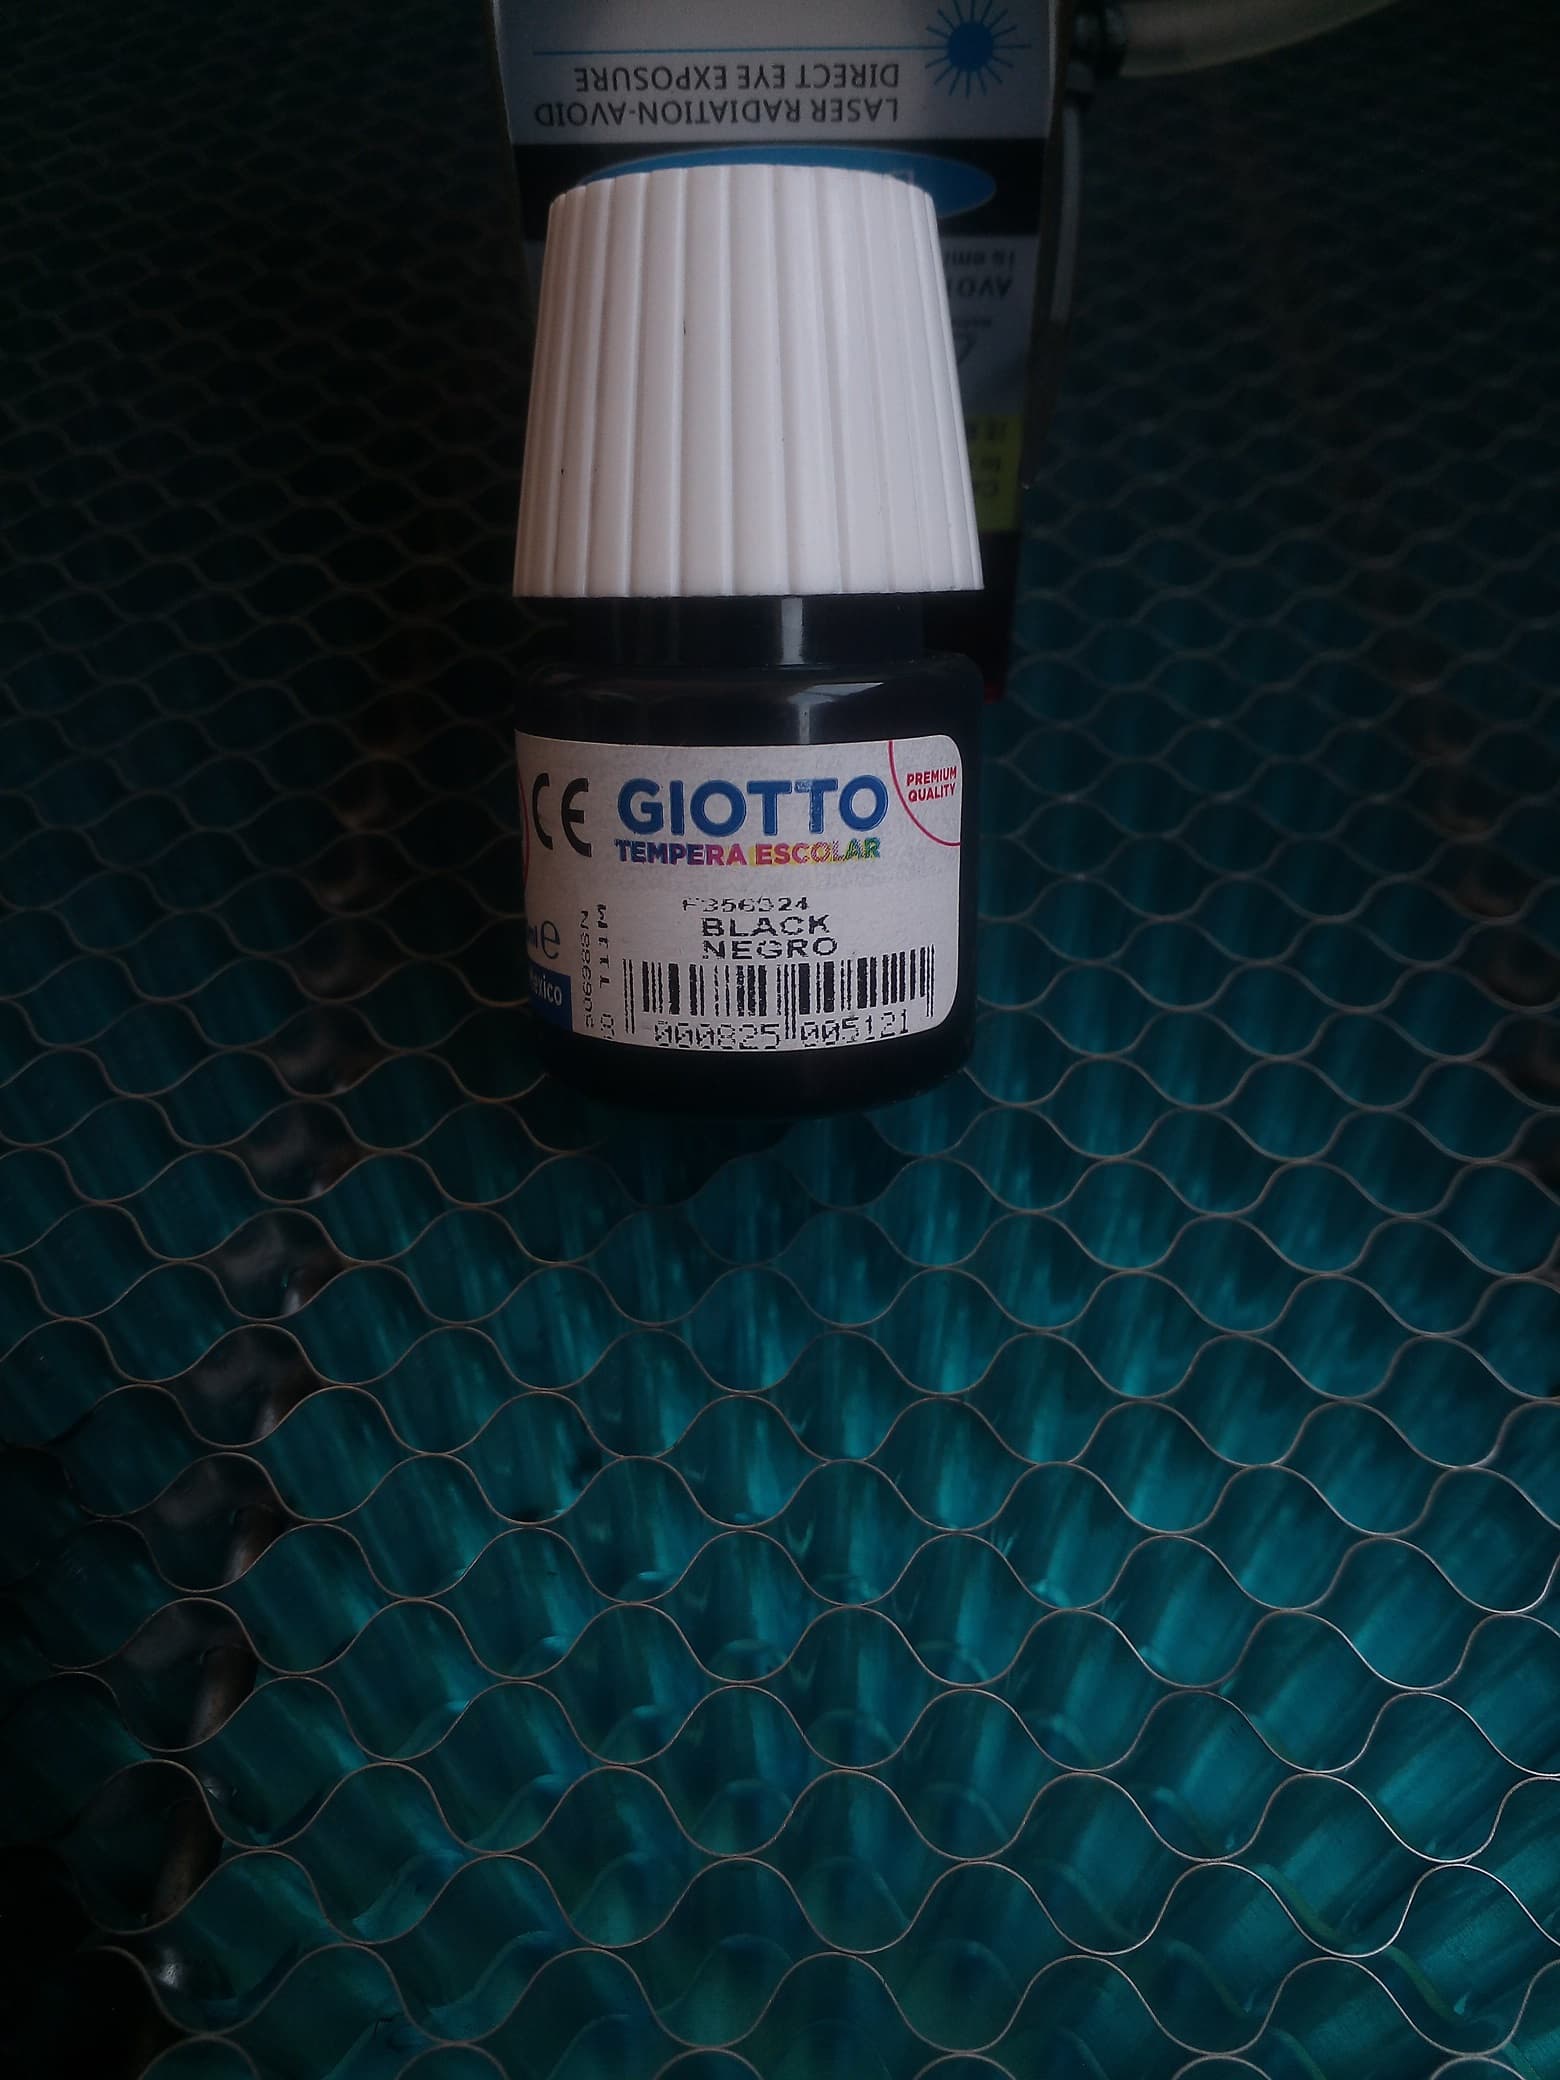
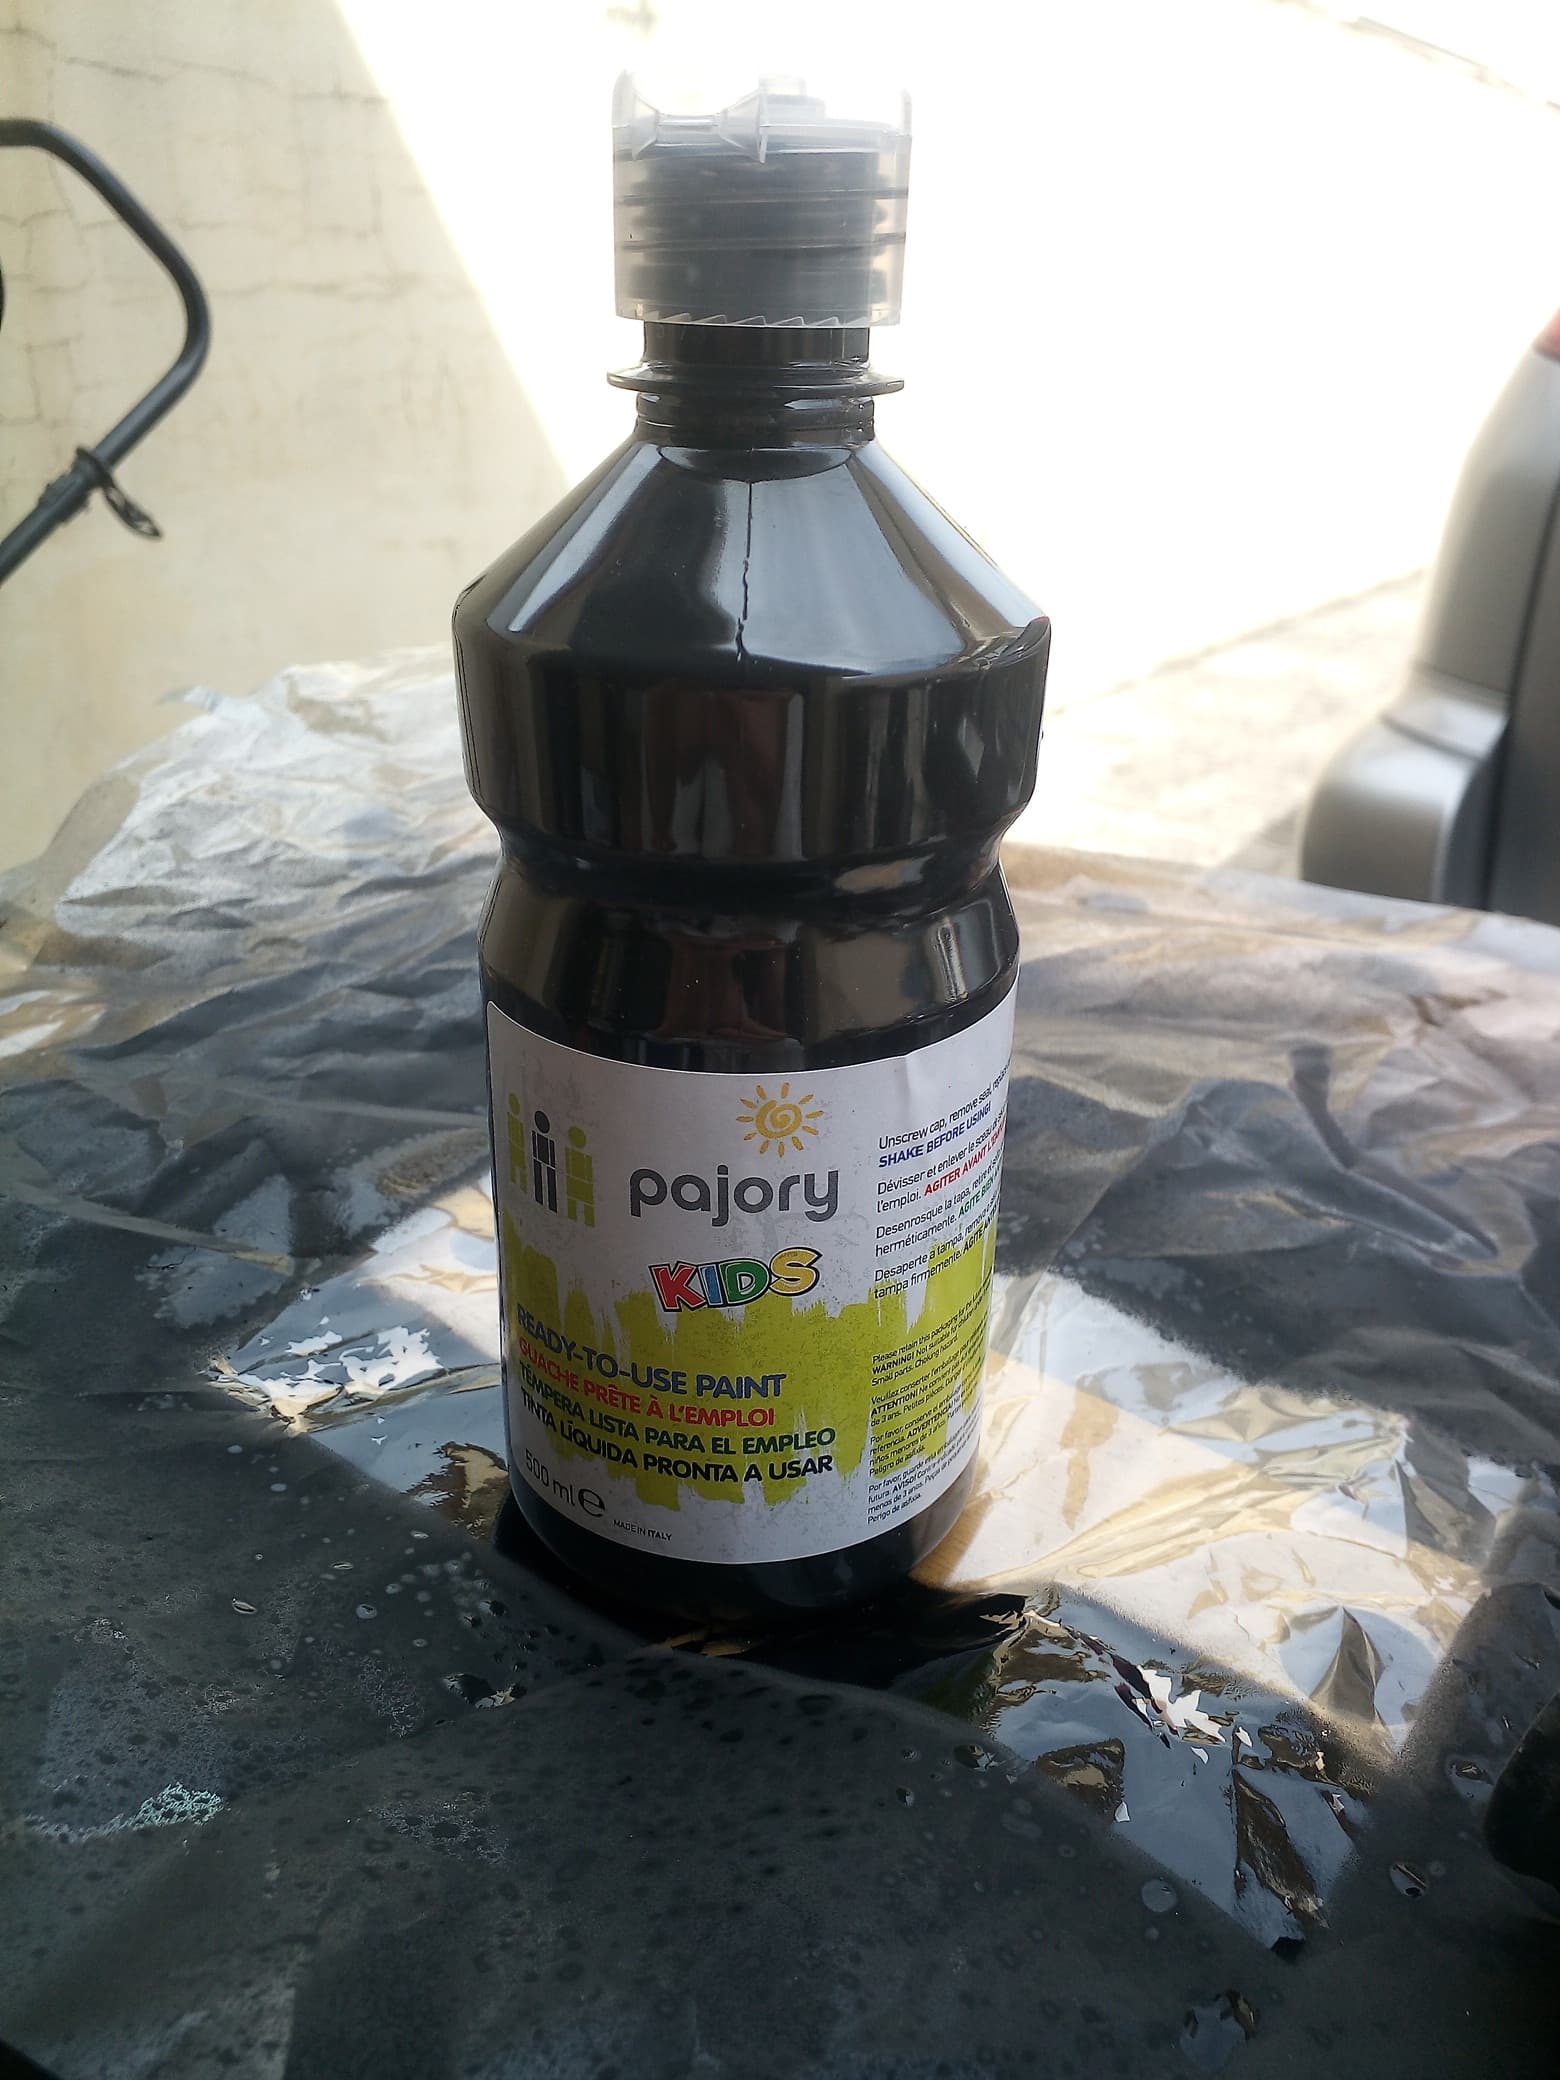
What is tempera? Goggle can´t translate to portuguese and in portuguese language “têmpera” means quenching. Not a good solution…
Yes, is the photo.
If the origin of wiggling in lines is mechanical the only cause i guess comes from dirt on guides or worn ball bearings.
Or it may also be “made in china”
I will pay attention to those factors, but in due time.
Thanks.
I hope I will figure out the solution and will update everyone on what worked eventually
Kuth, I had a 5w diode before getting this bigger (used) CO2 machine, and I was trying to do a few things with my kid. There’s water-soluble spray paint, it’s not the cheapest, but it was the easiest to wash off in our experiments. The only thing, these water-based paints take some time to dry.
I think this is the kind of paint i am looking for but i don´t find at any store where I live. Is this that kind of paint you can apply with a sponge brush?
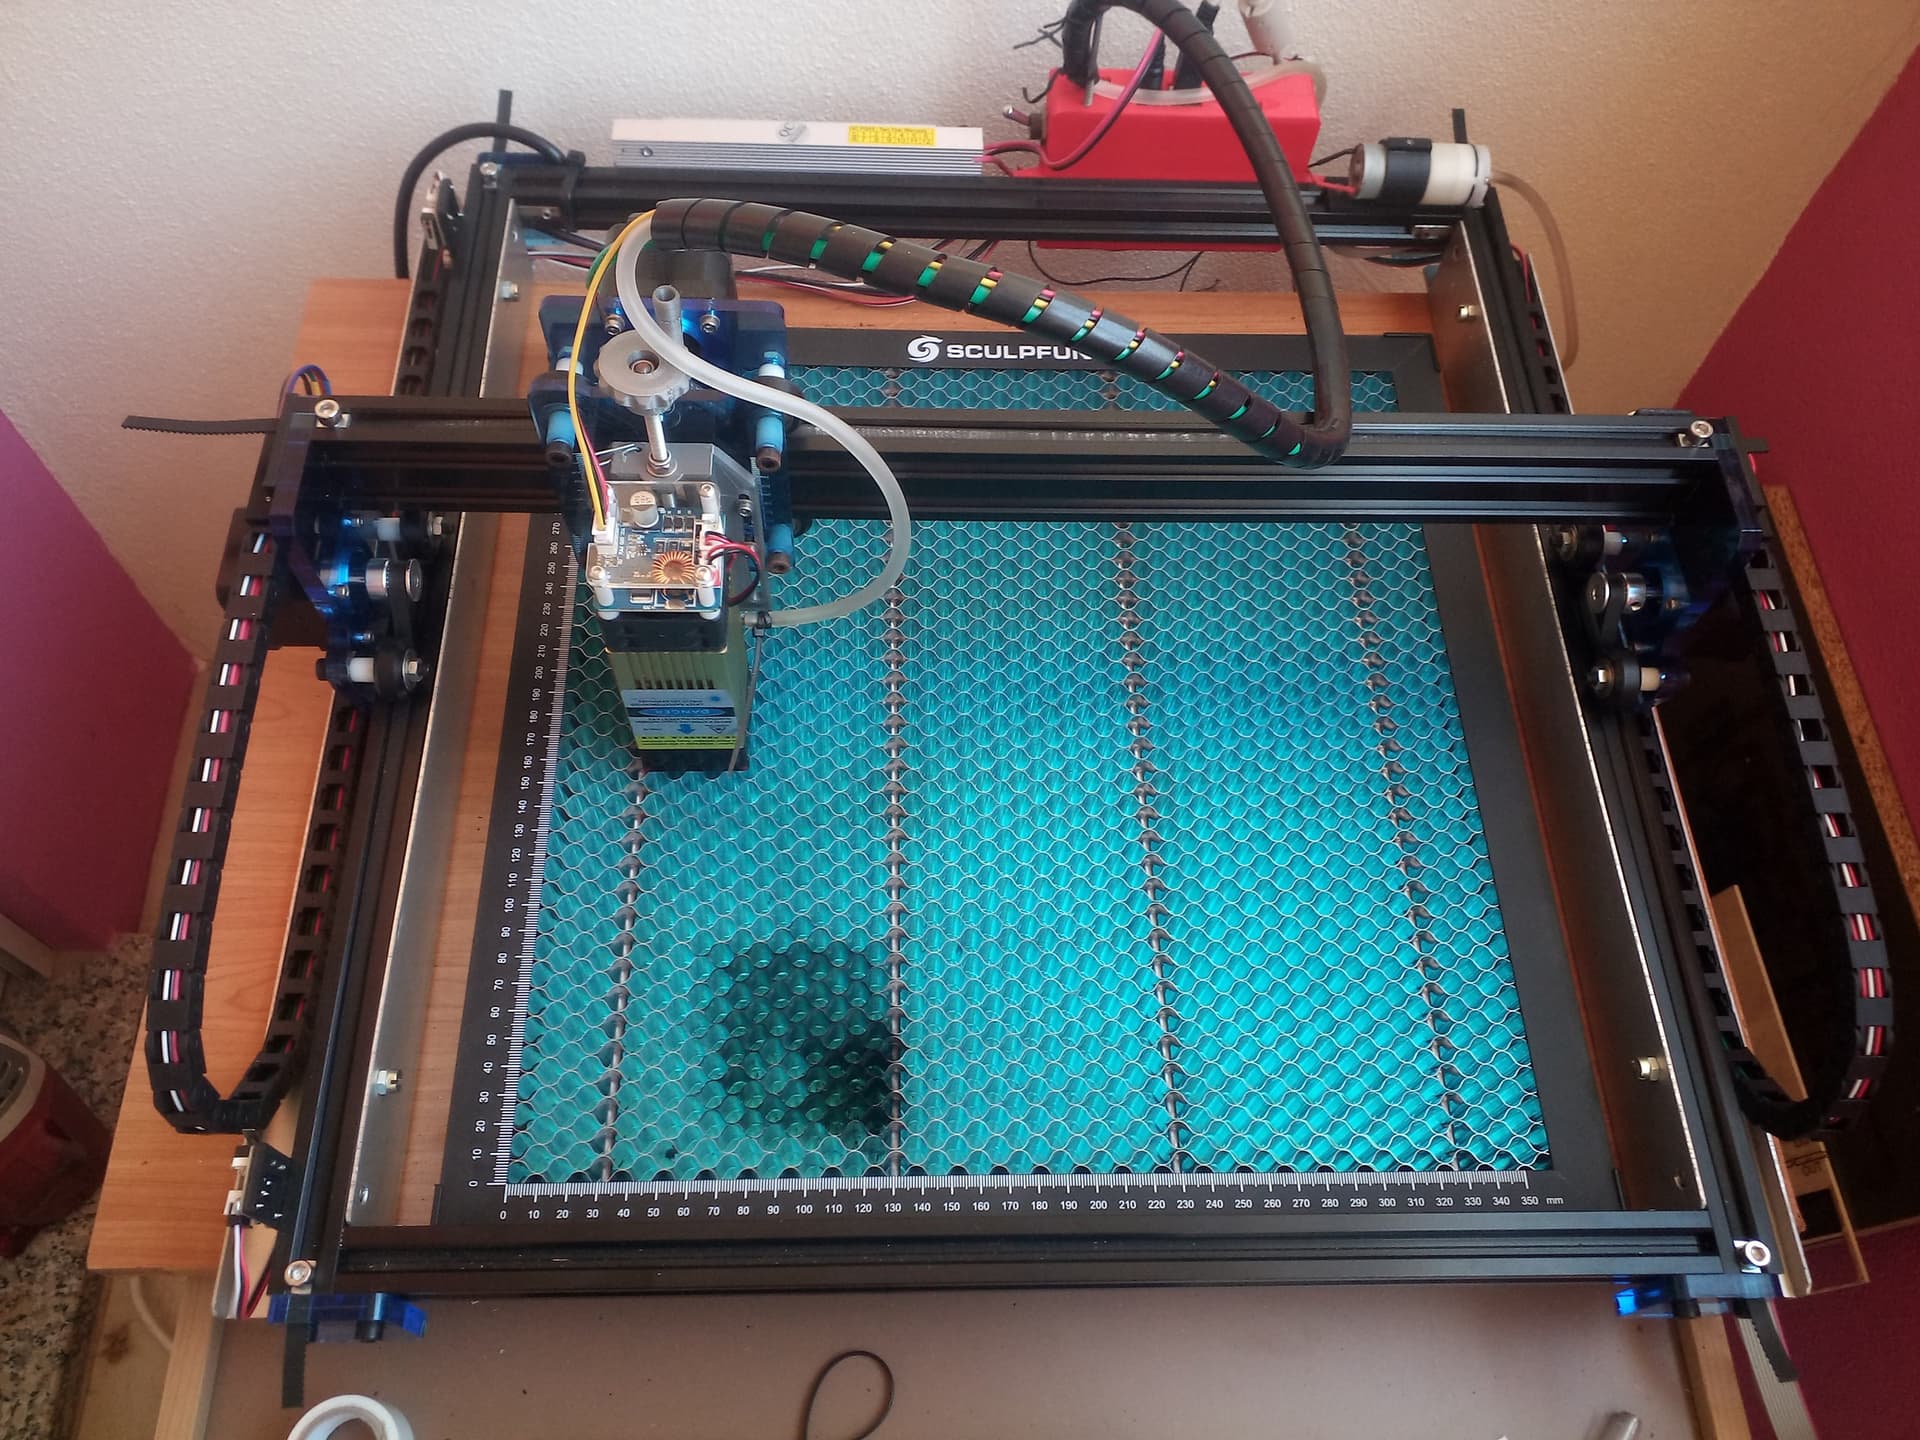
Belts are stretched, maybe too much!
As the belt has few teeth in contact with the sprocket, I chose to stretch belts well instead of leaving them just stretched out and “jump a tooth”. ( sounds strange to me but I don’t know the proper term)
Not at all.
I have also participated and have been following that topic.
The only similarity, in my opinion, are mechanical problems.
The machine in question in that topic is much better than mine. From the pictures I’ve seen that machine slides on shafts and uses in-line ball bearings.
Mine has four standard ball bearings in each “carriage” (also sounds strange to me) and slides on a square mounting rail with slots that I don’t know the specific name of.
Those must go to the gym. The gutters (I believe this is the correct term) for the Y axis are rectangular and mine are square.
The first one is that a camera installed beside laser head?
This weekend I took a few hours there to dedicate myself to polystyrene and laser.
Tempera paint is a bit tricky with polystyrene… In the first place because you need a firm hand to not leave scratches on the first coat and it doesn’t allow a second coat. The paint barely sticks, just drop water from the tap or run your finger and the paint starts to come out.
In second place I have to find a way to paint evenly on the first coat. I used a sponge brush for this, but since I don’t practice it a lot, I couldn’t get a layer without a few scratches.
I’m thinking in a way to spray tempera paint but I have to find a suitable tool for this purpose.
I’ve already tried using spray water to make the paint more wet and fluid and thus join the scratches and create a uniform layer but the water, as it doesn’t stick to the polystyrene, makes the situation worse instead of improving it.
I’m sorry but I didn’t take pictures because I was pressed for time but next time I’ll try to post some pictures.
That’s ok about the pictures… one of the issues with most of the coating techniques is that the coat has to be consistant across the material…
The same with LBT100, which is a laser marking spray… I’ve use it a lot and if you’re not careful you don’t get an even coating and it doesn’t perform as expected.
Any of the coating require care to apply correctly… probably why paint is used quite a bit of the time, as it’s pretty idiot proof.
I used a air brush on most of my tiles…
Another issues with coat thickness is that the thicker the coat the more power it takes and the less resolution you end up with.
That´s in my opinion one the most important aspects to consider. Otherwise the engraving it will not be consistent.
I think if I can spray it evenly all the rest is adjustments.
That´s a very acceptable option. Right now my air brush is an industrial one (for car painting proposes). It wastes a lot of paint for my small projects. But as i have to acquire more tempere paint for further tests and projects,… well, once will not be a problem.
Forgot to mention that the airbrush works great with TiO2, but it has a tendency to clog or plug up… keep that it in mind when mixing…
I actually tried Ethanol and TiO2 as per suggestions as the alcohol being a solvent for TiO2… it separated out, so I saturated it or ?
I also live in the SW Desert where it’s very hot in the summer, so most of the alcohol makes it to the tile and almost instantly evaporates…
I’ve had a couple of good tiles from using it only with ethanol, but it’s tricky and I don’t do it anymore… too time consuming and inconsistent results… it’s hard to judge the coating with a white powder on a white tile
I’ve put a little food coloring in mine, so there is some contrast during application.
I confess that I had to search for Tio2 because I never heard about it. In fact, I have no idea where I can find such a product here in Portugal.
I’ve heard and know people who use molybdenum oil in some cases. Being an oil, it does not dry out, maintains an even coat and washes off very easily. Obviously not suitable for porous materials.
Did you try this? Put the tile in the fridge and let it it cool. Both alcohol or ethanol will take longer to evaporate (depends on the thickness of the tile) Crazy idea? Maybe, I am single and a refrigeration technician!
As soon as it is sprayed it tends to evaporate. Some of it doesn’t even make the tile… Tried lots of variations… getting a consistent thickness with the coating is the most difficult with all of these sprays or coatings…
I think I actually did better with just water and a few coats… have to be careful it will wipe, rub or wash off easily.
I use LBT100 with both the fiber and co2… I thought it’s molybdenum based but washes off with water…
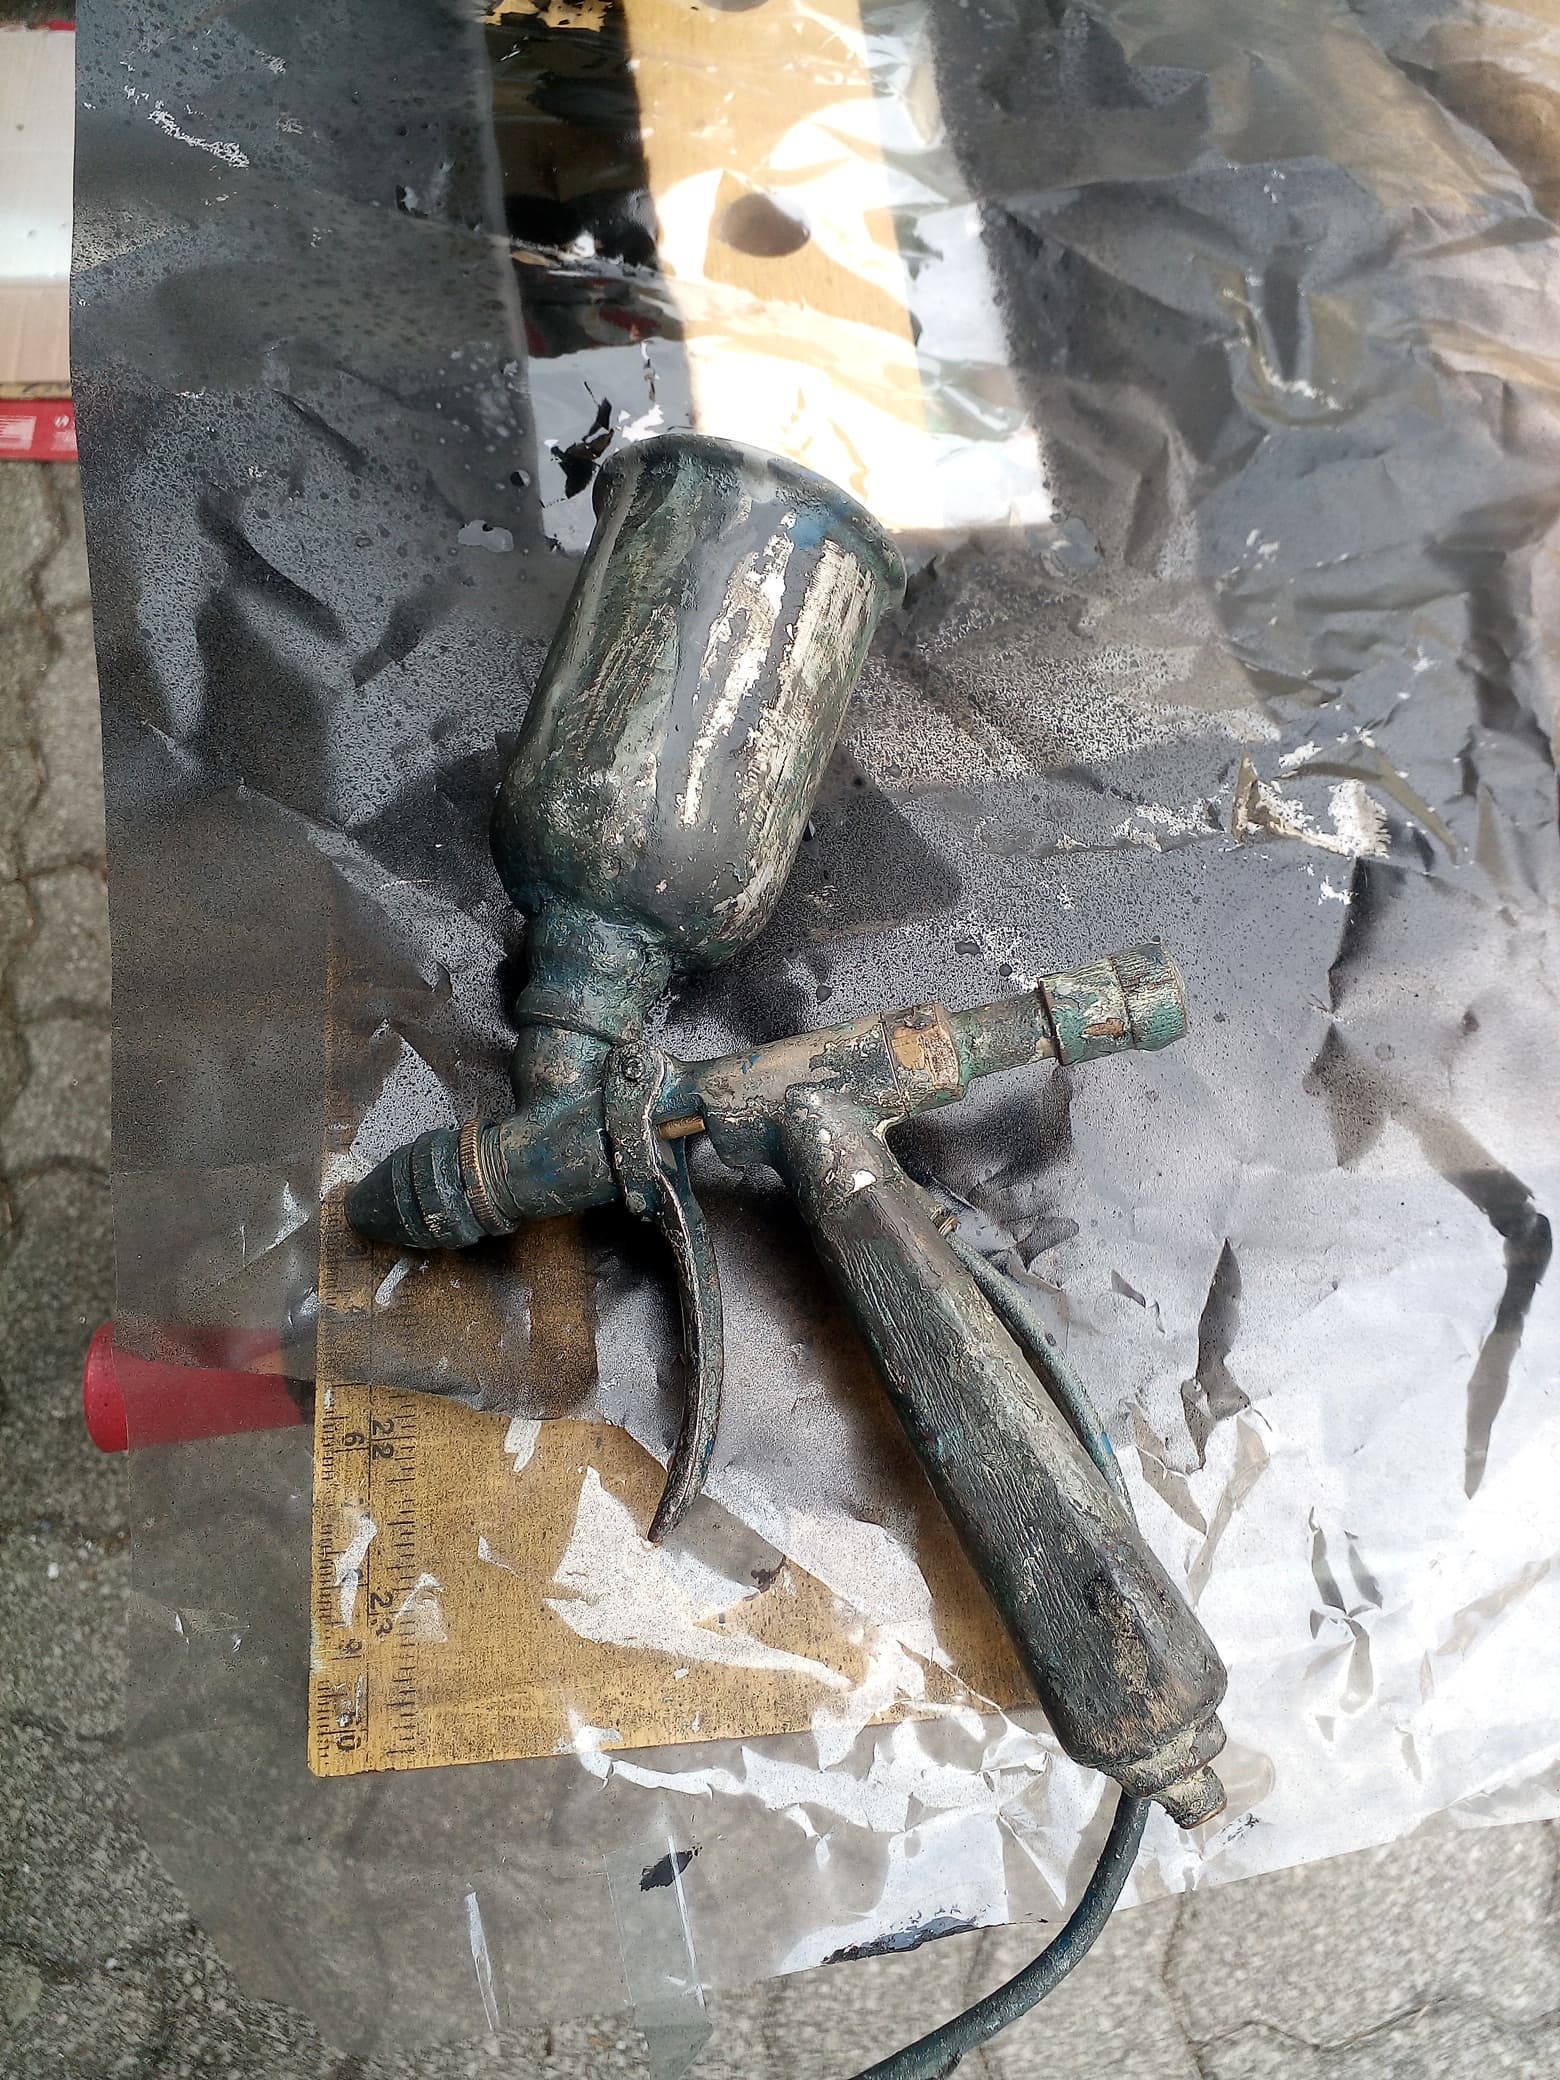
It looks i find a way to spray tempera paint evenly!!
After trying with domestic bottle with spray gun I realised (I already suspected that would happen) as it is a very thick paint, the gun does not pull the paint.
I tried diluting it up to 50% with water, although the gun already pulls the paint, it becomes too diluted and many thick drops come out of the tip, which leaves an uneven layer.
So I turned to something more industrial, an old spray gun that was discarded at my job site.