How do I go about burning a grid on a waste board for aid in alignment of my work piece I’m sure it is very simple but just starting to use lightburn
1 Like
You could draw two lines, one vertical and one horizontal, sized to match that of your workspace and use the ‘Array’ tools to create a grid quickly. Set this grid layer to ‘Line’ and set appropriate speed and power to just mark your wasteboard.
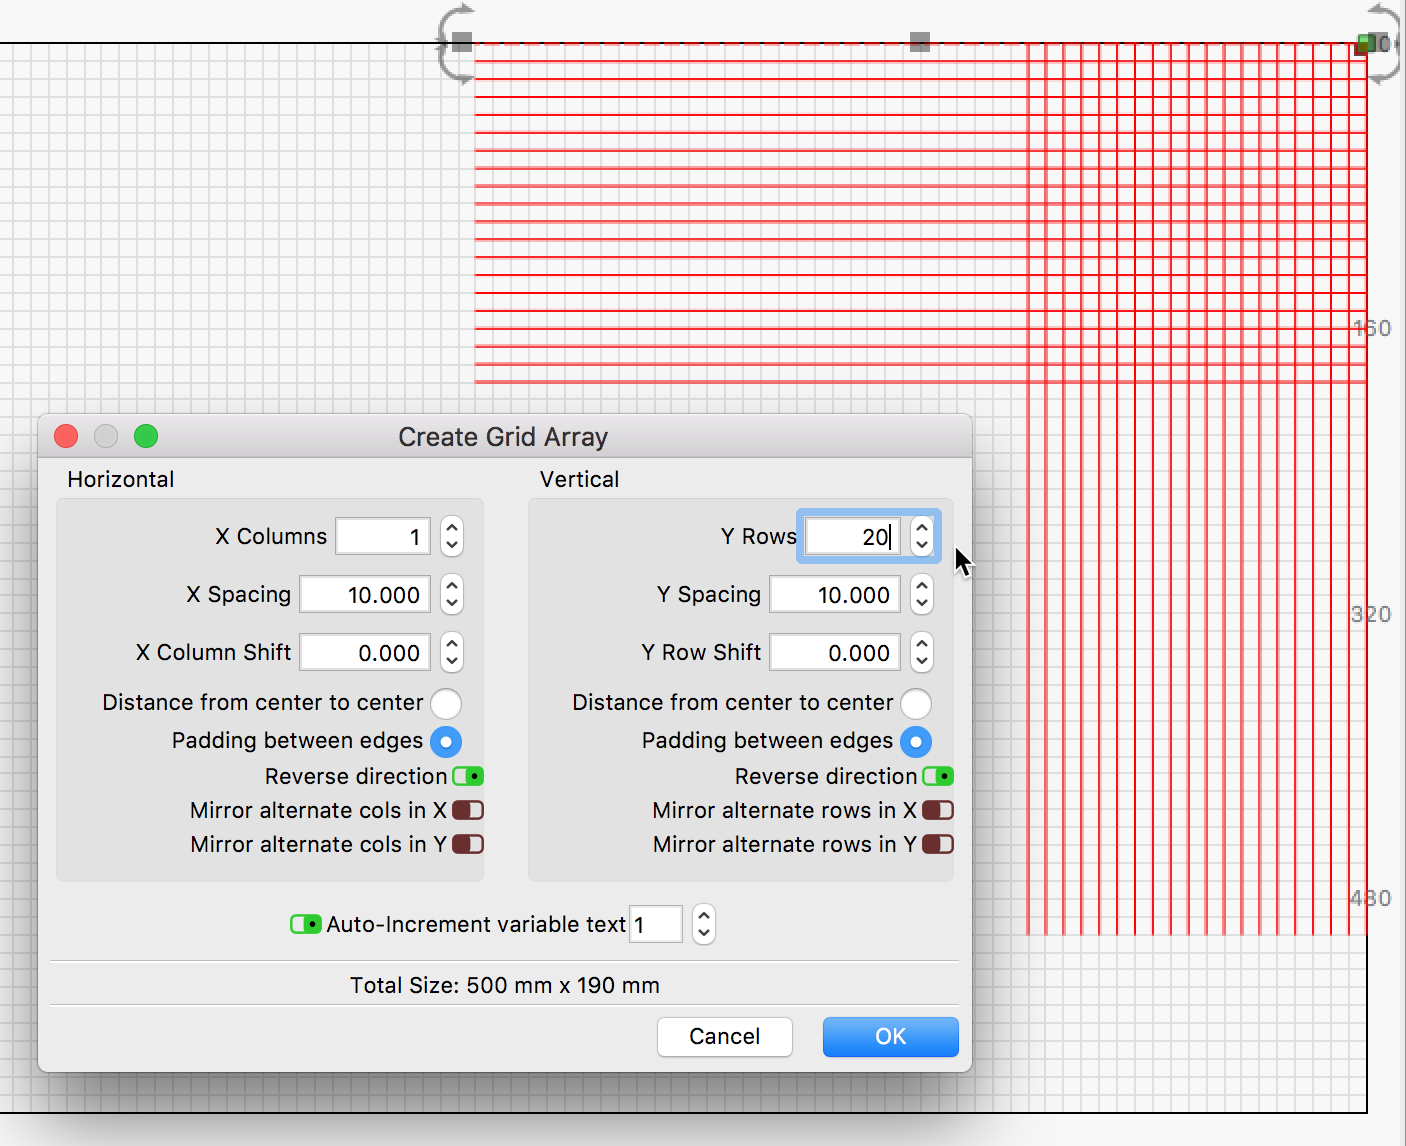
Here I have set the ‘Array’ spacing to match that of my LightBurn ‘Visual Grid Setting’ found in the ‘Settings’ window, currently set to 10mm.
3 Likes
Thank you Rick that worked great.
1 Like
I’ve been trying to find something like this in the forum for two days. I build a grid and burned it to my new layout board under my laser. Today I tried some burns and when I put my graphic on my grid it didn’t want to start where I had [placed it. I realized that I had not used my grid but the default grid.
I burned my grid so I could align products to be engraved but now I may have wasted my time and a new $50 sheet of plywood. Is there any way I can use the grid I created and burned to my base plate to align my material to that is to be engraved?
Can I turn off the LB grid or dim it down and use mine? At least I found the article about positioning and I’m not crashing into rails any more. I didn’t realize I could have burned the LB grid but mine is just a bit smaller all around and the ‘cells’ are the same as the LB grid.
Any help would be great. I want to use this to burn multiple products at a time if possible.
Thank you,
Ernie Hodge
Under Settings there’s Grid Contrast and Grid Spacing. Is that what you’re seeking?
Also, just a tip: MDF is inexpensive and might be a handy substitute for plywood depending on your needs.
Nicole,
I already had A nice sheet of plywood and used that. Hadn’t thought about MDF.
After I posted I figured out I could move my grid to match the LB grid but I’m still not sure how to get my designs on my grid. Do I just import them and place them where I want them and then make the entire grid a file?
Thank you for your reply to my post,
Ernie Hodge
Well I’m officially frustrated beyond anything I’ve ever done before. I can’t get my laser to work with the grid I printed on my base plate as an alignment tool. To be honest I about ready to throw the entire thing in the canal behind the house.
Does anyone in the forum know where I can find a ‘layman’s’ tutorial on how to get my laser to hook up with my placement grid?
I can’t find anything like that anywhere and I’m sure it’s me not using the correct search terms (which I have no clue what to search for).
I can burn projects but when it takes twenty minutes to get everything in alignment it’s just not worth the wasted time.
I could really use some guidance,
Ernie Hodge
The grid you see on-screen is exactly the size of the bed, if you told LightBurn what that size is when you first set up. You do this in the ‘Device Profile’. You can check / adjust this if required. Click the ‘Spanner / Screwdriver’ icon near the top-center to expose.
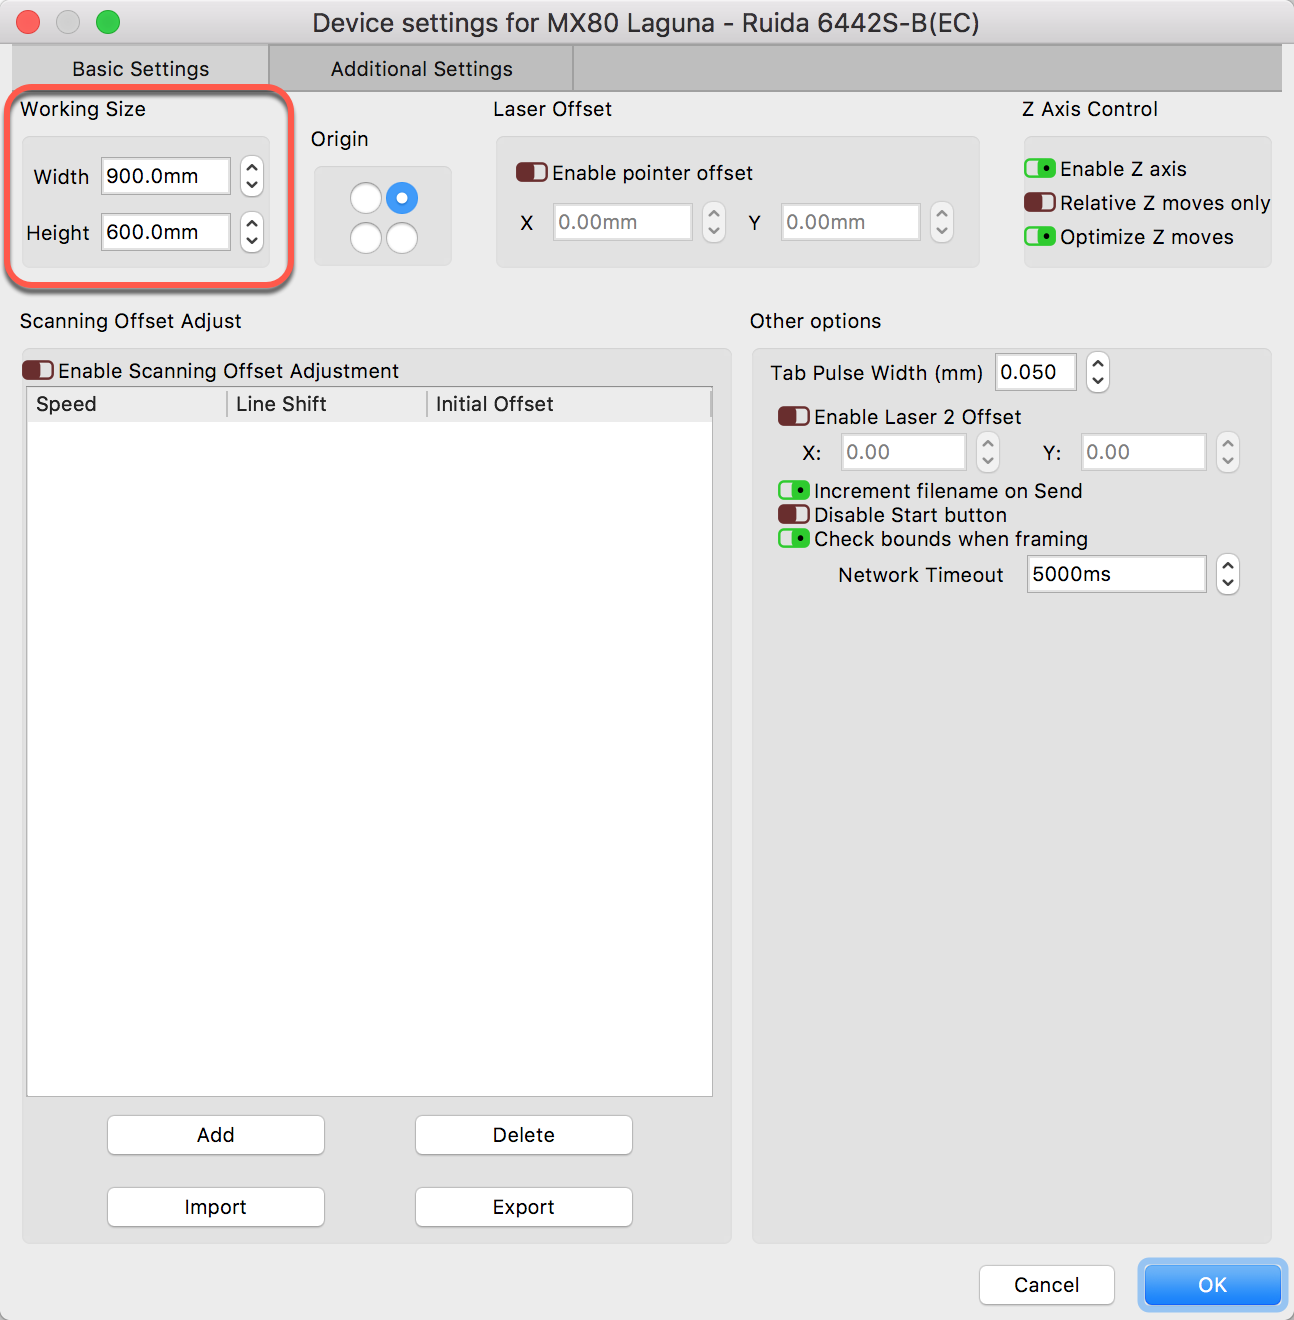
Once set to match the physical size of your gear, locations seen on-screen will match the same location on your bed when output.
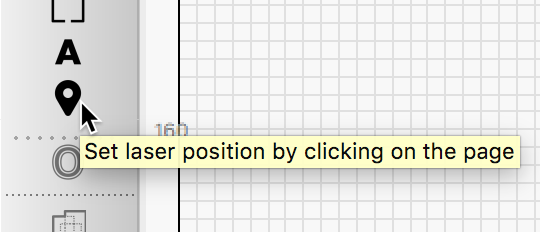
If you use the ‘Position Laser’ tool, click some location, say X=20 Y=20 on the screen grid and your laser should travel to that physical location on the laser itself when configured properly.
Do you have limit switches setup for this system?
Yes, you can turn off the grid in LightBurn, but using another grid that you created is not a good solution. You are trying to replace a key element of LightBurn, a coordinate system that matches that of your hardware, providing very accurate placement and production. Your grid, no matter how you create it, will never be as accurate as the internal LightBurn coordinate system.
I would like to suggest you walk-through our beginning project to help you understand LightBurn. I think your frustration may be helped by doing so. Suggest starting here: Redirecting...
Keep us informed of your progress. We are here to help.
1 Like
Rick,
Thank you for your reply and help. My laser does not have limit switches.
I went through the link you posted and I may have found what I’m ‘not getting’. I’ll attach a picture.
If I don’t have a grid printed under my laser, how will I know where to put my ‘product’ on my laser bed to burn my design? That’s what I’ve been trying to figure out. Can I burn the LightBurn grid on my base under my laser and if yes how?
I know I’m not asking this with the correct terminology but honestly I just don’t know how to ask what I need. Let me try this, I need a grid under my laser so I can put say a cutting board and burn a design on it without having to frame the project multiply times to get the alignment correct.
Does that make sense?
I really appreciate your help and I don’t want to be a pain, I just want to get this laser up and running so I can get some Christmas products up in my Etsy store before it’s to late this year.
Thank yo,
Ernie Hodge
On my diode laser I have put a perforated steel plate with spacer blocks on an mdf plate. Then I screwed a 3mm plywood board onto the steel plate and used my max coordinates to cut out an angle as my reference. It worked very well for me.
To make a series of uniform topics, I make a template that I straighten into my reference angle.
It is ok, and your terminology is fine. I understand what you are trying to do. I did provide a link to the exact steps we suggest for create a “waste-board matching grid project” for output.
Here I went into greater detail: Drawing a grid the size of my burn area - #8 by Rick
You replied that you had success with this process and ran that job. Please show the result. Where did you have the ‘Job Origin’ set? Show us how that file looks in LightBurn (screen cap entire window).
This may help in understanding how the Coordinates and Job Origin settings affect the location of your output.
Is your waste board and laser frame fixed together, meaning stationary, so they don’t move independent form each other? To have repeatability, you will need these fixed to ensure the registration of your grid stays calibrated with the actual movement of your laser. If the waste board moves, registration is lost.
Rick,
I did use your instructions to create my grid. I did make it two squares (60mm) smaller all the way around. I got tired of banging rails with the laser. I positioned a graphic in the lower left corner of my grid that is burned onto my base board. (The one you call waste board.) When I tried to frame the graphic it went to the left of and towards the front of the lower left corner. So I was back to manually positioning the board I was trying to put the graphic on.
I don’t have the file to take a screen shot of but I guess I could try and do that again but I would rather move forward.
I actually have the Coordinate and Job Origin printed out and have gone through it several times trying to figure it out. If I remember correctly Absolute Coords is what I had set for my test that I did.
How can I burn the LB grid to my base plate? (After I paint it so my grid gets covered up.)
Which setting would be best to burn multiple products at the same time if that’s possible? That’s where I would like to get to. I don’t mind working towards that after getting a grid set that I can use to quickly align a project.
My laser has all four feet captured by angle brackets so it doesn’t move.
It’s late for me but I will go through the CoordinatesOrigin material again in the morning.
Thank you for sticking with me,
Ernie Hodge
Bernd,
Thank you for your reply. That’s sort of what I want to do after I get my grid set up and can be sure where my laser will burn.
You don’t need a grid for this - If you have a diode, you can enable it when framing or jogging, so you can see exactly where the beam will go. You can jog the laser around with the move buttons or the number pad arrows, and you can hold the Shift key when you click a ‘Frame’ button in LightBurn, and it will leave the beam on while tracing around the boundary of your design.
Hi Oz,
I just found your reply and thank you.
Let me explain why I ‘need’ a grid. Lets say I only have one product to engrave, then sure I wouldn’t need a grid. Now let’s say I’m getting 10 to twenty orders a day. I won’t have the time to manually position the laser. I realize I have a cheap Chinese laser but it’s all I can afford right now.
So, If I burn the LB grid to my base shouldn’t I be able to put my product on the printed grid and have the laser burn my graphic or text without having to manually move the laser into position?
I’m going to try and set my laser to the lower front left position on the grid as the home position when the laser gets turned on. My laser doesn’t have limit switches and that’s what I found somewhere in the docs. Please correct me on that if that’s not correct.
I would like to be able to do multiple designs at the same time. Can I do that? I’m asking because I don’t know if that’s possible or not.
So, do I need a grid. Maybe, maybe not but I want some kind of alignment system built on my base. Any suggestions are always welcome. I won’t apologize for maybe misunderstanding some of the docs and/or suggestions as my wife is dealing with a major health crisis at this time. It’s weighing heavy on me right now.
As always you help is appreciated,
Ernie Hodge
I’m with my laser and have created a grid file to the dimensions of the LB grid. When trying to Frame it nothing happens so I tried to burn the image and got a message saying ‘One or more shapes are crossing the edge of the machine workspace and will not be sent. Continue?’ I deleted the outside lines on the grid and got the same message so I put them back, hit start and when I got the message I clicked on ‘Continue’ and the laser moved a little over and inch X and W.
I guess I’m done until I figure this out and I’m wondering how I got the smaller grid to burn. Do I need to remove the 'boarder lines and shorten the vertical and horizontal lines 30mm all the way around? That would still give me what I’m looking for.
Thanks,
Ernie Hodge
OK, I created another grid which is one ‘cell’ smaller all the way around. Shut down LB, manually homed my laser, and restarted LB. Opened my new file and clicked on frame. The laser moved to the left around 90mm and then started framing. That put the laser against the left side rail, then down to the back, across the back and back to the front where it actually started the framing. How do I get the grid image centered as close as possible on my base? I must be missing something. I’m using Absolute Coordinates.
Thanks,
Ernie Hodge
You’ve said already that your laser does not have homing or limit switches, which means the laser has no idea where it is until you tell it, and it won’t be terribly repeatable - no grid that you lay down will be very accurate, because you don’t have any way of accurately zeroing the machine itself.
Toward the end of this post is a heading “Homing and workspace” - read this to help you understand how to get reasonable positioning without them:
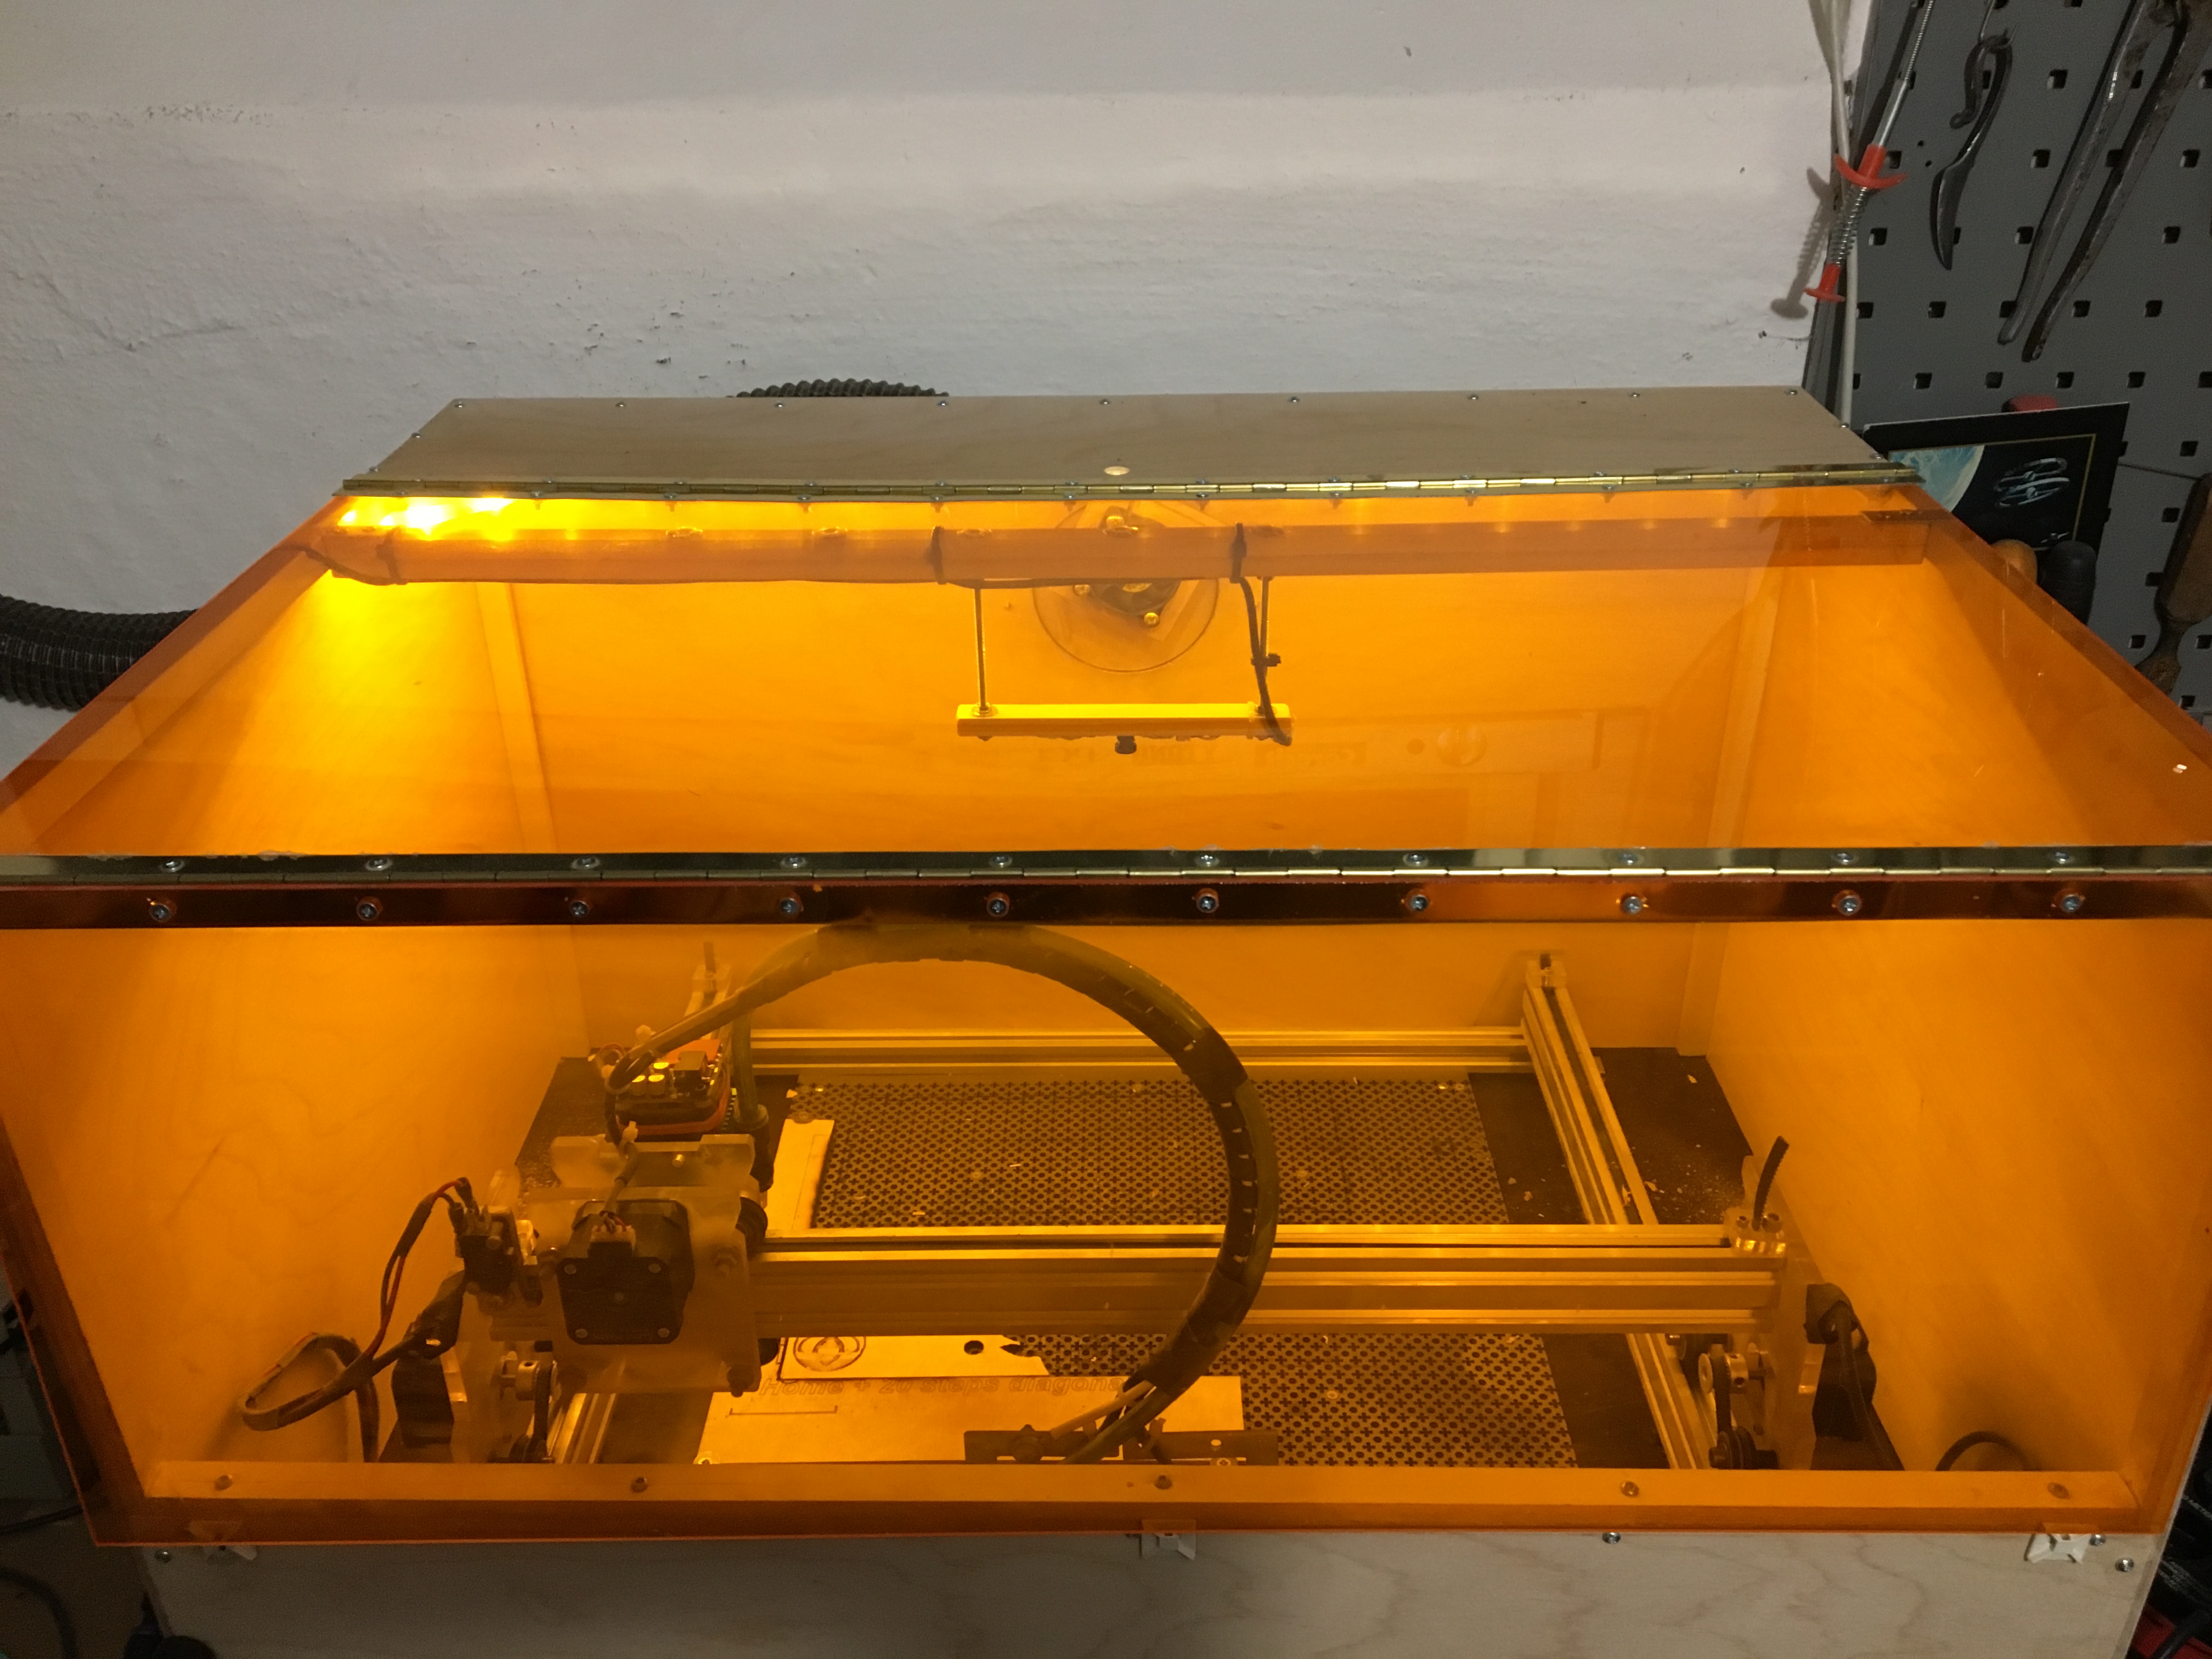
Ernie, if you zoom in on my machine (here in the thread) you can see one of the end stops that I have mounted on this machine. It is an easy task which in turn is substantial to be able to use the machine efficiently. If there are endstop switches in your controller it is fixed for 2 $ max and under 30 minutes.
Bernd,
My laser bed is 40" x 40". I will be doing what you have after I get my grid burned on my base plate. I’m using this laser for engraving so it won’t be a waste board.
I want to be able to locate more than one product at a time and they will all be the same physical size. That’s the reason for the grid. I hope that makes sense. I do like your angle bracket.
Thanks,
Ernie Hodge