Configuring for a rotary should not be an issue.
I’m assuming you are using the Y axes… you didn’t say…
- find steps/rotation
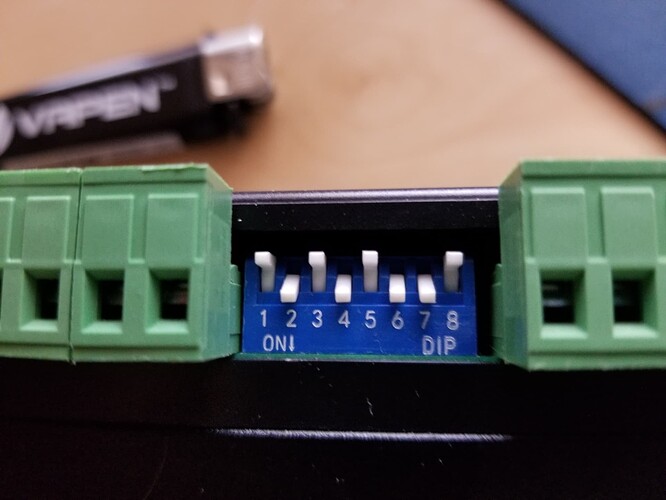
a. identify the switch settings
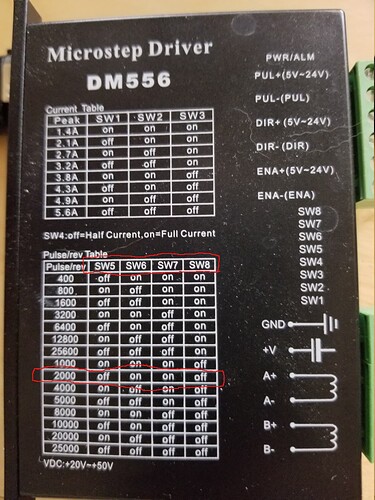
b. translate from the motor driver placard - steps/rotation is then computed based on a ratio.
a. value entered is steps/rotation multiplied by the ratio which results in the steps/rotation of the wheel, which is what Lightburn needs to know.
This is the basic procedure.
Look up the settings on the devices placard…
For mine, there are 2000 steps/rotation of the motor itself.
The number used for steps/rotation that Lightburn needs is for the driving wheel.
In my case with a PiBurn rotary, there is a ratio of 2.5 to 1… the motor must turn 2.5 times to rotate the driving wheel once. This ratio should be made available to you from the manufacturer. You can compute it with diameters or counting teeth… much more simple and correct if you get if from the manufacturer… or in the rotaries manual…
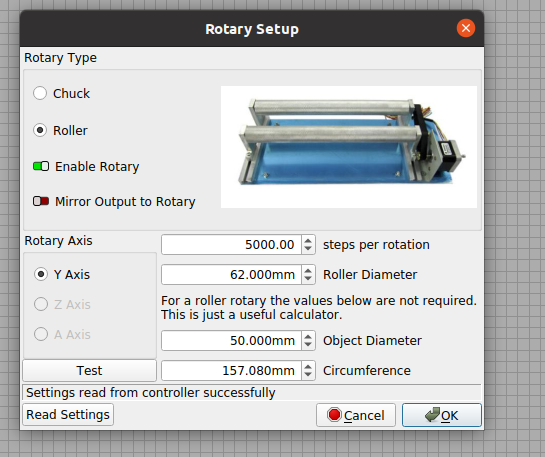
2000 steps/rotation X 2.5 = 5000 steps/rotation in the Lightburn gui… like this

Pressing the ‘test’ button should rotate the driving wheel one complete turn and back…
Up to the driving wheel, the system is digital, so once set this should be accurate…
The only ‘analog’ part is the driving wheel itself… Mine is supposed to be 63mm and I measured it at 62… if you have to fudge it, this is the place.
Make sense?
When you enable the rotary it’s written to the Ruida. The only time you need to write to the Ruida configuration is changes made to the operating parameters.
I suggest you go to edit → machine settings. Then save to file the current configuration as a factory backup… it’s easy to forget what you’ve changed. I keep a configuration for a rotary and no rotary. I can just read from file and write them to the Ruida.
I have my acceleration set to single digits when engraving with vector art.
Good luck
![]()

